
Here is a pic of the hardware and gasket kit that we supply with the GT Headers currently.
(4) 10mm nuts
(4) 10mm Bolts
(4) 10mm washers
(4) 10mm Lock Washers
(2) 2 bolt composite fire ring gaskets (to Y Pipe)
(2) 90 degree O2 Sensor Spacers
The gasket to the cylinder head is a stainless steel gasket that is re useable. If someone wanted a new one, they can be had at any Mitsubishi dealer and cost $8 each.
We include two O2 spacers that _usually_ help trick the ECU into thinking that the pre-cat is still there and working. Here is Mike’s standard answer to O2 sensor/SES light questions. Also install, noise and smog answers. For more specific information please ask Mike directly at mike@roadraceengineering.com
Install-
The front header takes about 45 minutes to install with basic mechanics tools. You should soak all the nuts and bolts and O2 sensor threads with a penetrating lubricant the night before and again when you start working on it. If you live where they salt the roads, be prepared to deal with lots of broken bolts and stuck threads.
The rear header is pretty difficult to install. Well… actually it is that the rear exhaust manifold and cat assy is very difficult to remove from the car. It is in an awkward location to begin with. Then once you do get it unbolted, it does not fit out through the tight spaces well at all. The passenger front wheel and axle need to be removed to make some space for the stock manifold to come out. Even then, it is a tricky wiggle and rotation to get out of the hole. A few people give up and chop it into two pieces to get it out of there :-P. But that makes going back to stock impossible. Once out, the RRE rear header easily fits in there.
Smog-
These headers eliminate the front pre-catalytic converters. Consult your local laws and smog check requirements before committing to these. You can still pass a tail pipe inspection with the main center cat in place. But it will come down to your local visual inspection as to what you can get away with.
Noise-
These headers will increase the exhaust noise considerably. It is a good sound. But it is definitely louder. It is even noticeably louder with a stock muffler. If you have a stock center cat and a straight through muffler (think Magnaflow) it will be sporty loud, think Mustang rumble) but livable. The younger you are, the more you will like it J If you remove the center main cat, things get super loud, think open race car exhaust sound.
O2 Sensors and Spacers-
There are Oxygen sensors (O2 sensors) that need to be transferred to the new headers from the old manifolds. If you do that part wrong or upside down somehow a little yellow light will come on. If you drop or bang on the O2 sensors too much it can damage them. If you get WD-40 or anti-seize contamination in them, it will damage them. But then again that little yellow light comes on for nothing or even something little like leaving the gas cap a little loose, its sole existence is to nag you about potential smog issues. The yellow light isn’t all that scary to us, but it seems to horrify some people.
With the current 90 degree spacers that we supply, about 1 out of 20 people get a SES light and we help them deal with it as best we can. If that possibility disturbs you then headers are not for you. We will not be redesigning anything. We have done all that is reasonably possible to make a little money selling them and still have an affordable product built in the USA. We are happy with the balance that we have struck. A guaranteed SES light fix would be a $200 electronic box that would need custom wiring to fool the computer better in all possible situations.
IF the light does come on usually
the hole in the spacer needs to be drilled out a little bit. Just
a little bit bigger at a time. It is easy to make them bigger, very difficult to
make them smaller ![]()
We found the difference between cars is whether or not
they have a main cat after the spacers and how restrictive the exhaust system
is. Cars with totally free flowing low back pressure systems need a bigger hole.
More restrictive systems need a smaller hole. You want to read out the actual
code before modifying the spacer.
It does not matter which O2 sensor goes in which location in the header. There is no longer a pre cat to be in front of or behind of. But the sensor that was after the cat gets a spacer (the one with the black wire cover) needs to be the one that is bolted into the spacer.
The spacer is trying to trick the ECU into thinking that the cat cleaned things up some (but not too much). More exhaust system back pressure or less will require playing with the size of the hole in the spacer and also the volume of the spacer. No one spacer works for every car. It is a black art and takes some fiddling and paying attention to what code and reacting accordingly.
Code Checking-
Cheap OBD-2 Code Checkers and clearers are available from Amazon for less than $25. There is no reason to panic or run to the internets when you get a SES light. There is no reason to pay $80 to get your code scanned.
We have used this one:
U480 CAN-BUS OBDII Car Diagnostic Scanner
And this one:
Autel MaxiScan MS300 CAN Diagnostic Scan Tool for OBDII Vehicles
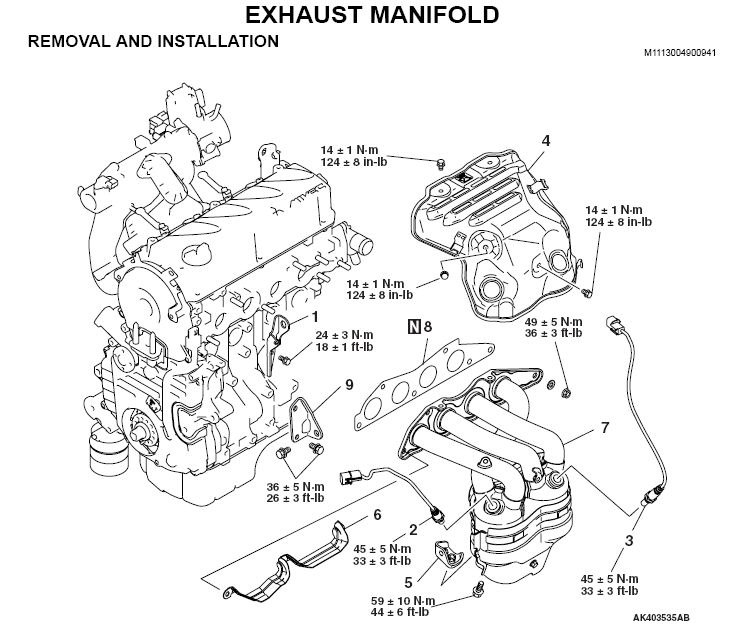
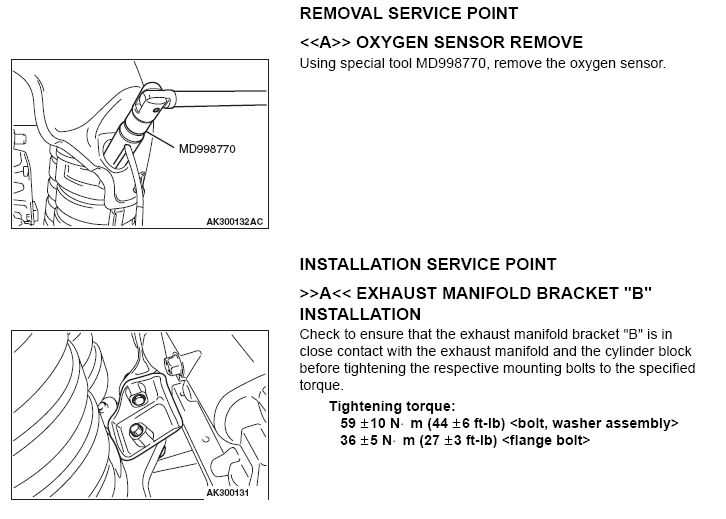
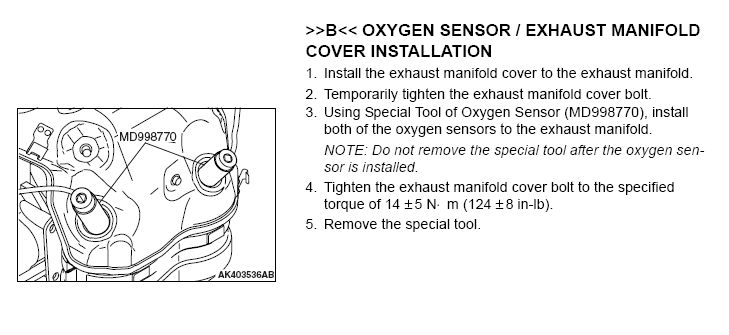
Stock Header Removal:
Images from the factory manual along with torque specs
Spacer Instalation
It does not matter which O2 sensor goes in what hole. What does matter is that the sensor with the black wire needs to be installed into the spacer.
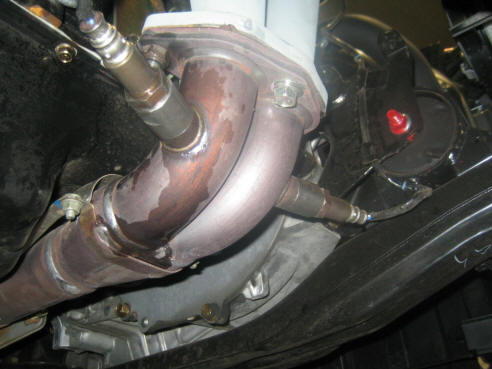
For the GS, the O2 sensor spacers will be installed under the O2 sensors that were originally screwed into the down pipe. In this pic it shows the older straight spacers, but this is where the 90 degree spacers go.


