EVO Factory “Mag Style” Lug Nuts – Chrome and Black
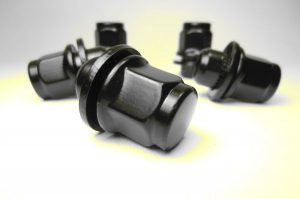
Black
Factory Mag style lug nuts are needed for the factory wheels. These use the regular 21mm socket the same as stock. Other “Acorn” style lug nuts and cute anodized and JDM fruity colors lug nuts wont work correctly with the factory wheels. They will not seat correctly, these do. Now available in Chrome and Black finish.
Price includes USPS Priority Mail Shipping in the US (2-3 days delivery)

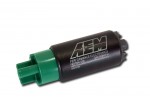
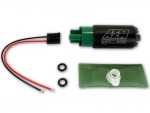
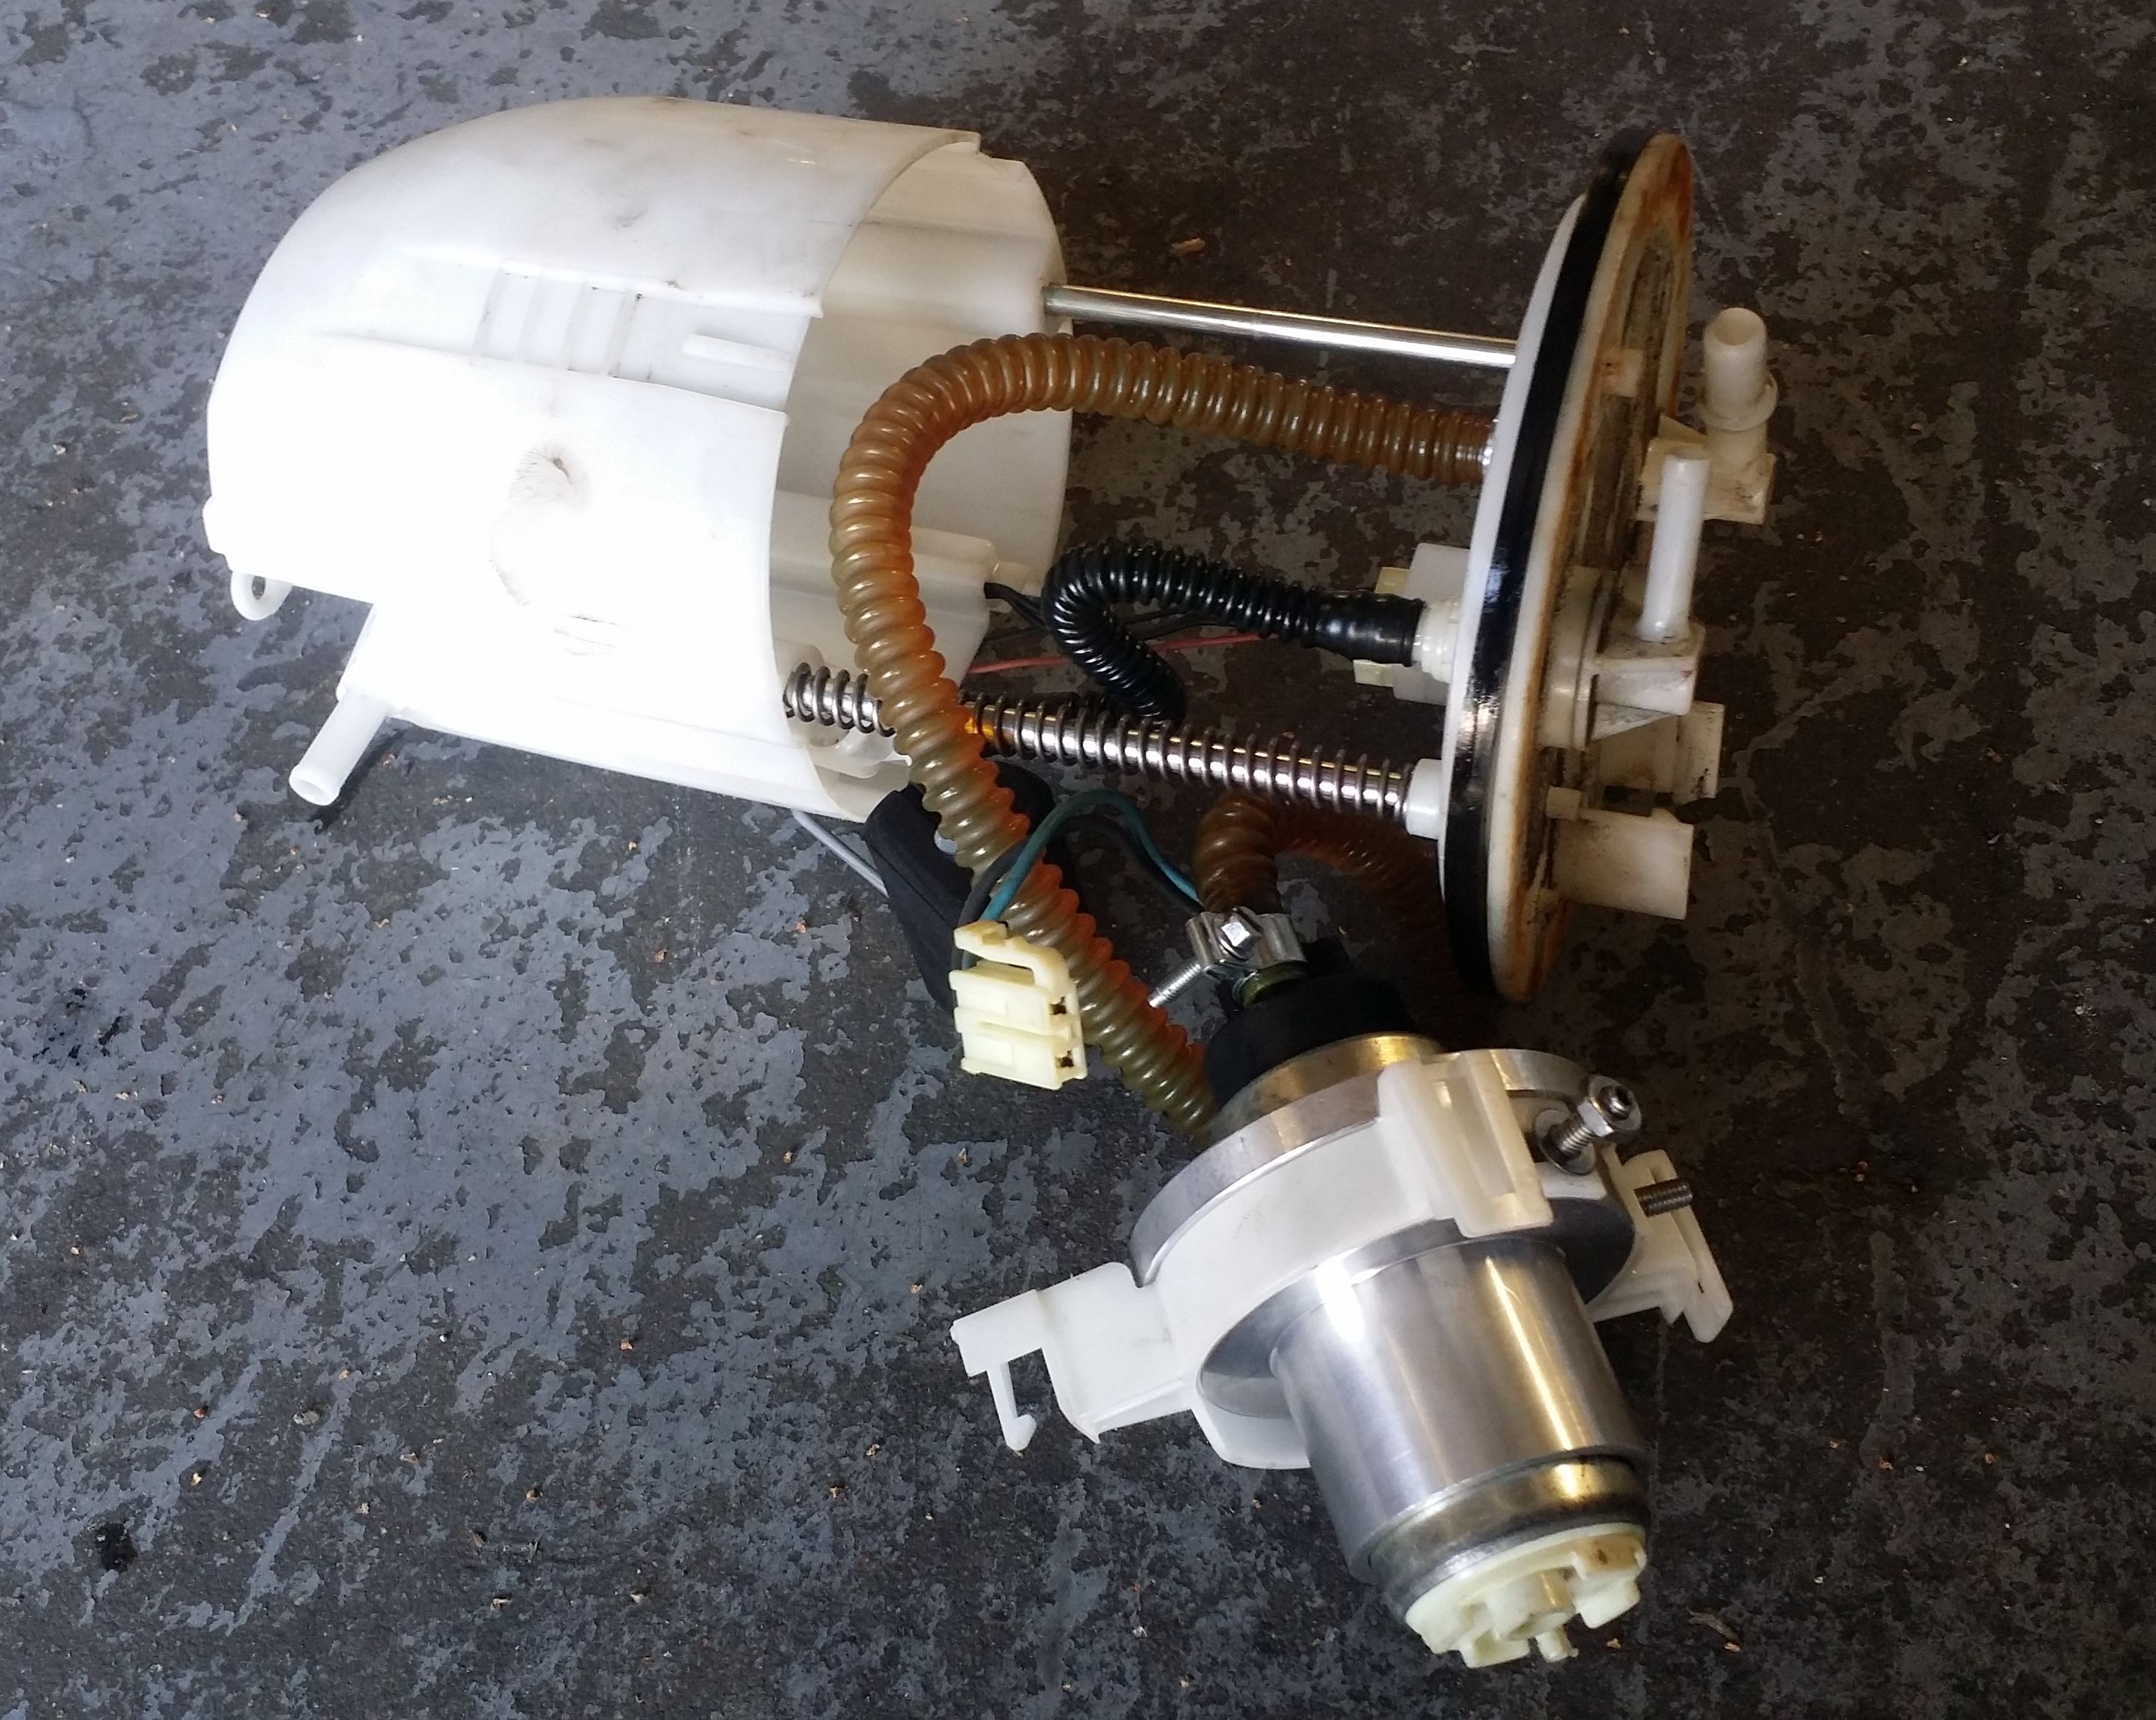
AEM E-85 Rated Fuel Pump for the EVO X 50-1220
$130 inc Priority Mail 2/3 Day Shipping
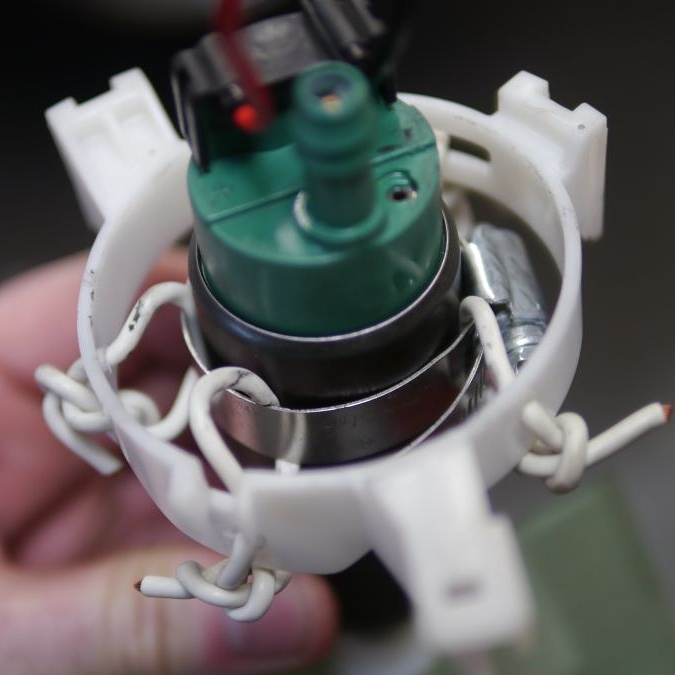
The AEM 340 lph drop in fuel pump for the EVO X (AEM part number 50-1220) is currently our go-to fuel pump for the best fit and best reliability. We never had much long term luck with the other drop in pumps for the EVO X. Premature wear and clogged up filters were becoming too common.
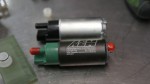
We have also seen many stock fuel pumps die, some on the dyno right in front of us. While the stock pump when everything is working perfect will keep up with up to 350 whp on pump gas, once the pump and fuel gets hot some random fuel pressure drop offs become common. This has caused some busted spark plugs and the resultant mess from running lean.
There will be random reviews around the web on other versions of AEM fuel pumps. They are older reviews and “How-To’s” before this EVO X specific pump was available. Some people try to use the Walbro 255 size pumps and they require special expensive adapters that eliminate the fuel filter housing. Look! No filter housing :-P
In addition to running no pick up sock, the car that this pump came out of had no fuel filter under the hood either. He was on his second motor after breaking sparkplugs on his first motor with this setup.
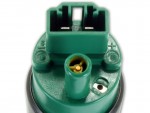
Many people confuse the fuel pre filter on the bottom of the pump for the actual fuel filter. That pick up pre filter is just there to keep swarf out of the fuel pump. You need a proper filter after the fuel pump (miniature inline screen filters don’t count)
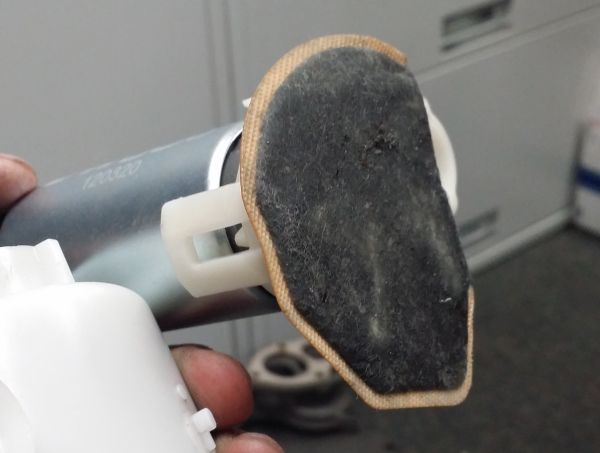
This means that we prefer to keep the factory filter housing in place and functional. We have also seen some seriously sketchy fuel pump installs. Some by under water basket weavers, many with kinked hoses. Often with the wrong hose not rated for high pressure. Somehow something that seems easy to install ends up making a mess.
The AEM 50-1220 fuel pump also fits several other vehicles besides the 2008-15 EVO X and RalliArt. Here is AEM’s propaganda for all vehicles:
AEM’s 340lph E85-Compatible High Flow In-Tank Fuel Pumps feature robust internal construction that is designed to withstand the low lubricity characteristics of ethanol and methanol fuels, and are tested to work with ethanol fuels up to E100, methanol fuels up to M100 and all types of gasoline. This physical size of this fuel pump makes it a great replacement for the 2000-’09 Honda S2000, 2000-’05 Honda Civic, 1992-’01 Acura Integra, 2002-’06 Acura RSX, 2002-’15 Mitsubishi Evo, 2002-’07 Subaru WRX, 2013-’15 Subaru BRZ, 2013-’15 Scion FRS and many other popular enthusiast applications (NOTE:The plug wiring may need to be updated for some applications). Its compact, short body design (65mm length) with mounting hooks also makes it ideal in universal applications that have fuel tanks with tight tolerances.
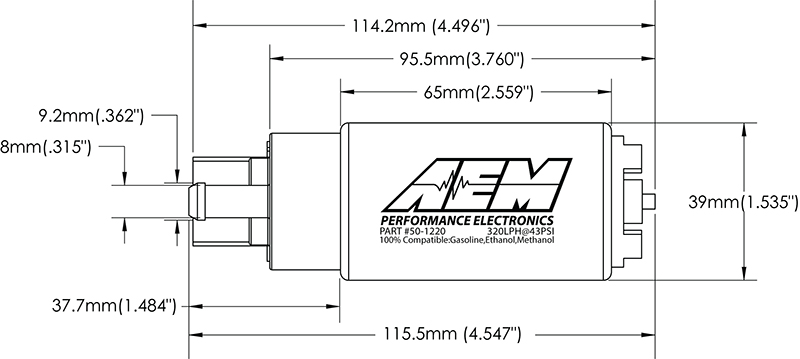
The AEM 340lph E85-Compatible High Flow In-Tank Fuel Pump is designed for in-tank mounting on high performance naturally aspirated and forced induction vehicles. It features a compact 39mm diameter that fits most applications and an offset inlet design that eases installation.
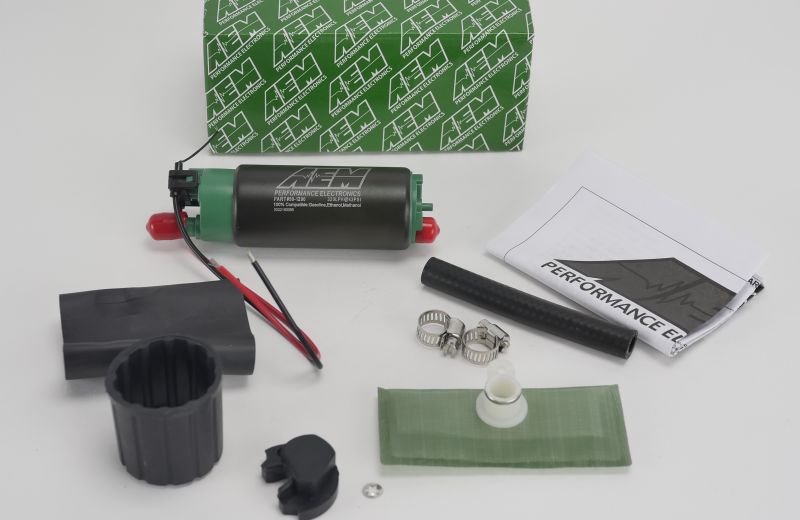
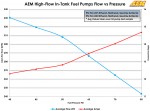
The 320lph E85-Compatible High Flow In-Tank fuel pump includes a wiring harness, pre filter and O-rings. Every AEM 320lph E85-Compatible Fuel Pump is tested to flow 340 lph at 43 PSI before it is packaged for sale.
- Tested and compatible with ethanol fuels up to E100, methanol fuels up to M100 and all types of gasoline
- Designed for high output naturally aspirated and forced induction EFI vehicles
- In tank design
- Each pump is tested to flow 340 lph @ 43 PSI
- Compact body (39mm diameter x 65mm length)
- Includes pre filter, hose, clamps, flying lead, end cap and rubber buffer sleeve
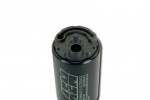
RRE 3 Port Boost Control Solenoid (3 Port BCS)
What is the best 3 port boost control solenoid for the Mitsubishi EVO? We like this one :-)
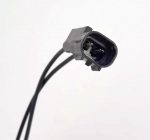
It comes complete with silicone hose and zip ties for mounting and securing hoses. The RRE 3 Port Boost Control Solenoid includes a direct plug in connector to fit the EVO 8/9/X
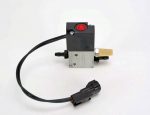
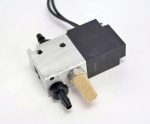
We use these about 8 times a week on all of the cars that we tune in house here at RRE. We find that it is more responsive and smother than the more expensive ones. Solenoids will make some noise when they are clicking so we typically will zip tie the BCS to a hose or wire loom to isolate the possible sound. These can be used with the 3rd port venting or with the air going back in. We typically vent it to keep things simple. Fittings are included to run the BCS either way. Many aftermarket intakes have janky fittings and tiny nipples that are not well secureds for the vent air to blow back in to the intake. The less you push and pull on those little fittings the better.
2G DSM Eclipse 1G Motor Swap CAS Harness
2G DSM Eclipse 1G Motor Swap CAS Harness
[paypal_wp_button_manager id=6096]This is a cam angle sensor harness for those of you who plan on swapping 6-bolt motor in your 2G’s.
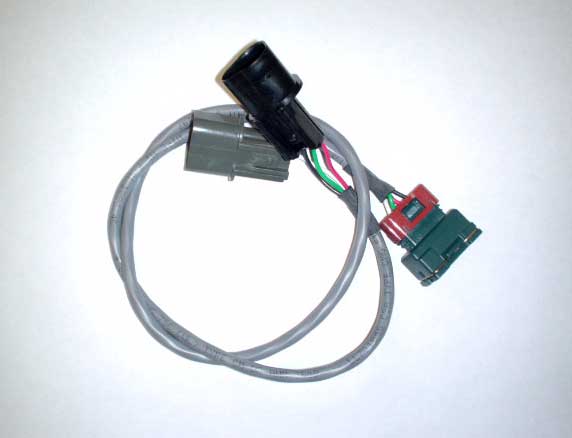
What it does: It keeps you from digging around in junk yards for the connectors to make everything plug in. It allows you to not understand tricky wiring diagrams. It connects to a 91-94 1G Eclipse CAS on one side and at the other end it plugs into your 2G wire harness where your old 2G cam and crank angle sensors would have in order to give a cam and crank position signal to the ECU.
What it does not do: It does not help you deal with any potential random misfire codes. It does not read and understand for you all the information here and here. It does not make a 1G motor instantly magically start and run in your 2G. It does not explain you the difference between trying to use a green lid or black lid sensor. It does not work if you buy a ’90 CAS.
On ’97-’99 Eclipses, you need to grab this blue wire from the 2G CAM sensor plug and solder to the white wire coming out the CAS harness.
Price $70.00 Please specify _your_ vehicle year. Not the year of the motor or ECU, the year of the Eclipse is what we need.
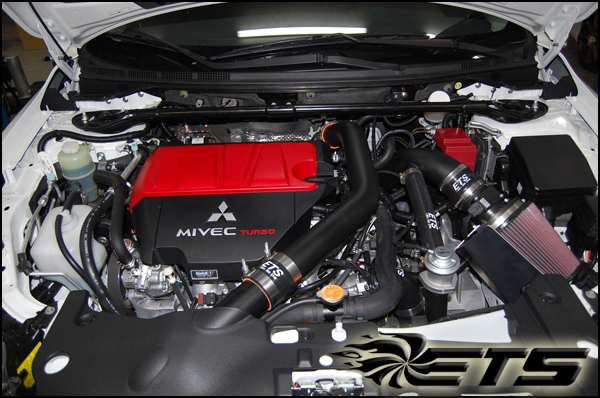
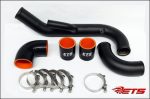
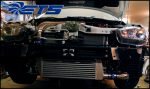
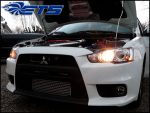
ETS Intercooler Piping for the EVO X (2008-2015)
Price includes standard ground shipping within the lower 48 states.
We use and sell only ETS for intercoolers and piping. It comes down to value. There are some Chinese pipes out there that are cheaper. But the quality of the hoses is horrible and fitment is random. For the upper pipe often the support bracket to the radiator support will break off creating a boost leak. There are more expensive pipes out there too. Maybe they are cuter, maybe the company has a fast race car that they need to pay for. But the expensive pipes won’t make your car any faster. Here in “Kalifornia” we need to keep things on the stealthy side so we only offer the black piping with black couplers.
Mostly we recommend upgrading the intercooler pipes and the intercooler all at once. If on a budget, do just the upper pipe for now and the rest later. For the lower pipe and the intercooler install, the front bumper cover pretty much needs to come off. Might as well do them together.
-
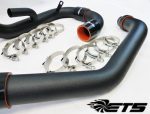
- Upper and lower piping kit
-
- Durable wrinkle coated black finish
-
- 4 ply hoses and T-Bolt clamps included
ETS Upper Intercooler Pipe
The upper intercooler piping starts with a smooth mandrel bent 2.5″ stock turbo outlet pipe which connects to the remainder of the hot side piping. The stock turbo outlet pipe is separate to allow it to be swapped out with the installation of the ETS EVO X turbo kit to come so that the remainder of the upper piping can be retained. This ensures that you never have to “upgrade an upgrade” and spend more money on a new upper pipe when it comes time for a big turbo kit. Making the connection from the turbo outlet pipe to the intercooler is a single-piece mandrel bent 2.5″ upper intercooler pipe.
The ETS Mitsubishi Evolution X Upper Pipe removes the restrictive factory hose which is 1.75″ after the turbo outlet and replaces it with a full 2.5″ upper intercooler pipe which helps with throttle response as well as reliability. The factory hoses are prone to ballooning and blowing off under high boost over time.
Features:
- 2.50″ Mandrel Bent Piping
- Upper Intercooler Pipe
- Upper Intercooler Pipe Bracket
- 4-ply Silicone
- T-Bolt Clamps
- Includes all mounting hardware
Upper piping kit installed
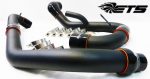
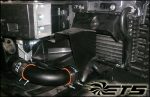
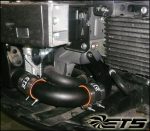
ETS Lower Intercooler Pipe
The ETS Mitsubishi EVO X Lower Piping Kit removes the factory rubber hoses which are prone to ballooning and popping off under higher boost pressure over time.
From the intercooler outlet the 2.5″ mandrel bent piping continues around the core support, with only two smooth gradual radius bends in its entire length, to the lower intercooler pipe bracket before making a straight shot up to the throttle body. ETS 4-ply silicone and 100% SS T-bolt clamps are included for every connection to ensure that blown off intercooler piping stays a thing of the past.
Features:
- 2.50″ Mandrel Bent Piping
- Lower Intercooler Pipe Bracket
- 4-ply Silicone
- T-Bolt Clamps
- Includes all mounting hardware
- Does not block the oil cooler ducting like some of the competitor pipes
- Works with GSR and MR transmission as well as the stock airbox and blow off valve. (Direct replacement of factory unit)
-
- Lower piping kit only
-
- Lower piping kit only
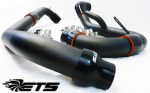
ETS EVO X FMIC
Extreme Turbo Systems Intercooler Only
Mostly we use the 3.5″ core. The 3″ core could work for someone that was going to be stock turbo for life. But then who does that? The 3.5″ FMIC isn’t too big for the stock turbo, yet will still handle easily anything that an upgraded turbo can flow. Even up to 800 whp. Sure a 4″ FMIC will add some flow, but with the trimming required and the extra cost, it is for that 1% of hard core drag racers. We use FMICs from ETS because of the value. There are some with cast end tanks that cost $100 more but in the end make only the same power as an equivalent ETS assembly.
Because we are in California we typically sell them without the “ETS” stencil. Black anodizing is also an option. For stencil and black anodizing please email for pricing and time frame involved. These options can add considerable time to an order. The above prices include standard ground shipping within the lower 48 states. Inquire for shipping
- Pressure checked at 35 psi.
- Bolt on design to retain crash beam.
- Fills the entire grill with core.
- Stainless steel t-bolt clamps.
- 4-ply couplers.
- Includes all mounting hardware.

The obvious tie-in between the UICP and LICP is the ETS EVO X Intercooler. This unit is a tour de force in efficiency, distribution and flow. The factory inlet and out locations allow for the inlet and outlet to be at diagonally opposing corners of the core. This provides the best possible airflow distribution through the core’s height making sure that all charge rows are used effectively. The Auto CAD drawn end tanks are as smooth as on the previous EVO intercooler with aluminum metal forming that looks more like artwork than end tank. Between the tanks is any one of our sizing options with 3″, 3.5″ or 4″ intercoolers as BOLT-ON designs behind the factory crash beam and above the factory undertray. 4″ requires trimming and additional fitment.
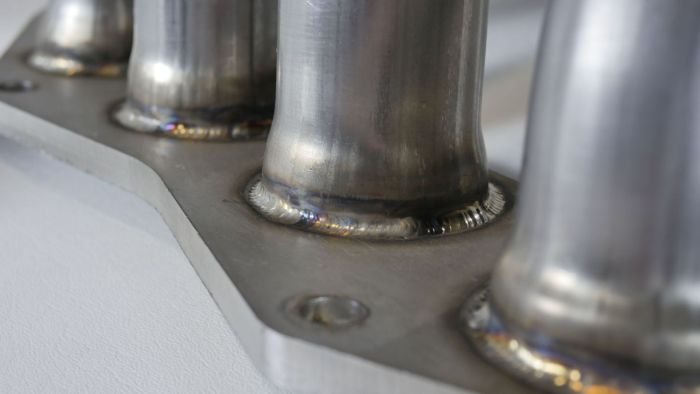
RRE 4G Eclipse Competition GS Headers (2006-2014) Install Pics and Tips
RRE 4G GS 4cyl Headers $530 plus $50 shipping within the lower 48 states: For Canada or other locations email the shop roadraceengineering _at_ gmail dot com with your full contact info and full shipping address.
We make 4G Eclipse headers. We are never quite sure if everyone is headed to China to get their parts or if they prefer American made parts still. While quality parts can be made in China for a decent price, quality control over workmanship and materials is always a concern. Locally we have much more control over everything.

Here is a batch that just finished up. TIG welded stainless Steel throughout. We did an install and took some step by step pictures.
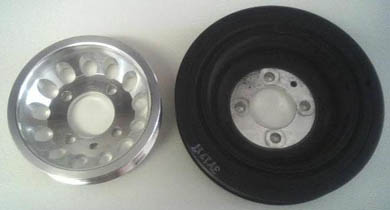
RRE Eclipse GS 2.4 MIVEC Underdrive Pulley Kit
RRE Eclipse GS 2.4 MIVEC Underdrive Pulley Kit
$189 plus $11 shipping for USPS Priority Mail within the lower 48 states. If you are looking to get one shiped to somewhere else, contact us for a price with shipping included.
This pulley kit has yielded an improvement of 6-7 whp and 9 ft/lbs of torque in dyno testing. Both the lighter construction and smaller size helps improve power. Kit includes a new belt and the pulley. Everything that you need. Fits all 2.4 liter Eclipses and Galants from 2005 through 2014
Tanabe 4G Eclipse Chassis Stiffening Bars
Tanabe Front Strut Tower Bar
[paypal_wp_button_manager id=6452]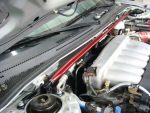
The price is $179 plus $20 covers Ground Shipping within the lower 48 states. This front upper strut tower tie bar its the GT and GS. The cross bar is a red anodized aluminum tube and it comes with black powder coated ends. For the 2006-2012 Mitsubishi Eclipse GT and GS.
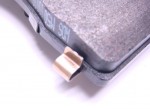
RRE’s 4G Eclipse Brake Parts and Options
Here are the brake parts that we trust and use the most for the 4G Eclipse GT and GS 2006-2012.
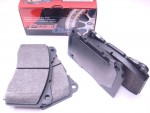
Centric PosiQuiet Brake Pads:
For street cars, we like the Centric PosiQuiet Ceramic based pads. They have low dust (as low as you can get and not affect brake performance) and they also have great cold stopping performance. They have minimal wear on the rotors. The grip is also very consistent across their heat range and driving conditions. They are not a track pad, but do very well on the Eclipse on the street. It is a heavy car and these hit the sweet spot between performance and the price.
Price includes USPS Priority (2-3 day) shipping within the lower 48 states!
- Long wearing
- Low brake rotor wear
- Stable friction performance across wide temperature range, particularly higher temperatures
- Good cold stopping bite.
Stoptech Slotted Brake Rotors
StopTech Sport Rotors – the new name for one-piece performance upgrade rotors from StopTech. Formerly known as Power Slot or SportStop rotors, StopTech Sport Rotors are still the best aftermarket performance upgrade rotors around – only the name has changed. StopTech slotted brake rotors prevent glazing of the pads, add bite and improve wet and dry braking performance.
E-Coated Finish – StopTech Sport Rotors are finished with black e-coating on both sides of the hat, inside the cooling vanes, and on the outside edge. E-coating is a superior electro-statically applied finish designed to withstand 400 hours of salt water exposure without rusting. This is especially important on both mounting faces of the hat where it touches the hub flange and back face of the wheel. Any accumulation of rust in these area can lead to installed lateral run out issues.
Power Alloy Metallurgy – This is an exclusive feature of StopTech rotors. StopTech works with their foundry partners to adjust the molybdenum and carbon content of the castings, and to carefully control the cooling rate during production to reach targets for hardness and tensile strength.
We only sell the slotted version of these rotors. Rotors with drilled holes will always crack around the holes when driven hard. Slotted only does the best job of venting and cleaning evenly. Drilled rotors look cute for sure, we are more about the function over looks.
UPS Ground Shipping (3-4 days) to the lower 48 states is included in the price.
-
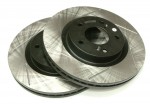
- Powerslot 4G Eclipse frotn slotted brake rotors
-
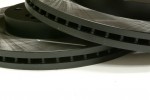
- Up close view of the venting and slots
-
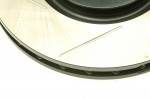
- Slots and surface finish
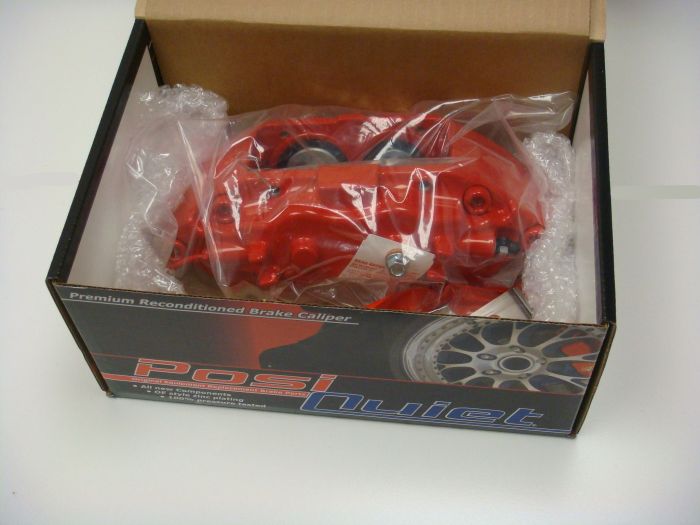
Suffering With Brownbos? Caliper Refinishing by Centric Brakes
Update 4/8/2014
We are no longer offering this service. Centric changed to a different powdercoating company a while ago and the current finish is not the same as shown in these pics below. Sorry for the older teaser pics.
Current powdercoating process looks more like this:

Centric can still do the rebuild on a Brembo EVO caliper and get the rebuild part mechanically perfect. But the powdercoating is more what you can expect for a race car. The caliper will be red. It may have random dirt specs in the finish, it will have orange peal. But it will be stuck down and a high temperature red. Same price as listed below. Sorry but it just is what it is they say.
Old pics and original post below.
____________________________
Are your calipers maroon, brown or even black from having too much fun with them? Is the clear coat flaking? Pink from the sun and wheel cleaning chemicals?
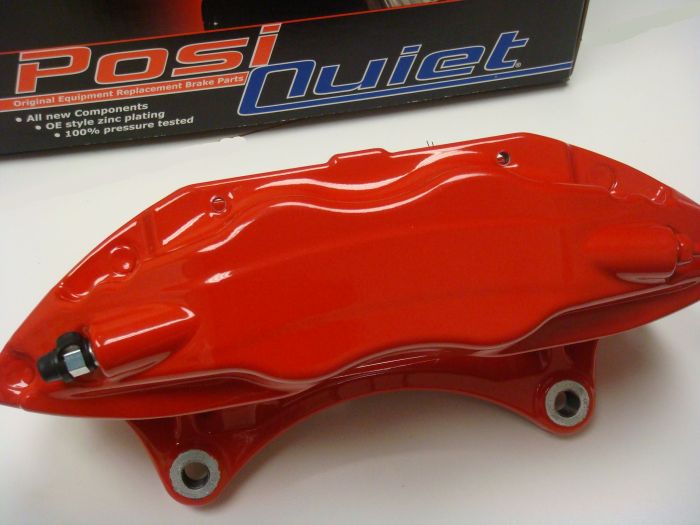
For EVO Brembo caliper painting and rebuilding we use Centric (parent company of Stoptech and Powerslot). Front calipers are $375 for a pair for the service, rears are $260 for the pair. This is for a complete rebuild and powdercoat of the calipers. Basically they are re-manufactured to like new condition. It takes about 5-6 working days to do your calipers so plan on some downtime with your car.
Here are a set of front and rear calipers that just came back:
Front Caliper
Box and package: (old process, not a current pic)
What you get: (old process, not a current pic)
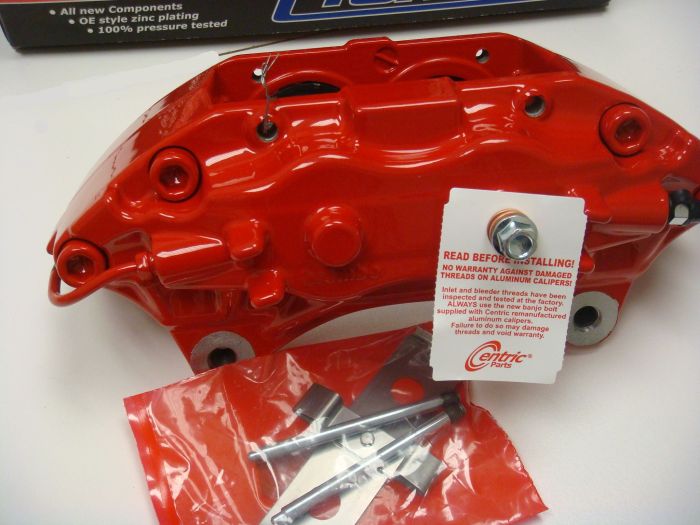
Front: (old process, not a current pic)
Click for more pics!
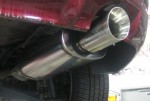
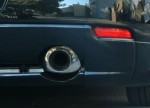
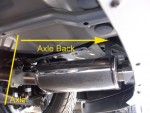
RRE 4G Eclipse Axleback Exhaust
Road Race Axle Back Exhaust 2006-2008
No Longer Available – Magnaflow had a large price increase which make this part no longer competitive. If you can get a decent deal somewhere on the Magnaflow muffler (Part Number 14851 – includes the tip already installed) that we used, get it and have a local muffler shop do the install. Use the pics still posted here for inspiration.
| Built using a stainless steel Magnaflow muffler. Sweet throaty sound. Not buzzy or droning at all. Your stock piping is a decent diameter and this is the best value for more power and the best sound. Aggressive but not huge 4″ double wall stainless steel tip. |
Sound Clips: Driving Inside From Behind Driving Off
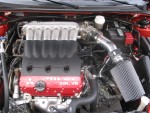
RRE 4G Eclipse Cold Air Intakes – AEM – Injen
AEM Cold Air Intake Eclipse GT V6
AEM only makes an option for the Eclipse GT. The AEM kit includes an oversized virtually indestructible AEM Dry Flow filter. Their kit includes all necessary nuts, bolts, brackets, connecting hoses and hose clamps. Installs long and cold or short and hot. AEM makes a different model intake for the 6 Speed and Auto Tranny GT and the color choices vary a bit between them. Please be sure to choose from what transmission you have!
-
- GT Installed Long
-
- GT Auto Trans Blue
-
- GT Auto Trans Gunmetal
-
- GT Installed Short
AEM GT Auto Transmission – Free Ground Shipping within the lower 48 states [paypal_wp_button_manager id=6147]
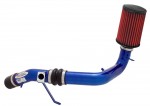
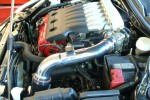
Injen Intakes for the Eclipse GT and GS
Injen’s strong point in their design is the lower bend down behind the radiator in front of the transmission. They used a silicone bend there to help insulate the intake from the hot air coming off the radiator. This allows for more consistent intake air temperatures. The Injen can be installed long for cold air or be installed short on one of those pesky El Niño years, For the 4G Eclipse GS equipped with the auto transmission, Injen only offers the Short Ram version because of the extra space that the auto trans takes up down there..
-
- Polished Cold Air Version
-
- Polished installed “Short” on a GT
-
- Polished “short” on a GT with detail showing the lower silicone section
-
- Polished “short” version for the 4G GS
-
- Black “short” version for the 4G GS
-
- “Short” installed on a GS
Eclipse GT V6 Options – Free Ground Shipping within the lower 48 states
Eclipse GS 4 Cyl Options – Free Ground Shipping within the lower 48 states
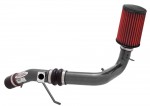
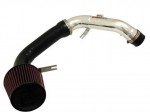
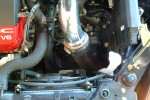
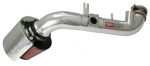
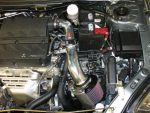
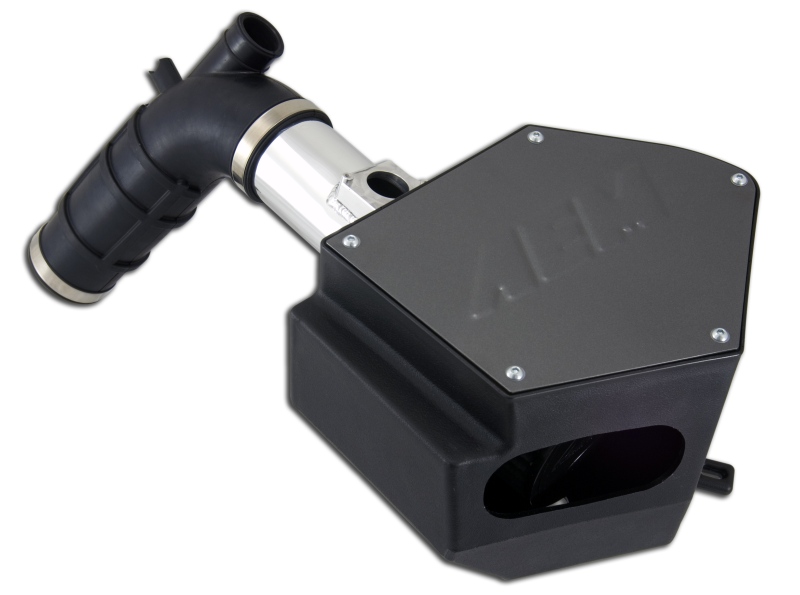
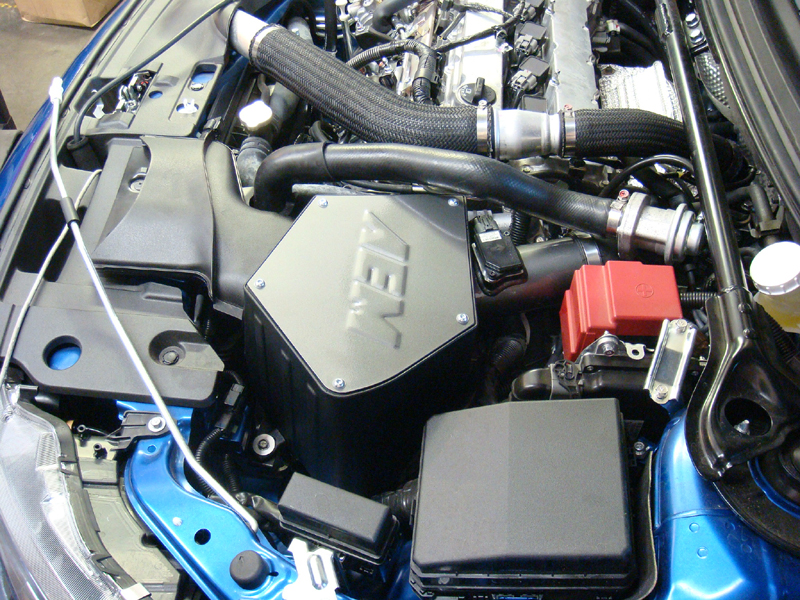
AEM Cold Air Intake For The EVO X 21-678C (2008-2015)
[paypal_wp_button_manager id=6686]Price of $304.99 includes Standard Ground shipping within the lower 48 states.
AEM’s Cold Air Intake for the EVO X uses their latest design technology to create and manufacture a high HP intake while remaining stealthy. The kit uses an AEM Dry Flow filter inside a large air box that is fed from the factory cold air ducting. We have tested this intake at a 16 whp gain on a stock car. The way that they have run the boost control recirculating hoses back into the intake raises boost a bit. The larger MAF housing cross section does two things. First, on an untuned car it will lean it out a bit. This is one reason that the AEM intake for the EVO X makes power. Once tuned, that benefit goes away to a point. But then the larger MAF does allow for more airflow into the motor. Once you have big cams, an upgraded turbo and more, then the larger 3″ MAF along with proper tuning will get you greater gains than the intakes that use the stock MAF housing (K&N, ETS)
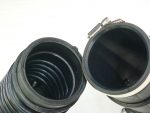
Suction tube is a molded EDM rubber piece. Looks factory. OEM quality.
-
- Smooth inside compared to stock:
-
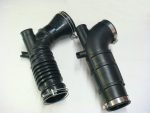
- Larger suction tube
Filter is inside the box:
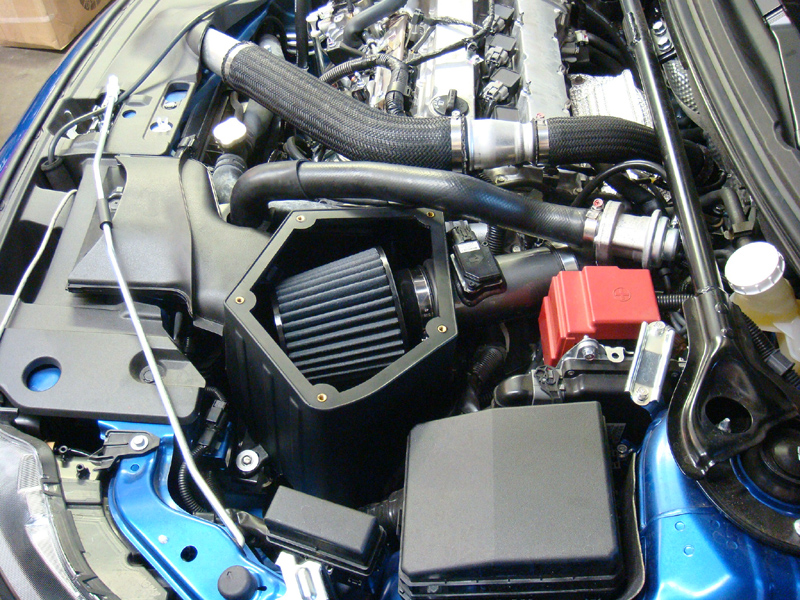
All done and buttoned up.
EVO 9 AEM Meth Kit Install
Any meth kit is only as good as its install, here is one EVO 9 AEM Meth Kit Install:
AEM one gallon tank mounted in the left rear 1/4 panel behind the trunk liner:

Later went to a 5 gallon tank with a full size spare tire:
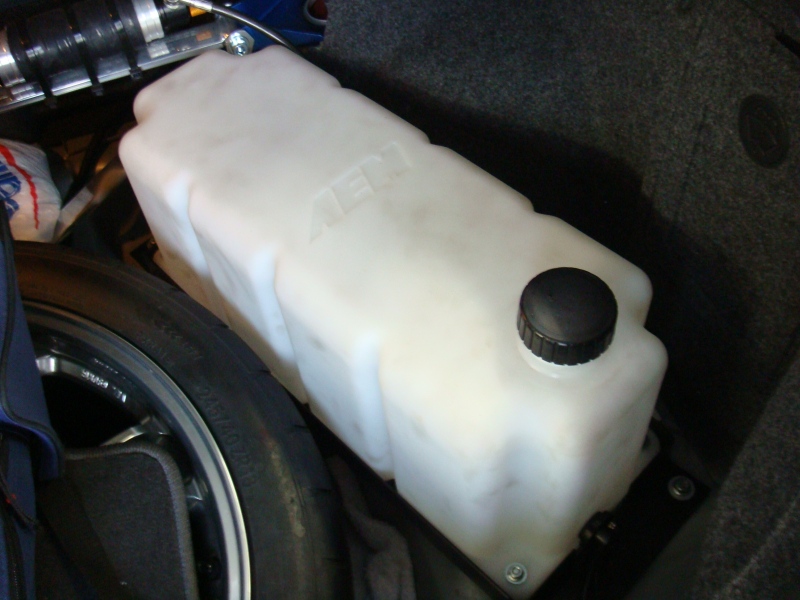
The pump fits nice under the spare tire:

The hose runs through a grommet out through the spare tire well. (more…)
RRE Turbo Oil Supply Line Instructions
| Install the banjo bolt fitting onto the end of the -4 stainless line and tighten the fitting before bolting the banjo fitting to the turbo. Install the assembled oil supply line to the turbo before installing theturbo onto the manifold. Use new copper crush washers and torque the banjo bolt to about 25 foot pounds.1G: Remove the correct Allen plug from the oil filter housing. See the photos below for the correct location !If the Allen plug is tight and you think that you might strip out the Allen socket, heat will loosen it. The heat allows the aluminum housing to expand and loosen it’s grip on the plug. Heat also loosens any thread sealant. Get it warm with a propane torch or oxy/acetylene torch. Don’t melt anything, just warm it up good. If you strip out the Allen fitting to the point that an Allen wrench wont turn it, you are screwed.2G: Remove the larger fitting and replace it with the 90 degree fitting.Use thread sealant or Teflon tape on the pipe threads that screw into the housing. Note that the threads are cut into the housing at a different angle than the face of the housing. It will almost look like it is threading into the housing crooked. Be careful with any sealant or tape, you do not want anything to get into the turbo bearings.If you find that the clearance to the oil pressure sensor is too close to the fitting to screw it in, remove the sensor, install the 90 degree fitting and re-install the sensor.
2G Connected at the turbo
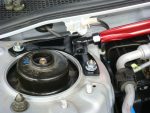
Oil supply location on a 2G Note that the fitting screws into the housing hole at a slight angle to the machined face. This can seem a little odd when first getting the threads started. Note the angle of the stock adapter fitting before you remove it, this will help. The fitting threads are a tapered pipe thread, as you screw it in, it will get tighter. Be sure to stop at a clocking that will allow the proper run of the oil line.
Tied off to the fan shroud.
Tied off to the fan shroud.
Don’t let the line contact the fan shroud directly. We use a double zip tie to separate them.
1G If you specified the oil supply line for a 1G, use the supplied short 10mmx1.25 bolt and crush washer to block off the stockoil supply location at the cylinder head. Oil supply location on a 91-94 1G Turbo
91-94 1G supply location pictured. You want the upper and outer fitting location. Using the lower fitting on a ’91-94 oil filter housing (water cooled oil cooler) will result in the turbo receiving unfiltered oil.
90 1G supply location pictured. On a 90 model oil filter housing, the two fittings are spread out a little more. Use the lower fitting on a ’90 oil filter housing (cars with a factory air cooled oil cooler). Using the upper outer fitting will give unfiltered oil to the turbo.
Stock, the turbo oil supply is just about the last oil in the whole motor. If you get it at the oil filter housing, you get oil fresh out of the filter. Note that if you do not use the specified location, you will be using unfiltered oil.
|


RRE 2G Eclipse SS Clutch Line Instructions
2G Turbo Cars (95-99)
The RRE SS Clutch line replaces the Rubber flexible line that runs from the frame rail under the fuse box down to the transmission. On a 2G car, it also replaces the reservoir that is bolted to the front of the transmission.

Unbolt the fuse box so that is can be shifted to the side. Crack loose the 10mm flare nut to the stock hose. After it is cracked loose then remove the clip that secures the hose end to the bracket with pliers. Unbolt the reservoir from the transmission by removing the 3 12mm head bolts. Remove the banjo bolt to the slave cylinder.

Here is a pic of the stock hose / reservoir / line assembly once it is removed.
Install the new line using the supplied banjo bolt and new crush washers. You will need to bleed the clutch fluid of all air in the lines. Use any brake fluid for the clutch hydraulic fluid. Check for leaks.

When installing the SS Clutch line, you have the option of removing the clutch fluid restrictor. It is a small plate with a .050″ hole in it that slows down the release of the clutch. Mitsubishi put it in there to help make clutch release smooth and slow. If you want it to release faster than you have now, pull it out. Our suggestion is to try your clutch with just the new line first. If you want more grab than that, pull the restrictor too, just be careful what you wish for.

This is a pic of the restrictor being picked out of the hole once the banjo bolt has been removed.

This is the restrictor once it is removed

While you are down there replacing the clutch line, also check to see if the slave cylinder is leaking. Pull back the rubber boot. There should be NO fluid in there. If there is fluid behind the boot, it is leaking past the piston and seal. Most 1G cars and many higher mileage 2G cars will have this problem.
