![]()
| Main Page | Crank Walk | Original
RRE 1G in a 2G |
Cam Angle Sensor 1G in a 2G |
Magnus
Method 1G in a 2G |
E-Mail Support Group |
Note 10/2007
This is the original OG method. There are many other options available , all with their own advantages and disadvantages. For the most current news, methodology, pit falls and fashion trends always read and participate in the Yahoo Groups forums here:
http://groups.yahoo.com/group/DSM1gina2g
Lets just start by saying "when you kill your engine it sucks." 2nd gen. motors are really hard to come by and they usually have a hefty price tag IF you can find one. $1600 - $4000. Rebuilding a 2nd gen. motor is currently regarded as risky due to issues with the "Walking Crank Shaft" (see other articles for the ugly details). The best possible solution is to put a 1st gen. power plant into a 2nd gen. car. They are abundant, built in Japan, and cheep. Note: All second generation Eclipse motors were built in the US and subject to the "Walking Crank" issues The only exception to this is a Lancer EVO1 through 3 Motor, but they are rare rare rare. SO...
Out of necessity, I volunteered to be a guinea pig. Hopefully this documentation will make it easy for anyone else who falls into my situation to get back on the road. (This would be anyone with a second gen. eclipse who is replacing their engine)
The two key problems:
2nd gen. ECU's require a crank angle sensor AND one of the motor mounts is different.
The simplest solution was to mix and match 1st gen. and 2nd gen. parts in order to minimize the work Cam angle sensor modifications may be required. This will depend on your combination of head and 2nd gen. eclipse. Cam angle sensor modifications are described in a different document and will not be detailed here. (see 2g-1g head swap)
The following is a list of required 2nd gen. parts and the 1st gen. parts that were modified.
1st gen. water pump (modified) - part# xxxxx
1st gen. (6 bolt crank)
engine block (modified) - part# xxxxx
2nd gen. (7 bolt crank) oil pan
(modified) - part# MD332043
2nd gen. oil pump (modified) - part#
MD327450
2nd gen. crank angle sensor - part# xxxxx
2nd gen. hydraulic
tensioner - part# MD308587
2nd gen. motor mount (modified) - part#
MD189172
2nd gen. arm, timing belt tensioner (modified) - part#
MD170402
2nd gen. cover, timing belt (modified) - part# MD332865
2nd gen.
cover, timing belt under (modified) - part# MD199941
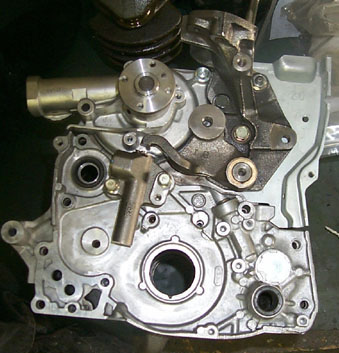
A. OIL PUMP and ENGINE BLOCK modifications.
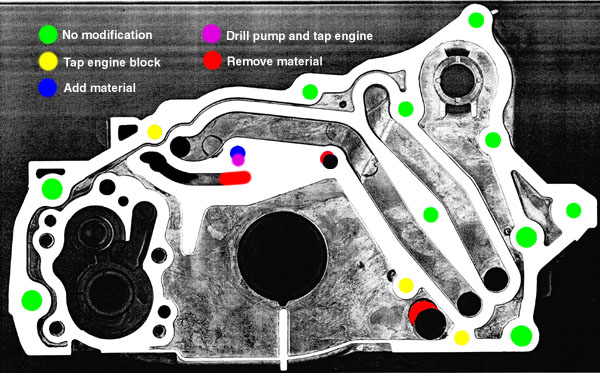
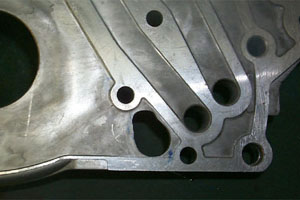
The following overlay illustrates in RED the 1st gen. gasket/engine block. In BLACK are the oil channels for the 2nd gen. oil pump. Numbers 1-8 illustrate points where they don't quite match up. Each point has its own solution.
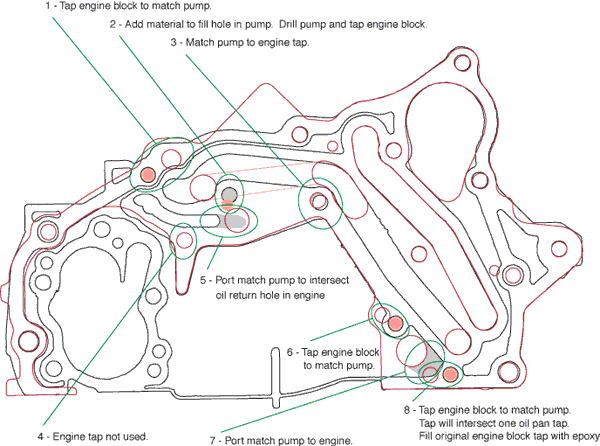
1. With the oil pump in place, carefully mark the engine block for a new hole. Remove the pump and drill a (xxxx) hole (xxxx) inches into the engine block. Try to avoid drilling through, into the crank case. (assemble with silicone if you do) Cut threads into the hole with a (xxxx) tap.
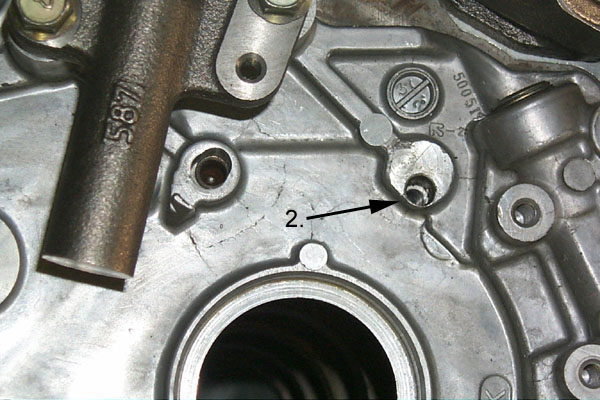
2. Weld aluminum from the outside (timing belt side) to fill the hole in location 2. Using a flat faced grinding tool in a drill press, grind flat the weld. (use tap oil) Carefully mark the location for a new hole in both the oil pump and the engine block. Reference two fixed points that can be found on both the pump and the engine block. Using the 1st gen. gasket as a guide, make sure the hole will not intersect any high pressure oil channels. Make a (xxxx) hole in the pump at location 2. Place the oil pump back on the block and see if the new hole lines up with your marks on the block. YES? Good,
Drill the same (xxxx) hole (xxxx) inches into the engine block (Again, try not to drill through into the crank case) Cut threads into the engine block with a (xxxx) tap. Enlarge the hole in the pump to (xxxx) so the (xxxx) bolt can slide through.
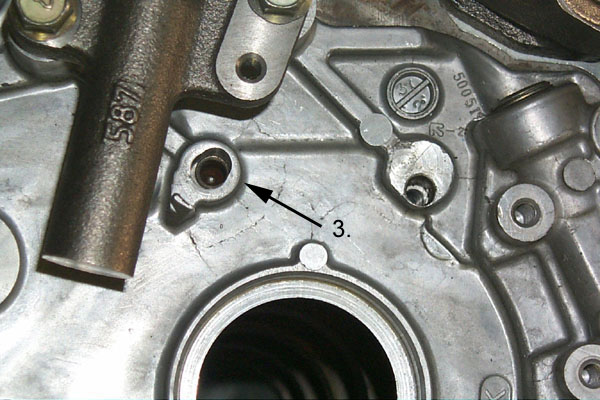
3. Ovalize the hole at location 3 with a drill or round file to match the existing tap in the engine block.
4. The tap in the engine block at location 4 is not used.
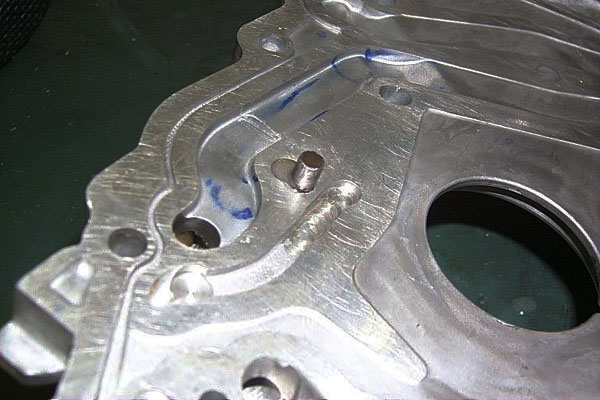
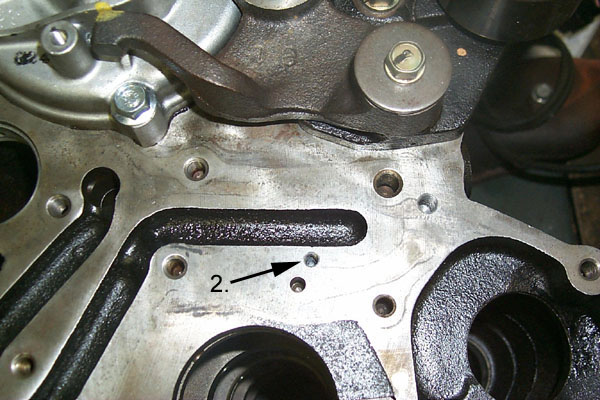
5. A high pressure oil channel in the oil pump must be extended to intersect an oil return hole in the block. Do this by cutting a track in the machined face with a high speed grinder. Use a cutting bit that only cuts on its edges, so the depth of the track will be maintained. (use tap oil) Use the 1st gen gasket as a guide to mark the end point for the track.
A drill bit is poking through the new hole next to the new oil channel. The old bolt hole has been carefully welded from the outside and filled with epoxy from the inside. Cut the epoxy flush with the aluminum using a razor blade while the epoxy is soft. This prevents the epoxy from creating a high spot on the machined face. Use silicone in the bolt hole and on the epoxy surface during final assembly to ensure a good seal.
BE VERY CAREFUL when doing modifications number 2 and 5. There is not much material separating the bolt hole and the high pressure oil channel. The separation must be maintained to avoid possible maintenance problems and leaks down the road. The track need not be as close as what's showing in the picture. (The next time I do this I'll cut the track in an arc to add extra clearance)
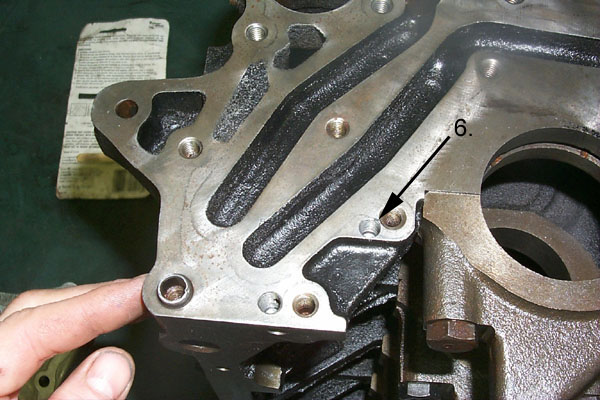
6. With the oil pump in place, carefully mark the engine block for a new hole at location 6. Remove the pump and drill a (xxxx) hole (xxxx) inches into the engine block. (again, try to avoid drilling through, into the crank case) Cut threads into the hole with a (xxxx) tap.
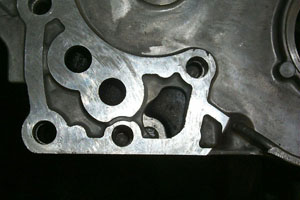
7. Port match the oil pump to the engine block. Mark the pump using the 1st gen. gasket. Use the grinder and bit from step 5.
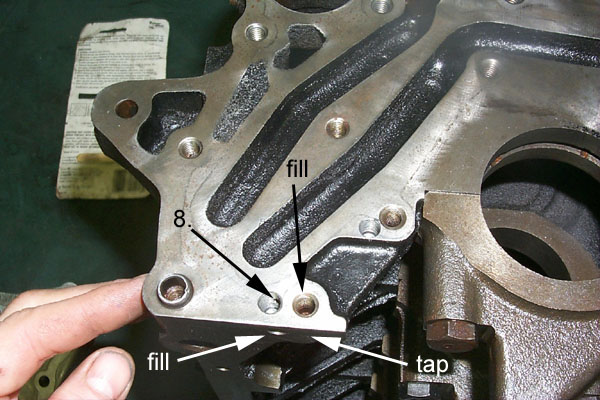
8. With the oil pump in place, carefully mark the engine block for a new hole at location 8. This hole will intersect an existing oil pan tap. Fill the original oil pan tap hole and engine block tap with epoxy. Cut the epoxy flush while the epoxy is soft. Drill a (xxxx) hole (xxxx) inches into the engine block. Cut threads into the hole with a (xxxx) tap.
Temporarily bolt on the oil pan. Mark the location for a new oil pan tap. Remove the pan and drill a new (xxxx) hole (xxxx) inches into the engine block. Cut threads into the hole with a (xxxx) tap.
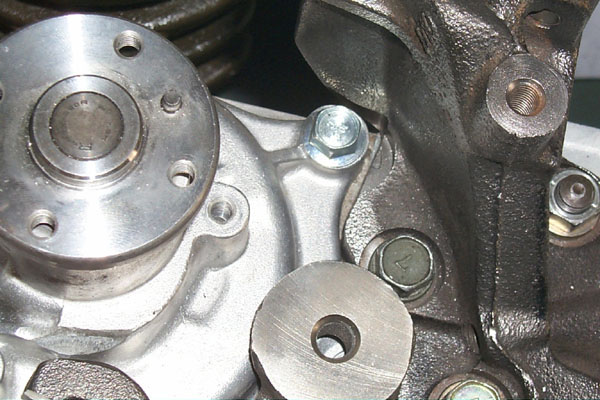
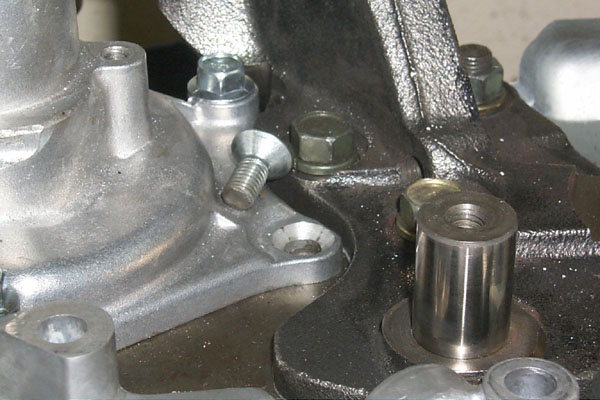
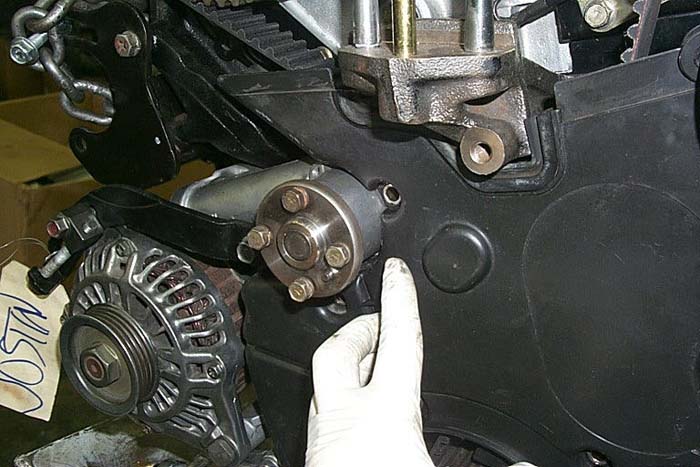
B. MOTOR MOUNT modifications
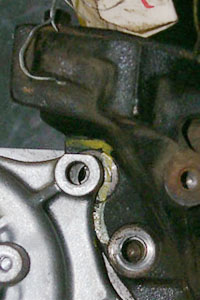
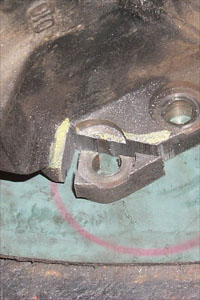
Using a band saw and grinder, modify the 2nd gen. motor mount to accommodate the 1st gen water pump.
C. TIMING BELT TENSIONER ARM modifications
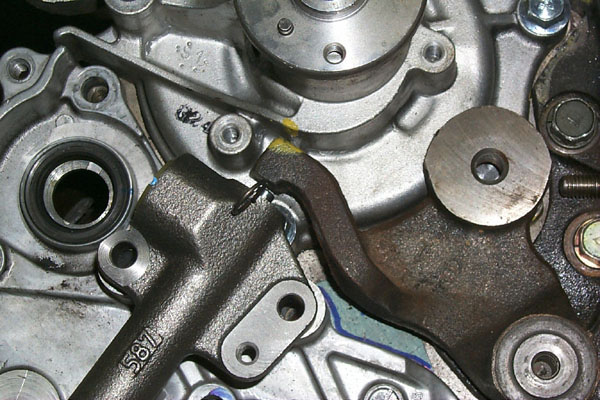
Now that the oil pump and motor mount mods are done, setting up the timing belt tensioner system will be next. The angle that the tensioner tool (long bolt) comes through the 2nd gen. motor mount is different than that of the 1st gen. A second gen. timing belt tensioner arm must be modified.
Loosely assemble the water pump, oil pump, motor mount, tensioner arm and tensioner to the engine. Mark the water pump and tensioner arm in the locations that need to have material removed. (the under side of the arm will need to be modified as well)
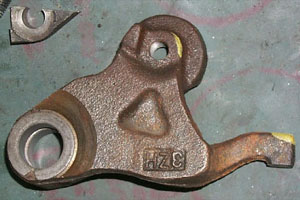
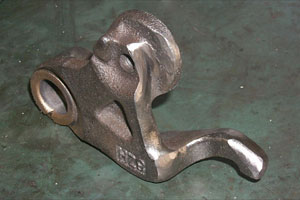
Use a Grinding wheel to slowly take away material as necessary. Try to make the edges smooth without deep cuts.
D. WATER PUMP modifications
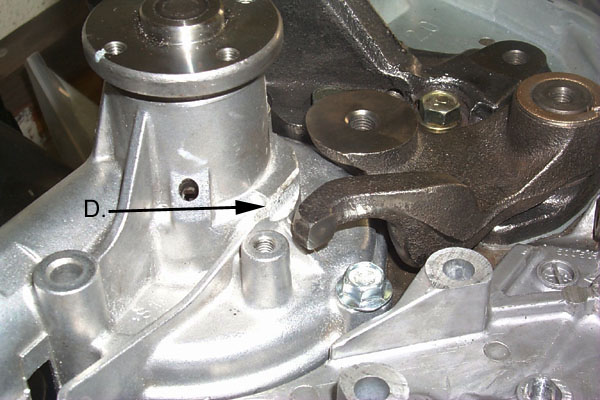
Using a high speed grinder and stone bit, trim back the edge of the aluminum water pump D. for additional clearance to the tensioner arm.
To prevent the tensioner arm from hanging up on the water pump mounting bolt, use a 8mmx1.25 counter sunk bolt.
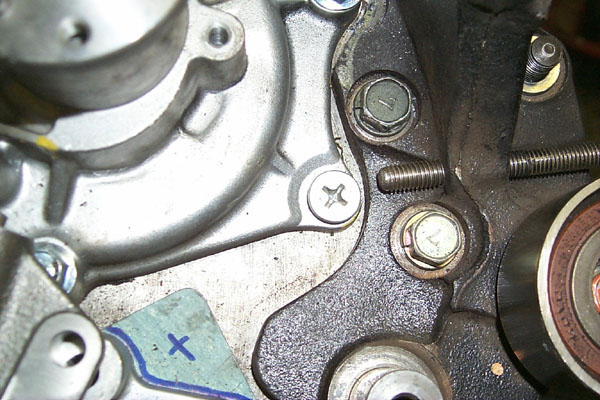
E. TIMING BELT COVER UNDER modifications
Cut the cover to accommodate the water pump. (remove the blue line)
All done? Yeah! Time to build the motor. (details on general motor assembly not included) Use silicone sealant on bolts and epoxy surfaces that need a little extra insurance against leaking.
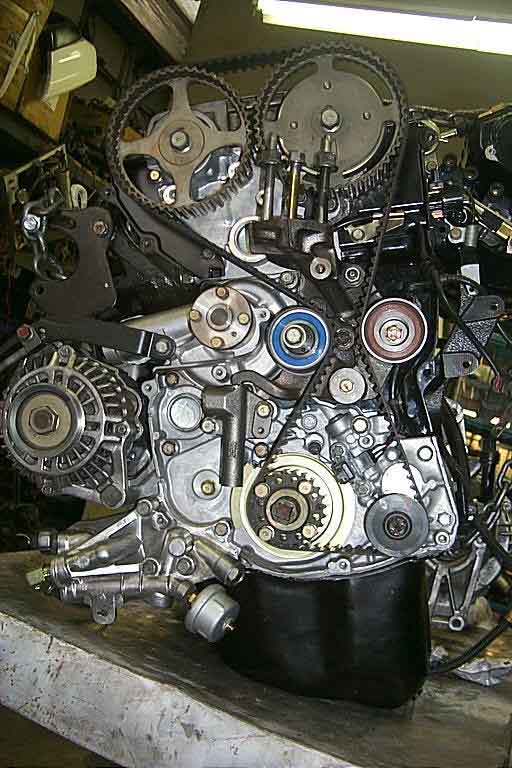
This motor was built using a balance shaft eliminator kit (highly recommended).
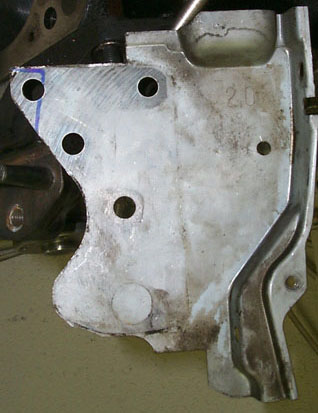
F. TIMING BELT COVER modifications.
The 2G timing belt cover will not fit around the 1G water pump. Trim the cover until a good fit is accomplished. Use a grinder with a cutting tool for plastic.
Cut the cover to accommodate the water pump. At least one of the cover bolt holes will not line up on the 1G water pump, and is not used.
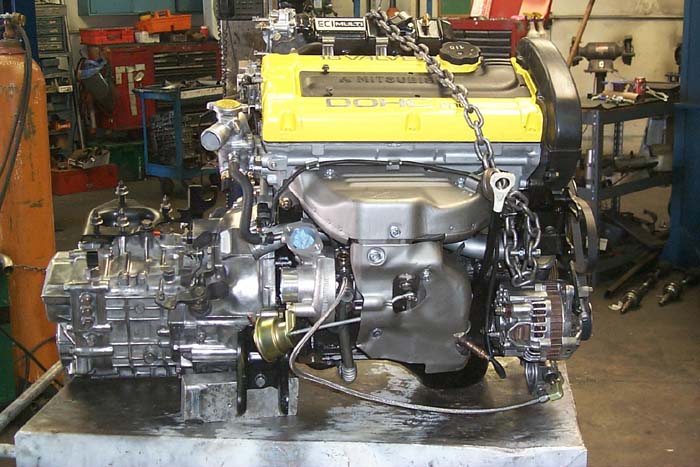
Finally, drop it in, fire it up, and go, go, go.