SCC Magazine – Ramada Express Rally 2000
Ramada Express Rally 2000

It’s a phrase no rallyist wants to utter.”Uh, Mike, can we borrow a hammer?”Mike Welch, of Road/Race Engineering, has along with his unhealthy fondness for fixing smashed rally cars, the world’s largest collection of rally car repair tools. Among them is The Hammer. The Hammer is a mangled, 60-LB block of lead impaled on the end of a Ford truck axle. We already knew The Hammer. We had seen it back at Road/Race’s shop and had even been known to pick it up just for fun, or point and giggle at the though of actually using a thing to fix a car. We weren’t laughing now.
Welch let us borrow The Hammer, but that was only the first hurdle. Next we had to swing it. The Hammer, when you count the handle and the various pieces of rally car shrapnel embedded in it, weighs at least half as much as the heftiest member of our Eyesore Racing Team.

Before long it seemed we had a carnival barker calling out, “Watch the big hammer swing the nerds!” A crowd had gathered to eye our vinyl topped shoebox of destruction with the mix of sympathy and humor appropriate for its current state. Bent, rally sore, and wheels akimbo, Project Rally Beater was coated with equal parts dirt, glory and despair. The despair was only getting thicker as, one after another, our 160-pound driver, 130-pound navigator, and 130-pound crew chief strained muscle and tendon to gently tap The Hammer against the rear wheel.
Then the crowd parted, and through the gap appeared Bob DeBenedetto. Spectator, rally nut, and easily 300 pounds of solid muscle, DeBenedetto probably could have bent our suspension back into shape with his hands. With a soft spoken “mind if I try?” he picked up the hammer lined it up with the top of the rear wheel and took a swing. The first hit was so hard the car jumped in the air. Dust gently wafted out of every crevice in the bodywork. But most importantly, the top of the wheel moved in about half an inch. He hit it again, and again, and again. “Hit it a little higher, a little farther forward, a little farther back.” With the precision of a laser alignment rack, The Hammer pointed the wheel back where it needed to go.
Back to Welch for another beg. With a welder borrowed from one team and a generator borrowed from another, Welch welded up the new crack in the control arm and that was it. With 10 minutes to spare, our rally was back on track and we were ready for the longest stage in American rallying.
The hammer incident was the culmination of a year’s worth of half-hearted preparation, corner-cutting and making do.
After noting the cheery disposition of a rally driver who had just tossed his car high into a pile of rocks at the 1999 Ramada Express Rally, it quickly became obvious that the true path to rally happiness was not through a WRX or Lancer, but through a Corolla, RX-7, or other suitably disposable beater.
Beaters can be flung against the rocks with wild abandon and then repaired for pennies–or replaced with another beater.
It was after watching this very rally in 1999 that we decided to build a beater ourselves. That we returned to the Ramada Express to race in 2000, however, was unexpected. The Beater’s first official competition was in the Treeline ClubRally, a local event so close to home that we didn’t need a trailer. At that point, the car was barely ready for competition, and the notion of being robust enough to finish a 46-mile rally was questionable at best. The 160-mile, three-day Laughlin event wasn’t even a consideration. But in the adrenaline of the moment, after most of the car proved somewhat durable (we did have a distributor failure that put us into last place for two stages) we gleefully proclaimed “We’re going to Laughlin!” Oh boy.
Of course, this event, officially dubbed the Ramada Express Hotel and Casino International Rally presented by Mitsubishi, is a much larger undertaking than Treeline. Treeline is six stages in one day, Laughlin is 15 stages in three days. Treeline is 47 stage miles, Laughlin is more than 160, with stage 11 alone totaling 45 miles. We had a car, now we needed serious logistics.
First lesson of rally logistics: Don’t make fun of your friends for driving trucks. When our longtime friend Jeff Payne traded in a Impreza 2.5 RS for an extended cab, four-wheel-drive Cummins turbo diesel pickup, we naturally unleashed the full force of our SUV hatred on him. Lucky for us, he has a short memory. You can fit a lot of rally car parts in the back of a Dodge truck, and the Cummins engine doesn’t even notice a rally beater on a trailer. Oh, and about that trailer. What’s an aspiring rally driver with limited parking supposed to do about trailers? We rented one from U-Haul for about $260 for five days.
And then there’s clutch paranoia. It isn’t a universal problem, but it strikes us before any long event. One Lap of America, 1999: Our WRX RA had been passed around to various members of the press for three years, and the clutch seemed to engage a little more softly than it should. Paranoid about a mid-race clutch failure, we talked Subaru into air freighting a new clutch from Japan and installing it one day before the car was shipped to the race. The old clutch, naturally, was less than half worn.
So it was with the Rally Beater. We had installed the engine only a few hundred miles before and the clutch, though worn, was far from ready for retirement. But somehow it suddenly didn’t seem to grab hard enough to give us confidence. A week before the rally, we frantically called Centerforce. Project Rally Beater has a clutch from a 2000 Datsun Roadster, an extremely rare car these days, but Centerforce not only makes a clutch for the Roadster, it was able to have it in our hands in less than two days! Now, that’s a pretty comprehensive product line! Working under a rally beater is an adventure in dirt. Removing the transmission after a rally means enduring an avalanche of gravel and mud every time you touch something, but in a few frantic hours, we had the old clutch out and the new one in. Naturally, the old one appeared to have plenty of life, but the two 30-foot black stripes on the street outside the office suggest the Centerforce is still far stronger.
And then there are the spare parts. At Treeline, we packed light. The only spare part was a distributor, which, as luck would have it, was the only part to break. For Laughlin, we packed everything. Digging around under shelves and behind workbenches revealed a treasure trove of forgotten parts. Spare engine mounts, brake drums, struts, steering linkages, alternators, starters, lights, hoses, fluids, anything and everything was put in plastic bins and labeled for the inevitable late-night repair sessions. Preparation for the rally was an all-consuming effort, mixing equal parts of paranoia and giddy excitement.
Naturally, the preparation didn’t end at getting the car to the event. We still had to unload it and pass tech. Normally, the pre-rally tech inspection is fairly minimal. The harnesses and roll cage were checked, the certification on your helmet and driving suits are reviewed and, because transit stages are often run on public roads, a basic check of headlights, horn, turn signals and brake lights is performed. No sweat, right?
Naturally, after 30 years of working perfectly, the brake lights chose to fail just as we were waved into the inspection. We got through (don’t ask how) and the preparation continued.
Word around the pits was that the first day’s forest stages were covered with snow and mud. Tomorrow was going to be a race of survival. Hmm, used, warm-weather rally tires, an open differential and snow. We stopped thinking about finishing well and started thinking about finishing at all. Five minutes before closing time, we came squealing into the last open auto parts store in town and bought tire chains. Is this an odd sport or what?
Then, we saw Rhys Millen preparing for the soggy mud/snow soup by cutting larger grooves in his nice, new Michelin rally tires. After a quick, tire-grooving tutorial from Millen, we borrowed a tire-gooving iron from fellow rallyist Paul Timmerman and started work on our tired, old Silverstones. Rallies have specific rules mandating when and where teams can work on their cars. In parc expose, teams may work on their cars as they are displayed to the public. However, in parc ferme, the car can’t be touched. Parc ferme began at midnight, and we finished grooving tires at 11:59 pm. The parc ferme rule never made sense before then; without this rule, we probably would have worked through the night.
Stage One
The transit stages for the Ramada Express Rally are huge. All the stage roads are on the Hualapai Nation on the edge of the Grand Canyon, about 100 miles from Laughlin. In previous years, drivers had complained about the fatigue, monotony and tire wear from the long transits, so the rules were changed this year to allow the cars to do the long transits on their trailers.
To make the race look more exciting for the locals, however, all the cars still drove over the start ramps and through town before loading onto the trailers across the border in Arizona. The American Rally Sport Group has a good record of trying to keep the competitors happy and the rally as spectator-friendly as possible.
Expecting mud, snow and slush on narrow forest roads, we pulled up to the start of stage one and saw a dry, hardpacked straightaway. Just before counting down to our start time, the starter warned us that two cars have rolled on this stage. No pressure… Go!
At approximately 7,000 feet, the Beater accelerated reluctantly to a top speed of about 80 mph. On the dirt, with thoughts of cars on their roofs, it still seemed really fast. After a few minutes of driving flat out, the road suddenly narrowed, got wet and snowy, and turned into a hard right. Less than 10 turns into the twisties, we saw warning triangles, an OK sign, and the Audi quattro of George Plsek and Alex Gelsomino tires up in the ditch. It took serious self control to keep the car on the road as we worked slowly up to speed. An upside-down car on the first stage doesn’t inspire confidence. A few turns later, the scene is repeated, this time with Mark Nelson and John Bellfleur’s Mitsubishi Lancer. This was getting ugly.
When we reached the end of the stage, the arrival time control was at the top of a very small hill, and another car was still busy checking in. We waited halfway down the hill, and then tried to pull forward when the other car moved. We tried.
Even on the very slight incline, we just sat and spun our tires in the mud. Just making it to the time control meant backing up and taking a running start. This was an omen.
Stage Two
Everything was brown. The road was brown, the cars were brown, the trees were brown, the windshield was brown. The road was heavily rutted, but the ruts were nearly impossible to see. They constantly tugged the car this way or that, and steering inputs seemed to have little effect in this slime.
The transit to stage two had two-way traffic, with the leaders, having already finished the second stage, coming head-on toward us on their way to the first service stop. Common sense said to slow down, physics said if we did so we’d get stuck, so there we were, flying through the muck, tires spinning, car sliding erratically from one side of the road to the other. Rhys Millen was doing the same, and we narrowly miss slamming head on into him. As our windows passed within inches, we could see the grin on his face was almost as big as ours. Insanity loves company.
The start of stage two was frozen and slick. So slick, in fact, that as Richard Byford and Fran Olson tried to inch forward to the start, their BMW 2002 did a slow, graceful pirouette and ended up stuck sideways in the road in front of us. Several navigators jumped from competing rally cars to push them from the muck.
The weighty slime so thoroughly coated the sides of our car that the stage workers had to ask our car number before recording our times. Our hearty mudflaps, which had survived all our “testing and development” miles without complaint, were ripped from the car after just two stages in the slime.
Stages three through six were more of the same–slimefests of epic proportions. The mud became so thick at one point that full throttle in The Beater produced all of 35 mph. At the end of day one, The Beater managed an impressive 10th overall, slotting in right after the open class Galant VR-4 of Keith Roper and Ray Damitio and sneaking in just in front of the Group 2 Eclipse of Christopher Burns and Steve Westwood. The next day was sure to be harder for The Beater as the roads opened up and horsepower became more of a factor.
Faster it was, though momentum was proving itself a fair substitute for horsepower for a while. Pounding up stage 7 out of the grand canyon, we managed to hold our position despite the need for power. After a brief roadside repair stop to fix some loose exhaust bolts, we started into the real horsepower stages where the fast cars were going 140 mph, and we were going 100. That lead directly to the ditch (see “Great Moments in Rallying #3, to the right.)
Driving fast on treacherous, slippery roads you have never seen requires a certain placidity, a certain Zen calmness in the face of unparalleled pressure. Every road has a rhythm, every car has its special moves, and being in the zone means being able to make the car dance. Try dancing after crashing a car, running a quarter mile with a helmet on your head and the thin air of 6,000 feet in your lungs, after spending five minutes jumping around in a ditch like a couple of drunk monkeys. This is the kind of challenge that separates the professionals from the dirt jockeys like us.
The very next stage, still breathing heavy, and still searching for our rhythm, it happened again. This time there was no glorious almost-save. This time it was simple. We went too fast, turned too late, and slid into a small ditch. A very hard small ditch. This, for certain, was the end of the rally for Eyesore Racing.
This brings us up to The Hammer, but you’ve already heard that one. Finishing the Laughlin rally’s 45-mile Canyon Challenge stage after repairing the The Beater with The Hammer may turn out to be the crowning achievement in our motorsport careers. The Canyon Challenge came at the end of the day as the sun was setting. And, as luck would have it, the stage ran primarily east to west. That meant the pucker factor was high as The Beater blasted over blind crests, directly into the blinding sun. However, this time, it stayed on the road and made it to the end of the second day.
Leg Three of the Laughlin event is held in a huge gravel field behind the headquarter’s hotel. It’s called the SuperStage and is basically a dirt autocross which pits competitors against one another in wheel-to-wheel brawls designed to put a spectator-friendly finishing touch on the event. Organizers match cars which have produced similar stage times on the rally’s previous legs to compete together on the two-lane SuperStage course.
The Beater was matched against the RX-7 of Jim Gillaspy and Mick Kilpatrick who had eeked out a fair lead on us the previous two days. The SuperStage, however, proved how well matched the cars really were as the two were given the exact same finishing time on two of the four stages. Naturally, Gillaspy’s car was slightly ahead on those runs, but a half car length is invisible in rally time. The other two runs were a draw–one win each. Stage 15 brought to an end one of the longest, roughest and highest attrition races in American rallying in the last 10 years.
In the end, The Beater did all right. Somehow, despite all our efforts to throw it away on stages 10 and 11, The Beater won its class (Group 2) and managed ninth overall–not bad given the number of four-wheel-drive open class cars in this race. And the reward for winning Group 2? One thousand glorious greenbacks! Who says rallying doesn’t pay? The ARSG gave away $25,000 in cash and prizes at the awards ceremony after the race.
The organizers of the Laughlin rally have a slogan: “We promise you an adventure,” they say. And given the roads, distance and fun factor of this year’s event, we couldn’t agree more. The Laughlin International Rally epitomizes what rallying should be: Man vs. road vs. the clock. It is, without question, an adventure.
Read more: http://www.modified.com/projectcars/0107scc_ramada_express_rally_2000/index.html#ixzz1hEqXbxeX

Sport Compact Car Magazine – Project Mazda 323 GTX: Part 2
Here is Josh Jacquot’s and Dave Coleman’s 2nd part of Project 323GTX. We no longer sell parts for this car since they have to be custom made on the car in the shop. But since I got my start working on AWD rally cars on the 323 GTX working for Rod Millen back in1990 I always have aspecial sentiment for these little cars.
In this article we helped the SCC Mag guys with the GTX’s suspension, brakes and rebuilding the distributor.
Sport Compact Car Magazine
September 2000
Written By Josh Jacquot
Photography by Les Bidrawn, Dave Coleman, Josh Jacquot
The resurrection of our Mazda 323 GTX project car is still in its infancy as we continue with the essential repairs we began in the first installment. In case you missed out last month, we covered the replacement of the transmission and clutch as well as the basics of a wheel bearing rebuild. This month, we’ll tackle the GTX’s suspension, distributor and brakes, as well as a few less critical aesthetic add-ons.

The GTX’s reliability (considering the regular pounding it receives) as well as its overall capability in the dirt continues to amaze and impress us all. It’s proving itself daily as one of the most fun and most practical cars around the office. While it may not impress anyone with its looks, every time we get behind the wheel, we remember why we had to have a car to play in the dirt.
Springs and Shocks
With what seems like several feet of rubbery suspension travel, the 323 isn’t very much fun when wearing worn-out shocks. This is a real problem and is something the GTX community is tackling in hundreds of creative ways. We aren’t going to pretend that there’s a simple solution either. No one has made new GTX-specific dampers in this country for years. Tokico Dirta struts went out of production several years back and very few, if any, shocks offer the kind of damping control required by the GTX’s long-travel strut system. Cork Sport, an Oregon-based Mazda specialty company still imports KYB struts for the car. However, they aren’t exactly what we were looking for, so the search continued.
Our solution? Buy used. We can’t, obviously, give our wholesale endorsement of this sort of upgrade, but in our case, it has worked fine so far. Given the lack of new suspension parts for these cars, this may be your best option if you decide to follow our lead. The 323 GTX listserv (www.egroups.com/group/323gtx) is likely the best place to look for used GTX parts and information.
Since our infatuation with 323 rally cars began a few years back, we’ve made friends with several 323 owners who race their cars in the California Rally Series and other SCCA events. This put us in good company when it came time to look for used suspension parts. Paul Timmerman (a local racer whose GTXs we featured in the January ’99 issue of SCC) and Road/Race Engineering came to the rescue.
Timmerman had a set of used GAB struts from an old Production GT 323 racecar he was keeping around as race spares. However, since he was planning to upgrade to a custom Bilstein coil-over setup in the near future, the parts that were currently on his car were about be spares. The timing was perfect and we stepped in with the cash. Timmerman gave us a generous price, which didn’t hurt the cause either. The front struts were fitted with stock-diameter rally springs but the rears had no springs. So, despite all our efforts and waiting, our wanna-be rally suspension still wasn’t complete.
Road/Race to the rescue. Naturally, Welch had the solution to our problem in the form of RRE’s coil-over setup. At $400 for all four corners, this reasonably priced setup allows an inch of adjustability–either up or down–from the stock ride height. We only needed half the kit since we already had front springs.
Welch chose 150 lb/in springs for the rear of the car, which he figured would complement the rather hefty looking front springs. At this point there was still no real way to know the rate of the front springs without disassembly and we were in a hurry to get the suspension together. Luckily, Welch has enough experience with these cars that we knew his estimate would be better than our guess. We plan to complete the coil-over kit in the future anyway, thereby eliminating the guesswork involved the spring rates. However, since this vehicle will be primarily a dirt car, the precision and exacting demands of dialing in a tarmac set-up don’t exist. If it worked well in the dirt, didn’t bottom out and rotated quickly, we would be happy.
Installation for the rear springs was as simple as sliding the sleeves over the strut body, threading on the collars, dropping on the spring and bumpstops, and then bolting the whole assembly together. We used the stock bumpstops but trimmed off the bellows section.There was still more than an inch of bumpstop to save our GABs from dangerously bottoming out, but with the added travel and increased spring rate, we figured that wouldn’t be a problem (and it hasn’t).
The fronts bolted into place with the same ease that everything else on the car had exhibited–rusted bolts, nuts and washers were the name of the game. We managed to get the struts out without breaking anything or rounding off any bolt heads. Fitment of the GAB strut housing required removing small amounts of material from the 323’s upright to achieve reasonable camber settings. This job was easily accomplished with a die grinder and a bit of patience.
Per Welch’s recommendation, we didn’t re-fit the front anti-roll bar after replacing the transmission. Reducing the GTX’s front roll stiffness enhances its ability to rotate quickly in the dirt–something real rally cars do very well. The rear anti-roll bar bushings were destroyed from years of wear and weather so we replaced them with RRE’s polyurethane anti-roll bar pivot bushings and new end links (which use rubber bushings). The original end links and bushings for the rear anti-roll bar had become one with the car after years of weather and wear and required some work with the sawzall and several choice words to remove. The new hardware went into place without any problems and took the slop out of the system.

We were initially quite concerned with the alignment settings of Project 323 GTX and asked our friends at Wheel Warehouse in Anaheim, Calif. to handle the job. However, after they could barely squeeze zero camber (Welch’s recommended dirt setting) out of the front end we were less serious about radical alignment. The problems in the front came from our less-than-precise method of grinding the uprights–a not-so-scientific way to get the GAB rally struts to fit. We simply set the car up to go straight down the road and quit worrying about toe and camber, since we are planning to spend most of our time in the dirt, where these settings become insignificant anyway.
Distributor
The GTX uses a mechanical-advance distributor to control spark and therefore suffers the consequences of such a complex design. The mechanical advance springs on most high-mileage GTXs fail, allowing the advance weights to swing into the distributor housing as the assembly spins. The weights then rub against the side of the housing, eventually cutting it in half if, not repaired. They also allow the engine to run with maximum mechanical advance of about 30 degrees BTDC. We found all this out the hard way.

Our car had just about every distributor problem the GTX can exhibit. Not only had the advance springs failed, cutting through the distributor housing and allowing maximum advance at all times, but the advance plate, which rotates on ball bearings had seized, allowing for very little, if any, vacuum advance or boost retard. Yet, through some miracle of God-given grace, the car made it 800 miles from Salt Lake City to Southern California in its initial run home.

The distributor is easily removed from the 323 with only two bolts, several electrical connectors, the spark plug wires and one coil wire. (We guess that’s simple, anyway). Be sure to note where the rotor is pointing upon removal and return the distributor to that position when reinstalling. Also, it’s critical to not turn the engine over while the distributor is removed or you’ll end up spending hours trying to time the engine correctly.
Our distributor was removed easily enough, but refused to come apart for a rebuild. We ended up using the most elegant method we could think of for disassembly. Out came the cutting torch and pry bars as Welch pounded, heated and pried until the entire assembly was in pieces. Graceful it wasn’t. But we eventually reached the source of our problems and were able to replace the advance springs and rebuild the advance plate, which controls vacuum advance and boost retard. The new springs (which RRE sells for $7) utilize a plastic reinforcement where they attach to the advance weights–we don’t expect any more problems here. However, due to the broken springs, the weights had worn a hole completely through the distributor housing. Welch patched the hole with epoxy since it wasn’t large enough to cause structural fatigue and began reassembly of the numerous distributor parts. We also replaced the distributor cap, since it was cracked in several places surrounding the contacts.

All the problems listed above are common to GTX distributors, so don’t be surprised if your car exhibits similar failures. We were lucky enough to have all of them. However, despite the many parts and complexity of the GTX’s distributor, it’s possible for most weekend wrenchers to tackle its rebuild. Careful disassembly goes a long way in putting things back together in the right order. Plus, the parts that fail are cheap. If you’re still not up to the task, send your distributor to Road/Race and they’ll handle the job for $100.
Brakes (or Lack Thereof)
Stopping our GTX has been a bit of challenge since this project got off the ground. A mushy pedal is never very confidence- inspiring, especially in a car that will be driven with any enthusiasm. It didn’t take long underneath our GTX to notice the extreme wear on the original brake lines. The lines were cracked and worn, and had a generally dangerous look about them. We figured an upgrade to RRE steel braided lines couldn’t hurt. At this point it seemed safe to assume replacing the lines and thoroughly bleeding the brakes would bring back a stiff pedal. However, after doing so, we soon realized the problems with our GTX’s brake system go beyond simple line replacement.

Welch tells us that it’s not uncommon for GTX calipers to lose some off their free play over time. Apparently, the calipers’ self-centering mechanism seizes with exposure to moisture and dust after years of use. The resulting twist in the calipers causes excessive pedal travel, regardless of new brake lines. So we’ll be treating Project 323 to a caliper rebuild and some new brake pads in the next few months to bring back some solid pedal feel. In the mean time it still stops well, so we’ll survive.
Always Accessorize
In our effort to make a reliable and inexpensive rally car, we ran across a few other necessities that we just had to have. What was the one thing that all rally cars had that we were lacking? The answer was simple: Huge, night-killing driving lights.

Toucan Industries stepped up with a set of Super Road Boy 100-watt driving lamps. The lights come with a complete wiring diagram, wires and an on/off switch. Our mounting requirements forced us to mount the giant lights upside down–not the most aesthetically pleasing solution, but this car is all about function, not form. Plus, our mount requires no drilling into the bumper. We used 1 x 1.5-inch box section aluminum as a mounting bracket for the lights. The back of this box section bolted to the original grille mounting bracket at either end of the main grille opening. The front of the bracket bolted directly through the lights’ rear housing–a simple mounting solution, which only took a few hours to assemble. We obviously removed the GTX’s unique grille and replaced it with a section of grillwork we found at the hardware store. The new grill isn’t exactly beautiful (in fact, it’s pretty ugly) but, judging on looks alone, it flows considerably more engine-saving cooling air than the original.
Next Time
Hopefully we’ve covered the majority of the major repairs necessary to keep the GTX in running order as a daily driver. We’re counting on it regularly for transportation and recreation these days, so it’s necessary that it not leave us stranded. Next time we’ll begin with the basic power upgrades as recommended by Road/Race Engineering and hopefully have a few dyno charts from local competition GTXs for comparison. Until then, rally on…

Sizing it up
Assuming you’ve already run across the SCC Rallycross Smackdown story last month, you know how effective a properly prepared GTX can be in the dirt. However, we always want a back-to-back, before-and-after comparison to quantify the effectiveness of the changes to our project cars. Before doing any of the above-mentioned work to the car, we staked off a section of dirt road in the nearby forest and went to work. The road, an unbelievably twisty section of gravel with huge elevation changes, ranks among the best gravel roads any of us have ever seen.
Project GTX bobbed and weaved with engineering editor Coleman clinging for dear life in the passenger seat during our initial runs. Don’t bother repeating this test on your own, as its stupidity exceeds even our grossly skewed limits of sanity. We made the runs again after all the repairs and with the much-improved rally suspension in place.

So, what did all this insanity prove? Mostly that the changing conditions of dirt roads aren’t so good for comparing improvements in rally car performance. Without question, the new suspension, improvements in ignition advance and overall preparedness of the car made it easier to drive and faster in any conditions. However, because of our wet spring and consequent road grating, our test road was in considerably different shape during our second visit. With a much softer surface and more loose conditions our times don’t show the improvement we had hoped for. What they do show, if one looks closely at the raw times (not listed here), is that the GTX is now much more predictable and easier to handle over rough terrain. In fact, the GTX’s ability to devour washouts, ruts, rocks and any other dirt road impediment is simply amazing. Before the upgrades we were operating on faith, now we drive with confidence. See the map and elevation profile on the next page for more details.
Full Article on Modified Magazine:
http://www.modified.com/projectcars/0009scc_mazda_323_gtx_part_3/index.html#ixzz1h9r51Zsi
Sport Compact Car Magazine – Project Mazda 323 GTX: Part 1
Here is Josh Jacquot’s Project 323GTX. We no longer sell parts for this car since they have to be custom made on the car in the shop. But since I got my start working on AWD rally cars on the 323 GTX working for Rod Millen back in1990 I always have aspecial sentiment for these fun little cars.
In this article we helped the SCC Mag guys with getting acquainted with the car and basic maintenance.
Sport Compact Car Magazine – August 2000
Writen By Josh Jacquot
Photography by Les Bidrawn, Josh Jacquot
Reprinted with permission

We’ll be the first to admit it. We’re shameless rally car freaks at Sport Compact Car. We like to slide around corners, fly sideways over water bars and charge down dirt roads with unlealthy amounts of confidence. Unfortunately, our budgets don’t allow for these kinds of antics in the most modern rally equipment, so we are forced to settle on cars somewhat less radical.
In this case, our choice for old-school rally equipment is a 1988 Mazda 323 GTX. With only about 1,200 of these cars sold in the United States in ’88 and ’89, they are a rare breed. We’d normally feel guilty about beating the life from a car this rare, but since ours was mostly dead when we bought it, we figure instilling a little rally car life back into its veins is the best thing we can do. Besides, its body is in fairly rough shape to begin with, so don’t plan on seeing pages of pretty pictures touting our GTX’s beauty. It’s not the best-looking SCC project car, but it may be the most functional.

Goals
Since we are appealing to an exceptionally small crowd with the GTX, we’re going to keep this buildup short. This installment we’ll explain a few of the rudimentary problems every GTX owner has faced or will face in the near future as their car shows the signs of age and high mileage. After dealing with the most nagging GTX problems, we’ll address the power issue over the course of a few more installments. When we’re finished, we should have turned a car with one wheel in the grave into a reliable, low buck hot rod.

Project 323 GTX won’t be a competition car. We’ll leave building a low-buck rally car to engineering editor Dave Coleman and his Datsun 510. Our car will kep its interior and sound deadening material while adding many of the go-fast parts common to competition GTXs. Central to this project, however, is price. We want to build a car you can duplicate at a price most normal people can afford. Obviously, much of what we do can’t be repeated exactly. But by sharing our parts venues and using a little patience, building a similar car isn’t impossible.
If you read our introduction to Project 323 GTX in the March ’00 issue of SCC, you know that we paid $2,000 for the car-a decent price for a car this capable. With lots of work on the horizon, we knew we’d be spending more money soon. The GTX needed its suspension reworked, had one bad wheel bearing, a nasty second-gear syncro and a distributor that had seen better days. The initial goal with Project 323 GTX was to pound on my fellow SCC scribes Coleman and Shiv Pathak at a California Rally Series rallycross in Ridgecrest, Calif. To do that successfully, there was no room for mechanical mishaps. It was time to get to work.
Transmission woes
Early on it became obvious that our 323 was suffering from the dreaded second-gear syncro problems for which GTX transmissions have become famous. Before heat built-up in the tranny, it was fine-shifting normally through all the gears. However, after a few minutes of operation, it became difficult to get the car into second gear without a painful and expensive-sounding crunch from the gearbox. This we couldn’t have.

Mike Welch, the illustrious owner of Road/Race Engineering is perhaps the best-schooled GTX guy in the country. He has prepared the cars for years and knows them inside and out. In fact, without Road/Race for local support, we wouldn’t have settled on a GTX for our dirt duties. Keep in mind that RRE specializes only in the four-wheel-drive turbocharged version of the 323 not in lesser two-wheel-drive 323s or Proteges.

So, it was with Welch’s recommendation that we purchased a used tranny from a local importer instead of trying to repair the original. Welch notes that it’s smarter to buy one that works than to take chances with a repair. Besides, at $495, it seemed likely that buying a used tranny could also be more cost effective.
Welch provided a list of importers which have been known to have GTX transmissions on hand and after a few phone calls, we discovered that CNS Motors in South El Monte, Calif. had what we needed. For less than $500, including tax, CNS loaded the tranny into the back of the GTX and we were on our way to Road/Race for the tear down. In the meantime, we placed a call to Centerforce for one of the company’s Dual Friction clutches.
Removing and replacing the transaxle/transfer case in a GTX is not a job for the ill-equipped. In fact, we absolutely recommend getting a professional to do the job. Without the tools and expertise on hand at Road/Race, our car would still be in pieces. This is especially true since every nut, bolt and fastener on our car was rusted together. We’ll spare you most of the gory details of removing and replacing the tranny, but understand that it’s a job for someone with the patience and mechanical expertise of a professional.

Our car spent most of its life up to this point in Utah, where snow covers the ground for months each year. Therefore, we had the pleasure of breaking every other bolt we attempted to remove, thanks to 12 years of rust buildup. Two of the most critical were the bolts holding the lower crossmember to the front of the chassis. ‘We spent an hour trying to remove them without snapping them in half, but our efforts were in vain. After breaking both bolts off inside the chassis, the heroes at Road/Race helped us drill out the remains and tap the holes for new bolts. Welch even came up with a clever solution to the lag bolts’ design and custom fabricated spacers to go in the freshly tapped holes.
This is just one of several hassles that wouldn’t have been solved without the experts at Road/Race. The pieces went back together with the new Centerforce clutch in place and a new lesson under our belt. If your GTX needs a new tranny and you haven’t done the job before, take it to a professional.
Wheel Bearings

If you already own a GTX, you’ve certainly heard about the problems associated with the car’s wheel bearing/hub assembly design. If you don’t own one, this is something worth considering before making the purchase. First, it’s a certified pain in the ass. Second, it takes special knowledge of the parts and assembly procedures to replace the GTX’s wheel bearings correctly. Even many Mazda dealers today are often unaware of the correct method to properly replace a worn wheel bearing on a car of this era,. Most GTXs with 100,000 miles will show bearing wear or failure especially if they’ve been exposed to dirt and moisture as most probably have.


Because the design sandwiches the wheel bearings in the upright, it requires one of 22 different sized Ma.zda space is in between the bearings to be rebuilt correctly. Spacer sizing is based on the amount of wear to the upright and hub surfaces and is usually a procedure which requires trial and error (disassembly and reassembly) to achieve proper bearing tension. It also requires a press and bearing separator, lots of time and an inhuman amount of patience to get right.

We’ve illustrated the process to make it easier to understand, but since it requires special tools and lots of time to do right, we recommend finding someone familiar with GTXs to do the job.

Details, details, details…
Finally, we should mention that despite all the repairs to the car we actually made a few changes that weren’t vital to the survival of our wanna-be rally car. We added a set of Team Dynamics Motorsport wheels in the company’s anthracite finish for street use. These 15×6.5-inch wheels are available in a positive 49mm offset so we spaced them back to 46mm with 3mm space is. Using 195/50-15 tires we’ve managed to avoid clearance issues up to this point. However, it’s an extremely tight fit (only a few millimeters) between the tire and our new struts in the rear. We suspect that with smaller stock struts clearance would be greater.
Next month
In the September issue we’ll bring you the updates to our suspension that allowed for our striking lead shot this month as well as addressing the basics behind the GTX’s various distributor problems. We’ll also discuss the installation of our Toucan Industries driving lights. After that, we’ll attack power enhancements in the order Road/Race recommends and take the appropriate safety measures to be sure we keep our prized B6 powerplant in one piece.
SCC Magazine – Best 10 Used Car Buyer’s Guide – 323GTX
The crew SCC magazine told me they were putting together a 10 best used car buys guide and asked for our input on the Eclipse and the GTX. Here is the GTX article:
Sport Compact Car Magazine – December 1998
By Dave Coleman
Reprinted with permission
What would we do without rally cars? To be considered a production car for Group A rallying the FIA mandated that 5,000 road-going versions of that car had to be built. The 323 GTX, like most of the world’s coolest cars, was built for production to homologate the all-wheel drive turbocharged 323 as a legal, production-based Group A rally car. The 323 GTX first appeared in Europe and Japan in 1986, but didn’t make it to our shores until 1988,when Mazda was trying to bolster the image of their rather pedestrian 323. Over its two year run in the United States, only 1,243 were sold, making It difficult to find one now but not impossible. If you can locate a GTX, its relative anonymity translates into a remarkably low resale value.

The GTX was powered by Mazda’s B6 engine, the same power plant that later found its way into the Miata. In the GTX, though, it had the added benefit of a turbocharger and intercooler, boosting output to 132 hp. Power was put to the ground through all four wheels by a compact planetary differential with an on-dash switch that could lock the differential for loose surfaces.
According to Mike Welch at Road/Race Engineering [(714) 899-1220] only about $1,000 worth of modifications (exhaust, filter, chip, and a boost bump to 15 psi) are needed to raise output to 180 hp. which Welch says makes a very comfortable power level for the street. That’s another benefit of homologation cars, they tend to be artificially de-tuned in. their street form, allowing plenty of room for tweakers. If you keep spending money, there is plenty of room left for even more power.
If you do manage to find a GTX, there are a few things to check: Transfer cases commonly wear out due to lack of maintenance. Since their oil supply is separate from the transmission, many forget to check the fluid level or change the fluid. The rear output shaft bearing is usually the first to go, so get under the car and try to move the very front of the drive shaft yoke up and down. If it’s loose, you’re going to have problems. The mechanical advance weights in the distributor (yes, it has mechanical advance!) can get sticky or the springs can break. This can cause ignition timing to get erratic, or in the worst case, can allow the advance weights to hit the inside of the distributor housing, cutting through it. If the housing is not damaged, the weights and springs are only $7.

If the car has warped rotors, don’t expect it to be an easy fix. The rotor is behind the hub, requiring full hub , disassembly, and probably a wheel bearing replacement. Believe it or not, a simple front brake job needs to be done by a Mazda specialist. Finally, a rare assembly flaw (or mistake during timing belt replacement can actually cause the front of the crank to snap off! According to Welch, most of the cars for which this is a problem have already had it happen, and if it’s any consolation, the crank is shared with the millions of Miatas out there, so replacement parts are easy to find. Still, if the front pulley wobbles at idle, walk away.
While this extensive list of possible problems may sound daunting, most of the problems are rare, and those that aren’t (like the distributor) are easy to fix. If you want a totally invisible hot rod, you can’t get much more invisible than a 323
Engine Type : Inline 4, turbocharged and intercooled, iron block, aluminum head
Valve train : DOHC,4 valves per cylinder
Displacement : 1597cc
Bore and Stroke : 78.0 X 83.6 mm
Compression Ratio : 7.9:1
Horsepower : 132 @ 6000 rpm
Torque : 136 hp @ 3000 rpm
Drive train :Transverse front engine, All wheel drive
Transmission :5-speed manual
How do you tell if it is a GTX by looking at only the VIN number ?
There are 17 numbers in the (USA) VIN numbers
Example:
JM1 BF 23 4 7 J 0 100001
The first three are the World Manufacturer Identifier
JM1 is for Mazda’s US and Canadian cars.
4th and 5th characters are the car line series
BF is for the 323 (in 88-89)
6th and 7th are is the body style code
22 is 4 door – 23 is 3 door hatch back – 34 is hatch back
8th is the money code number
2 is 1600cc EFI 2WD
3 is 16oocc DOHC Turbo 2WD
4 is 16oocc DOHC Turbo 4WD
The ninth digit is a check number from a mathematical formula
Keeps you from making up your own number.
10th digit is the year code
J is 1988 – K is for 1989
11th digit is the assembly plant
0 is Hiroshima
12th thru 17th is the production serial number
You want the 8th digit to be a “4” for a GTX
RRE 323 GTX Bosch BOV Instructions
This is a photo of the stock 323 GTX Compressor Bypass Valve or “Blow Off Valve” (BOV)

Inside the hose that runs from the pipe at the throttle body and down to the BOV, there is a restrictor that blocks the hose from 13mm down to 8mm. All your BOV air passes through this little hole. You can remove it to get some more flow through your stock BOV but with an open air filter you will hear some wicked bovine farty noises.
To remove the restrictor, find it by squeezing the hose to locate it. Pull it out with needle nose pliers.

An upgrade for a leaking BOV or to get rid of the strange noises is to replace the stock BOV with a Bosch BOV that comes stock on many European turbo cars. It is a quality part but can be had reasonably cheap. Expect to pay about $50, we keep them in stock. To connect it you will need two radiator hoses from an auto parts store. We used part numbers 71423 and 71409 from Pep Boys. I believe these are generic hose part numbers, possibly Gates numbers. If you cant get the numbers matched up, do like we did and ask for permission to climb the counter and go digging through the bins till you find what you need.

You need access to some slightly larger hose clamps, with the larger hoses and BOV, some of the stock clamps are not quite big enough.
This is a photo of the Bosch BOV installed. It uses a slightly smaller vacuum hose fitting, we used a small adapter to go from 6mm hose down to 4mm. The car this was installed on is still running stock boost. This mod eliminated the Moo Cow noises but did not make any noises that would frighten a honda or impress the ladies.

For more noise (good sounding noises… WHOOpshhhhh!) you can use a GReddy Type S BOV. It is a much more custom install best done with new I/C piping. The GReddy valve uses a two bolt flange that will need to be welded onto a pipe. The GReddy valves run about $200

The GReddy BOVs shown here are blowing to the atmosphere. With careful adjustment you can get away with this to some degree. The lower pic to the right is on a car with a TEC2 ECU that allows you to blow the air out with no problems.

Sport Compact Car Magazine – From The Cockpit – 1994
Sport Compact Car Magazine 1994 – Reprinted with permission
By Mitch McCullough
We were halfway through the eighth stage of the Lake Superior PRO Rally and things weren’t going so well. A misfire in the engine, caused by a faulty throttle position sensor had reduced our power. Then a problem with the clutch linkage made shifting difficult. So I wasn’t too surprised when a Mazda 323 GTX piloted by a fast local driver started catching our 323 GTX.
Our PRO Rally effort had been going extremely well up to this point. I had bought the partially prepared 1988 Mazda 323 GTX just before the 1993 season started, and codriver Scott Webb and I had won the 1993 California Rally Series championship. We had raced against some strong competition and it was the first time in the 18 year history of the series that a driver had won the championship in his rookie year. Webb and I were each named Rookie of the Year.
We went on to clinch the 1994 SCCA Southern Pacific Divisional Championship, which starts and ends on Labor Day. This title earned us an invitation to compete against Divisional champions from around the country at the Press On Regardless PRO Rally in Michigan’s Upper Peninsula, a vast wilderness of deer, trout and the kind of dirt roads all rallyists dream about.
This year, “the oldest, meanest, toughest” rally in America was renamed the Lake Superior PRO Rally. The Detroit Region SCCA, which had organized the Press On Regardless for 47 years, opted to pass the event on to the more strategically located Lake Superior Region, but retained the POR name for a road rally.
Despite the name change, it was the same event with many of the same dedicated workers and the same phenomenal roads. This year’s rally comprised 165 miles of special stages with another 288 miles of transits.
Stage Eight, called Far Point, began as a fourth and fifth gear run through the dark forests. The powerful driving lights filling our mirrors were mounted on the GTX driven by Craig Sobczak of nearby Marquette Mich. Our clutch would not fully disengage, so shifting was difficult. I was staying in fourth gear, lugging out of the slower corners and not shifting up to fifth on the longer straights, trying to avoid damaging the new close ratio gearbox. We had decided to simply drive for the finish.
It was a dark, rainy night and there was still a long way to go. I had lost my enthusiasm for the high speed stages. “You were driving like an old lady,” Webb said later.
When Sobczak got close, I turned on the right blinker and moved toward the right side of the dirt and gravel road, slowing to 70 mph to let him by. But watching Sobczak throw his GTX through the high speed corners inspired me to go faster. “This is like road racing,” I shouted.
Still, Sobczak was pulling away, dropping momentarily from sight around a bend. On the next straightaway we saw that his left taillight lens was missing and the gap between us had narrowed. Then we saw some tracks in the road where someone had skidded toward the ditch. “He went off and tagged the bank!”
Sobczak had slowed only slightly, but we had turned up the wick and cut our distance. Then Webb called an acute right hand corner where we turned off the smooth county road onto a muddy, slimy trail that went up a hill. A crowd of spectators had gathered, standing behind a yellow banner to witness this challenge.
As Sobczak turned in, his 323 bogged in the muddy turn. Seizing the opportunity, I turned inside and went by him, slinging mud in all directions, and accelerated away. Cameras flashed, the crowd cheered-this was racing!
The path we were now on was composed of the slipperiest mud I’d ever seen. Suddenly, I was switched on and the car seemed to be working much better at the lower speeds. We were shifting from second to third and back again, grinding gears, braking in the muck for the tight turns, the car fighting every change of direction as we squeezed through the trees on the narrow path, grappling for grip. We pulled away from Sobczak and when we finished the stage we were ecstatic. We knew we had lost the stage to Sobczak, but we felt as if we had won the race. It was the highlight of the event.
We failed to press on, however. On the next stage we hit a big rock that cracked the sump, draining our engine’s life blood and ending our race through the dark north woods. Veteran John Buffum won the rally in Paul Choinere’s Audi Quattro. Meanwhile, Rhees Harris from Vemmont beat us to take the overall Divisional driver’s title in the Open 4WD class.
I was surprised at my lack of disappointment over failing to finish the event. It had been a great season and we had prepared well, given our meager budget. In nearly two seasons of PRO Rally, we had not suffered any mechanical problems and were happy to gang them all up in one event. And at the awards breakfast, we learned Scott had amassed enough points to take the overall co driver’s divisional championship in our class!
How We Started
I bought the 1988 323 GTX from Bill Morton, a New Zealander who helped prepare Rod Millen’s 323s for the Asia Pacific series. He had built the GTX for his own rallying pleasure and was forced to sell it after taking a job with Toyota Team Europe. He lamented-and I reveled-in the fact that he had only tested the car once and had never gotten a chance to race it.
But Morton had prepared it well. He removed the interior except for the original front seats, door panels and dash. He and Mike Welch welded in a superb roll cage, reinforced with gussets, and painted the interior refrigerator white. Headroom abounded. They bolted on a sturdy skid pan and numerous mud flaps. And they installed an HKS manual boost control and PFC F CON fuel controller to extract additional horsepower from the tired motor.
But the big feature was the suspension: Morton had managed to procure a rally suspension that had been on one of Mazda Team Europe’s 1988 World Rally Championship cars. This suspension was much stronger than the stock setup and the spring and damping rates provided phenomenal handling over loose, rough surfaces. The rally suspension provided adjustable spring perches for varying the ride height and Bilstein competition dampers.
I knew the basic preparation was right. I knew there was a good divisional series in Southern California. I knew I had to have the car. So I bought it, figuring I’d run a few local events. Besides, I reasoned, the car was street legal so I could always use it to run around town.
A mere eighteen months later we had won two championships and had posted finishes in the top five nationally. My experience in autocross, road racing and blasting down the dirt and gravel roads of Eastern Washington and Northern Idaho seemed to have paid off.
The real key to our success, however, was sound car preparation, a crack crew chief and consistent driving.
Rallying What It Takes
Probably no other motorsport requires the combination of car preparation, driving ability, endurance and reliability demanded by rallying. Triumph in the face of adversity is the battle cry of the successful rallyist.
The key is car preparation. A competitive rally car must be fast, tough and reliable. It must be driven consistently fast, with more emphasis on consistency than on speed. PRO Rallies often comprise more than 100 miles of special stages and another 200 miles of transit legs-quite a bit longer than a 20 minute regional road racing event or three minute autocross. Many times we’ve seen drivers go extremely quick in the early stages only to break or crash later in the event. We’ve been guilty of this ourselves.
The car must be prepared to finish events. Too many teams spend too much money on horsepower, overtaxing the gearbox, suspension and brakes. And assuming you can’t afford to spend more than $30,000 for a six speed gearbox, the engine must offer a generous rev range with enough torque at the low end to dig the car out of sandy switchbacks.
Preparing The Rally Car
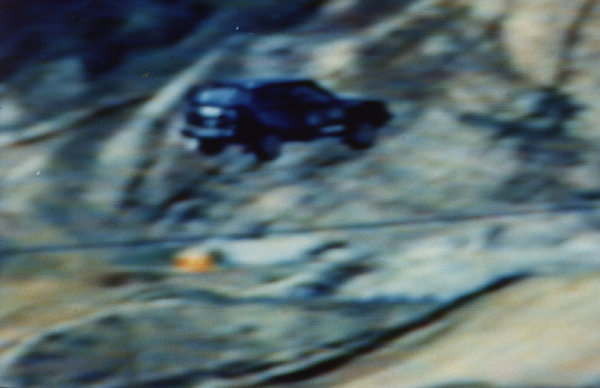
Our 323 suffered two major crashes during the season. In the first one, I mistook the little 323 for a stadium truck and launched it 12 feet into the air at a rally sprint on the Glen Helen, Calif., motocross facility, landing the car on the front bumper. In the second one, we drifted off a sweeper at the Prescott Forest PRO Rally, rolling four times down the mountain.
Most of our development efforts coincided with repair work from these crashes. Road/Race Autosport, a race preparation shop run by Scott Webb and Mike Welch in Los Alamitos, Calif, prepared the car.
Welch replaced the body work and painted the car white with a scheme reminiscent of Mazda’s 1988 World Rally Championship 323s. Road/Race replaced damaged and worn suspension bushings, lateral links, trailing arms, differential mounts and engine mounts using components from Mazda’s Competition Parts division.
Nonslip pedals help a driver keep his feet in place on those rough stages.
The benefit of strut bars is sometimes called into question, but we have witnessed their virtues. The stress of rallying was causing the front strut towers to rotate and gravitate inward. We had gained two degrees of camber and a new fender was off by more than an inch when we tried to match it up to the inner liner. Road/Race solved this problem by designing a front strut bar to tie the towers together. Most strut bars on the market are made of small diameter tubing and often are bent in several locations for clearance reasons, allowing them to flex under the high stress loads. The Road/Race bar is a highly rigid, yet lightweight design with larger diameter tubing and minimal bending between the struts to prevent any flex.
To reduce brake fade and improve reliability, we installed semi metallic brake pads, racing fluid and braided steel lines.
Most PRO Rally cars use a rally computer I to help their drivers keep on time.
Extensive underbody protection is required on a rally car to fend off rocks, tree limbs, flyovers and other hazards, particularly on the rough special stages of the Southwest. Morton’s skid pan protected the sump, and Road/Race added numerous guards made of carbon fiber to protect other areas, while clever metal skids were welded to the leading edges of differential mounts, exhaust joints and important bolts. And all those mud flaps aren’t just for snazzy good looks. A season of flying rocks is like a sand blaster working around the clock that will gradually grind suspension pieces away to nothing. So Road/Race installed mud flaps made of LPDE plastic behind each wheel. in front of the rear trailing arms next to the lower timing chain cover and anywhere else that was exposed to flying rocks. We’re constantly replacing them.
The car came with safety harnesses. so inside we added a rally computer, a pair of racing seats, a padded box for our helmets, window nets on both sides, an intercom and a co-driver’s map light with a red lens-a white light is distracting for the driver and is too bright for the white paper in the co-driver’s route book.
Road/Race replaced the bracket holding on our driving lights with an attractive pod for our massive, new PIAA fog and driving lights. The pod keeps the lights out of harm’s way, locates them out of the cooling air for the engine and can be quickly removed or installed for daytime and night stages. It also reduces vibration, which can be distracting.
We fitted 15 inch DP Enduro wheels shod with Michelin rally tires. Our competition tires are size 14/62-15 L4, meaning they are 140mm wide, 62cm overall height and 15 inches in diameter using compound No. 4 on an L-shaped block tread design. With four-wheel-drive cars, particularly those with locked differentials, it’s important to use the same size tires on all four corners. Otherwise the drive train will fight itself, possibly leading to an expensive repair. While rally tires may look like snow tires, they are really very sophisticated and provide surprising grip on pavement and are nothing short of phenomenal on dirt. The extremely strong sidewall construction of the Michelins makes them incredibly resistant to punctures from sharp rocks.
We try to start an SCCA National PRO Rally with six new tires. In 12 events, we’ve had only two punctures (both on the same stage!) and usually finish an event with four serviceable tires and two new spares, all of which can be used for the next event. This provides us with a complete set of spares in case the event is particularly brutal on tires. To be totally prepared, we should have gone to Michigan with ten new rally tires, six snow tires and six Showroom Stock tires for the tarmac stages. But we couldn’t afford to be totally prepared and, in the end, that was okay.
Halfway through the first season I asked MFI Power in Garden Grove, Calif, to rebuild the engine. John Mueller focused on a broad powerband with strong low-end torque rather than maximum horsepower. With the stock gearing, we had often found ourselves lugging out of sandy, uphill corners at the bottom of second or third gear.
For the most part, Mueller rebuilt the engine to stock specifications, porting and polishing where possible. However, he lightened the crankshaft by five pounds and dropped another nine pounds off the clutch and flywheel assembly to maximize off boost performance. He knife-edged the crank and machined the flywheel from aluminum stock. We added Torco 5W30 synthetic racing oil to provide maximum protection and minimum friction. We think Torco might have saved the engine when we lost all the oil in Michigan.
The result was an estimated 190 horsepower compared with 135 hp stock. We selected a Centerforce competition clutch and pressure plate designed for an RX-7 to handle the increased horsepower and the abuse of rallying. Road/Race designed a pair of hood ducts to extract hot air from the engine compartment. These reduced engine temperatures at the hot weather events, and we could see the hot airwaves coming out of the engine while waiting for the start of stages.
Our most exotic piece of equipment, a close ratio competition gearbox, was installed late this past season. Our top speed has dropped to somewhere in the 90s, but the gearing has really paid off
Competing for an SCCA National PRO Rally championship is not cheap and should not be considered a grassroots motorsport any more than IMSA Firestone Firehawk is grassroots road racing. However, it is possible to run a Divisional series or selected National events on a budget. For my money, there’s not a more exciting or fascinating form of the sport available.
When he’s not racing in PRO Rallies, Mitch McCullough is involved in motorsports public relations for various companies.
How Not To Take A Fly-Over
By Mitch McCullough

Mike Welch, my crew chief, is a master fabricator. A real body man. A regular McGyver. Maybe that was in the back of my mind. Or maybe I was frustrated at dealing with the big D. Or maybe I just like to show off – that’s what rallying is all about, after all.
Whatever it was, I had decided to take the jump flat out.
The physics of the situation seemed to have eluded me: Glen Helen Off-Road Vehicle Park just north of San Bernardino had been designed for off-road buggies and trucks, race cars with suspension travel measured in feet. I was sitting in a Mazda 323 GTX, a cheap econobox. That it had a turbo, four-wheel drive and a fantastic factory rally suspension was of no consequence on the big hump I was about to attack.

While walking around the course, I foolishly came to the conclusion that the big hump could be taken without braking. I mean, that’s what Rod Millen would do, right? Or am I thinking about Rod Hall? Anyway, the closed circuit took only five minutes or so to complete and it was a hoot. We’d be topped out in third gear on a straightaway, brake hard for a 180-degree turn, slide sideways through a 70-mph sweeper, then brake hard for the big hump. The rest of the course went considerably farther, but I would not be exploring the rest of it that day.
I sat in line, peering through my helmet as each rally car took its turn. The suspension of the first car got light as it went over the hump. “Whoa” went the crowd in the stands. The next car caught a little air, maybe six inches. “Yes!” shouted the crowd. As I watched, I thought: “Why are they braking so hard for that jump?” Beside me was co-driver Scott Webb, who had some sort of misplaced, irrational, idiotic faith in my driving abilities.
We pulled up to the start line. On cue, the starter draped a green flag over the front of the windshield and shouted, “Five! Four! Three! Two! One!” Then he yanked the flag up and quickly stepped back from the car. “Go!”
I stood on it and all four knobby Michelins twisted in the dirt. I grinded it on the upshift to second, but otherwise it was a good launch. I braked for the 180-degree turn and slid around a giant earth-moving tire. We slid to the outside as I accelerated out of the turn, but I stayed with it opening up the steering wheel to keep the speed coming on. As we approached the sweeper, I lifted, turned in and got back on the throttle. The car pivoted and slid around the corner, all four wheels slinging dirt. “This is going to be a good run,” I thought.
As we approached the jump, I lifted off the throttle where most people had been braking. We were doing about 65 mph. A cry crackled in my intercom: “Oh shit!” I stepped on the throttle again as we crested the top of the jump, thinking that would keep the nose up.
The little GTX jumped toward the heavens. Observers said there was at least 12 feet between the bottoms of the tires and Mother Earth. From inside the car, it seemed like the sky darkened as we crested the upper edge of the atmosphere. Our poorly designed rocket hit its apogee, then began the long ascent back to earth. When the ground loomed directly ahead I began to realize I may have overdriven just a bit. “Oh!” the crowded shouted. “What was he THINKING?”

It was a tremendous impact. The car landed on the front bumper. The radiator ripped in half, the hood crumpled, the bell housing cracked, the front wheels bent and most of the front clip was destroyed. Instead of going end over end, the car came to an abrupt halt and bounced back onto its wheels.
I looked to the right as the dust settled. “Are you okay?” “Ooof” was the only sound that came from the other seat. “Ooof.” Scott felt like he suddenly had a mouthful of sand. It was later determined that that was the enamel from all of his teeth. The emergency crew loaded us up on stretchers and carted us to the hospital where we spent a long, boring, humiliating day getting X-rays. We had stiff necks, I had bruised pride and Scott spent a fortune on dental work that year. Mike filmed the whole incident and later had the audacity to put it on his Web site, but the view from inside the car felt far more dramatic than the video portrays.


Mike quickly rebuilt the car in the Road/Race facility, replacing or repairing everything ahead of the windshield. We went on to win the California Rally Series championship that year. It was 1993 and we each earned Rookie of the Year titles. The following season, I drove off a 500-foot cliff in Arizona, rolling five times and stopping against a bush 100 feet down. The car looked destroyed, but we winched it to the top of the mountain and Mike had it back in the rally the following morning. We went on to win the 1994 SCCA PRO Rally Southern Pacific Division Championship in Open Class.
But that’s another story.


McCullough is a contributing correspondent to Field & Stream, AutoWeek, Sport Compact Car and European Car. He edits a car-buyer’s guide that can be seen at www.newcartestdrive.com. He now brakes for fly-overs.
Coming soon, the Co-Driver’s Version:
“It wasn’t my fault”