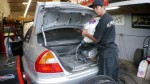
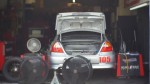
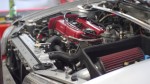
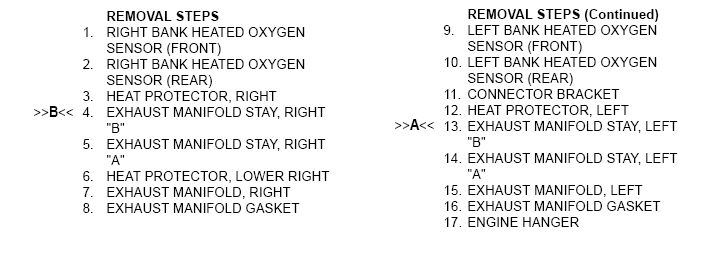
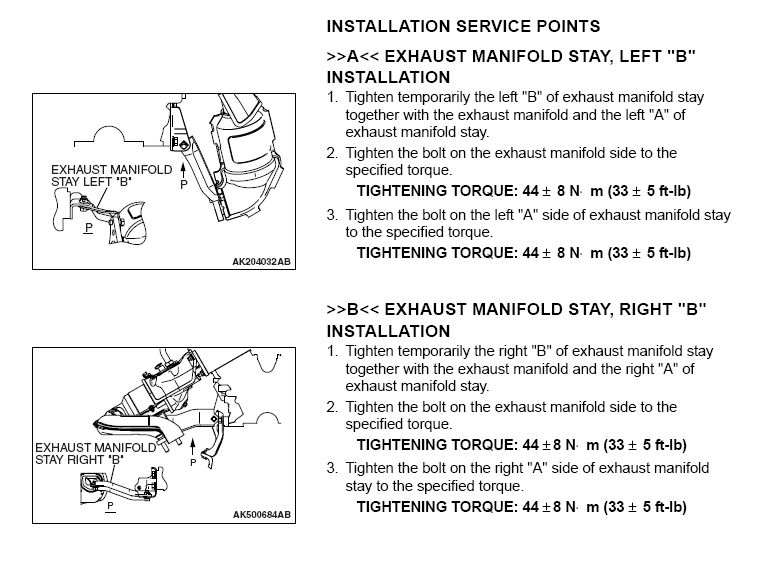
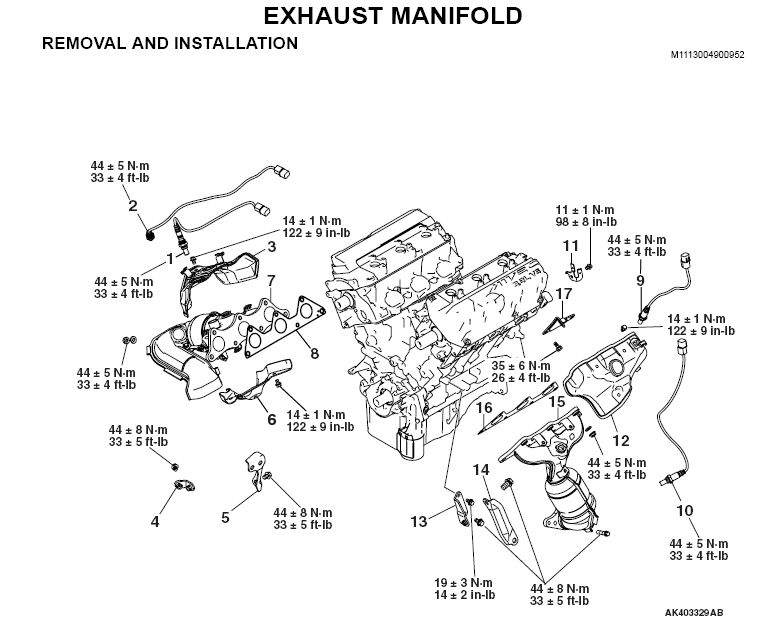
Sand Rail With AMG M113K Motor AEM Infinity ECU Dyno Tune
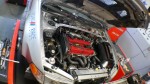
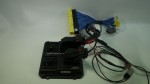
Basically this is a stock Mercedes/AMG Supercharged 5.4 Liter V8 in a sand rail chassis. The headers add some additional HP along with the AEM Infinity ECU. The rail is being tuned here on the RRE Dynapack Chassis Dyno by Sam C “icantunafish” The motor runs on California 91 octane pump gas with the Infinity ECU controlling the 50% water and 50% methanol injection.
The AEM Fail safe gauge keeps tabs on the flow rate and shuts the meth party down if the flow is out of range. If the meth nozzle is clogged of the pump is dying, then the flow will be low and the fail safe cuts in. If a meth pressure hose were to pop off or otherwise spring a leak then the fail safe would see too high a flow and shut things down also.

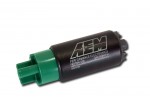
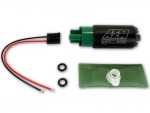
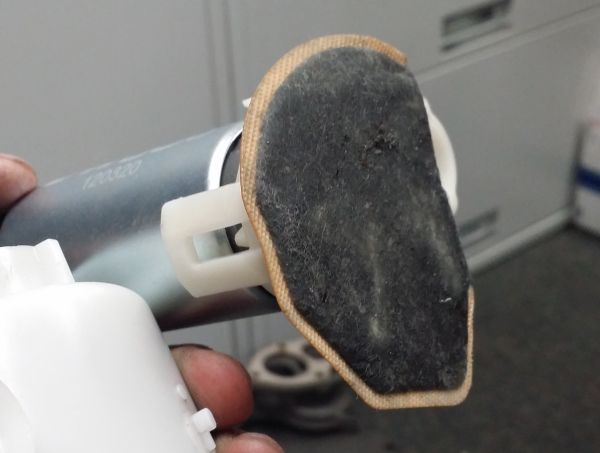
AEM E-85 Rated Fuel Pump for the EVO X 50-1220
$130 inc Priority Mail 2/3 Day Shipping
The AEM 340 lph drop in fuel pump for the EVO X (AEM part number 50-1220) is currently our go-to fuel pump for the best fit and best reliability. We never had much long term luck with the other drop in pumps for the EVO X. Premature wear and clogged up filters were becoming too common.
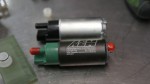
We have also seen many stock fuel pumps die, some on the dyno right in front of us. While the stock pump when everything is working perfect will keep up with up to 350 whp on pump gas, once the pump and fuel gets hot some random fuel pressure drop offs become common. This has caused some busted spark plugs and the resultant mess from running lean.
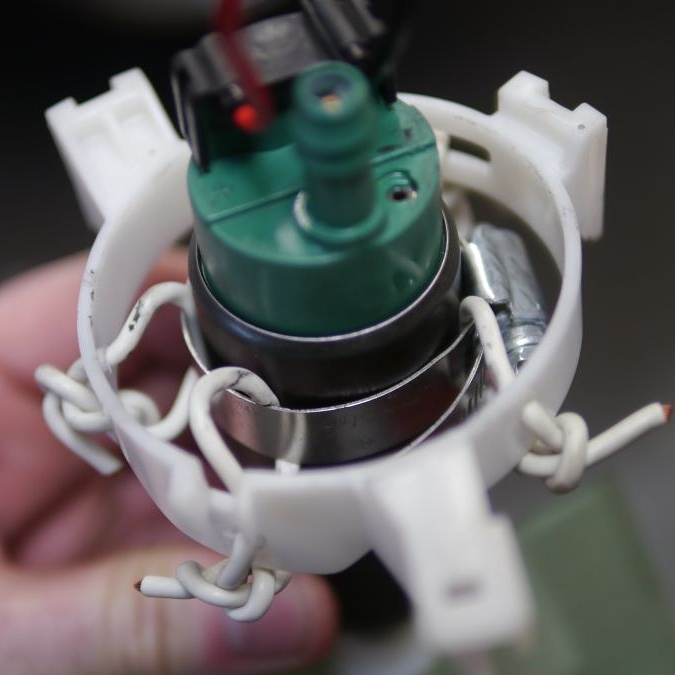
There will be random reviews around the web on other versions of AEM fuel pumps. They are older reviews and “How-To’s” before this EVO X specific pump was available. Some people try to use the Walbro 255 size pumps and they require special expensive adapters that eliminate the fuel filter housing. Look! No filter housing :-P
In addition to running no pick up sock, the car that this pump came out of had no fuel filter under the hood either. He was on his second motor after breaking sparkplugs on his first motor with this setup.
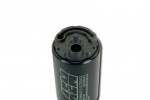
Many people confuse the fuel pre filter on the bottom of the pump for the actual fuel filter. That pick up pre filter is just there to keep swarf out of the fuel pump. You need a proper filter after the fuel pump (miniature inline screen filters don’t count)
This means that we prefer to keep the factory filter housing in place and functional. We have also seen some seriously sketchy fuel pump installs. Some by under water basket weavers, many with kinked hoses. Often with the wrong hose not rated for high pressure. Somehow something that seems easy to install ends up making a mess.
The AEM 50-1220 fuel pump also fits several other vehicles besides the 2008-15 EVO X and RalliArt. Here is AEM’s propaganda for all vehicles:
AEM’s 340lph E85-Compatible High Flow In-Tank Fuel Pumps feature robust internal construction that is designed to withstand the low lubricity characteristics of ethanol and methanol fuels, and are tested to work with ethanol fuels up to E100, methanol fuels up to M100 and all types of gasoline. This physical size of this fuel pump makes it a great replacement for the 2000-’09 Honda S2000, 2000-’05 Honda Civic, 1992-’01 Acura Integra, 2002-’06 Acura RSX, 2002-’15 Mitsubishi Evo, 2002-’07 Subaru WRX, 2013-’15 Subaru BRZ, 2013-’15 Scion FRS and many other popular enthusiast applications (NOTE:The plug wiring may need to be updated for some applications). Its compact, short body design (65mm length) with mounting hooks also makes it ideal in universal applications that have fuel tanks with tight tolerances.
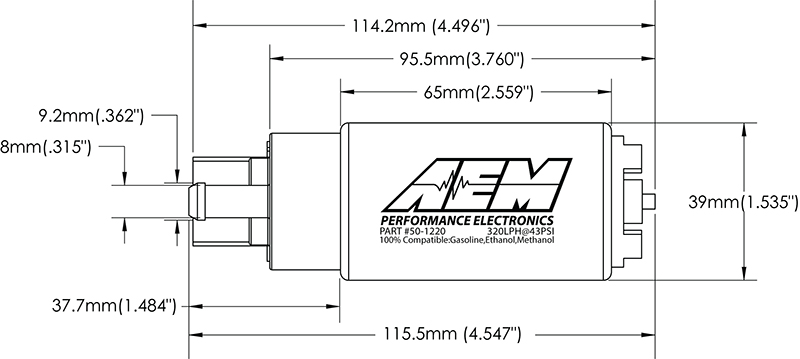
The AEM 340lph E85-Compatible High Flow In-Tank Fuel Pump is designed for in-tank mounting on high performance naturally aspirated and forced induction vehicles. It features a compact 39mm diameter that fits most applications and an offset inlet design that eases installation.
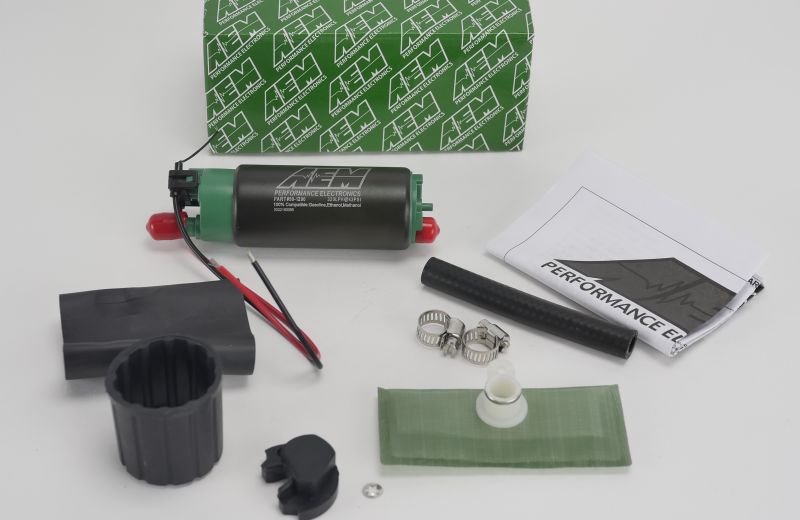
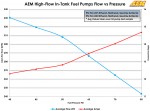
The 320lph E85-Compatible High Flow In-Tank fuel pump includes a wiring harness, pre filter and O-rings. Every AEM 320lph E85-Compatible Fuel Pump is tested to flow 340 lph at 43 PSI before it is packaged for sale.
- Tested and compatible with ethanol fuels up to E100, methanol fuels up to M100 and all types of gasoline
- Designed for high output naturally aspirated and forced induction EFI vehicles
- In tank design
- Each pump is tested to flow 340 lph @ 43 PSI
- Compact body (39mm diameter x 65mm length)
- Includes pre filter, hose, clamps, flying lead, end cap and rubber buffer sleeve
Dr Alex – EVO 6 AEM Infinity ECU E-85 Tune
The EVO 6, being an ex-rally car came with an Autronic SM2 ECU. While excellent for rally car engine management, we needed more for an all out track car running E-85. The car currently runs an RRE 2.3 with a Garrett GT35R turbo. The Infinity ECU allows up to 12 maps, virtually unlimited logging and incredible ease of tuning. Using the Zeitronix ECA Ethanol Content Analyzer the Infinity ECU also allows for full flex fuel operation.

Sam and Gus wired up a plug in ECU adapter harness starting with a Boomslang patch harness. With the Infinity ECU initial startup is easy. You just enter the vehicle crank sensor type and injector type and it fires right up.

Setup for some easy track shake down runs, the car made 420 whp running wastegate boost with full torque and boost hitting at 4,100 rpm. With the boost set higher to 23-20 psi the motor hits 450 torque and 480 whp. More than enough power for now to rip loose the Hoosier R6s anywhere he wants.


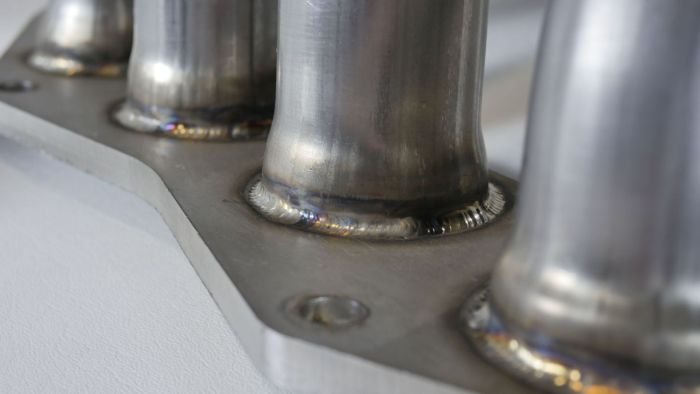
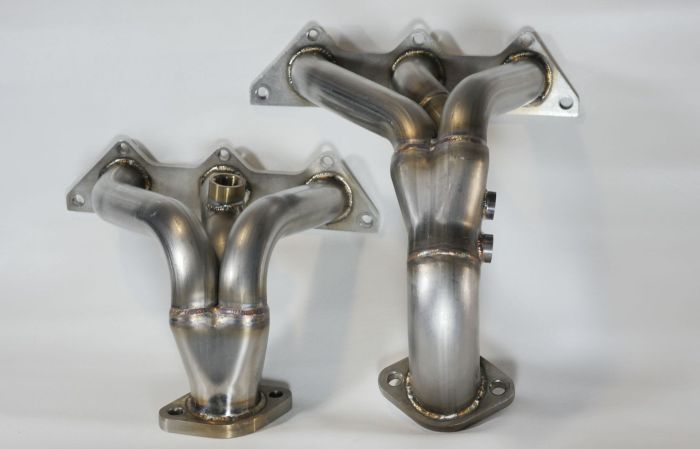
RRE 4G Eclipse Competition GS Headers (2006-2014) Install Pics and Tips
RRE 4G GS 4cyl Headers $530 plus $50 shipping within the lower 48 states: For Canada or other locations email the shop roadraceengineering _at_ gmail dot com with your full contact info and full shipping address.
We make 4G Eclipse headers. We are never quite sure if everyone is headed to China to get their parts or if they prefer American made parts still. While quality parts can be made in China for a decent price, quality control over workmanship and materials is always a concern. Locally we have much more control over everything.

Here is a batch that just finished up. TIG welded stainless Steel throughout. We did an install and took some step by step pictures.
RRE Eclipse GS 2.4 MIVEC Underdrive Pulley Kit
RRE Eclipse GS 2.4 MIVEC Underdrive Pulley Kit
$189 plus $11 shipping for USPS Priority Mail within the lower 48 states. If you are looking to get one shiped to somewhere else, contact us for a price with shipping included.
This pulley kit has yielded an improvement of 6-7 whp and 9 ft/lbs of torque in dyno testing. Both the lighter construction and smaller size helps improve power. Kit includes a new belt and the pulley. Everything that you need. Fits all 2.4 liter Eclipses and Galants from 2005 through 2014
RRE 4G GT Headers Install Tips and Pics
RRE Competition Stainless Steel Race Headers Eclipse GT V6
$660 plus $55 shipping within the lower 48 states. For Canada or other locations email the shop roadraceengineering _at_ gmail dot com with your full contact info and full shipping address.
On the Eclipse GT, the front header is fairly straight forward. Access is great, nothing too difficult for a weekend warrior. The rear header… good luck :-P It isnt so much that the RRE header is difficult to install, it is that the rear stock exhaust manifold is very difficult to get out of there once removed. If you live where they salt the roads, be prepared to deal with lots of broken bolts and stuck threads.
Start with soaking all the nuts and bolts with a penetrating lubricant the night before. Something along the lines of Lucas Tool Box Buddy, PB Blaster or WD-40 will to the trick. With all undercar bolts and nuts, especially with exhaust bolts, much care and respect is required. Even with everything soaked well, slow and steady works best. Dont use power tools. You want to slowly remove each nut or bolt while feeling for if it is getting stuck. If something galls up or starts to seize by feeling tight after breaking it loose, stop immediately and spray more lube on the thread. Then go back tight a bit until it feels free again. Spray more lube. then try loosening it again. Keep working it back and forth with out forcing things too much. Once you really gall up the threads, you can be in a big mess. THis goes double for the O2 sensor removal. Crack them loose and work them slowly out. if they tighten up at all, stop, lube and reverse. Lube and repeat.
Unplug the O2 sensor wires. You can unbolt the stock Y Pipe fairly easily. Unbolt the front header from the cylinder head. Note which sensors plugged into where. Were they the pre cat sensors or post cat sensors. Only the post cat sensors will get threaded into the spacers. Use your cell phone camera as you go to make notes of things.
The rear header is pretty difficult to install. Well… actually it is that the rear exhaust manifold and cat assy is very difficult to remove from the car. It is in an awkward location to begin with. Then once you do get it unbolted, it does not fit out through the tight spaces well at all. The passenger front wheel and axle need to be removed to make some space for the stock manifold to come out. Even then, it is a tricky wiggle and rotation to get out of the hole. A few people give up and chop it into two pieces to get it out of there :-P. But that makes going back to stock impossible. Once out, the RRE rear header easily fits in there.
The O2 sensors that were originally after the pre cats will get installed with the spacers. The O2 sensors that were originally before the pre cats and closer to the cylinder heads will get installed directly into the new header.
Here is a pic of the hardware and gasket kit that we supply with the headers currently.
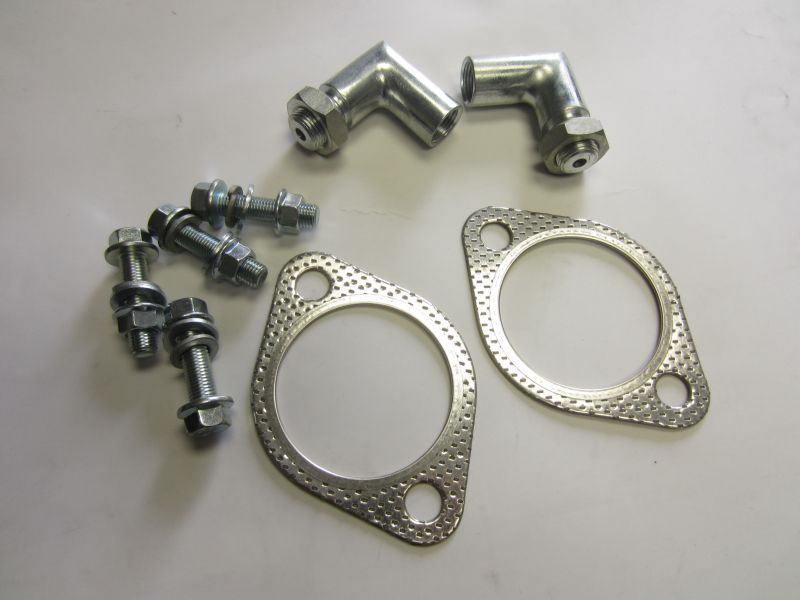
(4) 10mm nuts
(4) 10mm Bolts
(4) 10mm washers
(4) 10mm Lock Washers
(2) 2 bolt composite fire ring gaskets (to Y Pipe)
(2) 90 degree O2 Sensor Spacers
Install the headers, reusing the factory gasket to the cylinder heads is fine. Use the new supplied gaskets to the Y pipe. Tighten all the bolts, torque settings are included here at the end if you are into that.
It does not matter which O2 sensor goes in which location in the header. There is no longer a pre cat to be in front of or behind of. But the sensor that was after the cat gets a spacer (the one with the black wire cover) needs to be the one that is bolted into the spacer.
Smog-
These headers eliminate the front pre-catalytic converters. They are not for use on public highways in the USA. The Eclipse GT V6 motors are are popular with various front wheel drive dirt circle track race classes so that is what they are intended for. You can still pass a tail pipe inspection with the main center cat in place if that is what your race class requires.
Noise-
These headers will increase the exhaust noise considerably. It is a good sound. But it is definitely louder. It is even noticeably louder with a stock muffler. If you have a stock center cat and a straight through muffler (think Magnaflow) it will be sporty loud, think Mustang rumble) but livable. The younger you are, the more you will like it J If you remove the center main cat, things get super loud, think open race car exhaust sound. Check with your sanctioning body for sound level requirements.
O2 Sensors and Spacers-
There are Oxygen sensors (O2 sensors) that need to be transferred to the new headers from the old manifolds. If you do that part wrong or upside down somehow a little yellow light will come on. If you drop or bang on the O2 sensors too much it can damage them. If you get WD-40 or anti-seize contamination in them, it will damage them. But then again that little yellow light comes on for nothing or even something little like leaving the gas cap a little loose, its sole existence is to nag you about potential smog issues. The yellow light isn’t all that scary to us, but it seems to horrify some people.
With the current 90 degree spacers that we supply, about 1 out of 20 people get a SES light and we help them deal with it as best we can. If that possibility disturbs you then headers are not for you. We will not be redesigning anything. We have done all that is reasonably possible to make a little money selling them and still have an affordable product built in the USA. We are happy with the balance that we have struck.
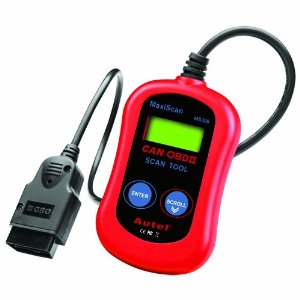
This simple OBD 2 code reader works well and only costs about $20 from Amazon
IF the light does come on usually the hole in the spacer needs to be drilled out a little bit. Just a little bit bigger at a time. It is easy to make them bigger, very difficult to make them smaller
We found the difference between cars is whether or not they have a main cat after spacers and how restrictive the exhaust system is. Cars with totally free flowing low back pressure systems need a bigger hole. More restrictive systems need a smaller hole. You want to read out the actual code before modifying the spacer.
The spacer is trying to trick the ECU into thinking that the cat cleaned things up some (but not too much). More exhaust system back pressure or less will require playing with the size of the hole in the spacer and also the volume of the spacer. No one spacer works for every car. It is a black art and takes some fiddling and paying attention to what code and reacting accordingly.
But seriously, these are for race cars only and you shouldn’t be complaining about a little yellow light. Why do you even have the dash in there on your race car?
Factory Parts Drawings:
Torque Numbers
EVO X – Full-Race ProStock Tubular Exhaust Manifold – Dyno Test
Normally when a customer with a Mitsubishi stumbles into the shop and the first thing they want to do is put on a header, our first question is “Was your last car a honda?” Typically the answer is “Yes”. The stock cast exhaust manifold on the EVO is a great match for a stock turbo. Even with an upgraded stock style turbo the stock EVO exhaust manifold will easily support 500whp on our dyno. If you want a little more power, do some porting on the stock manifold is what we usually suggest.

Knowing this, when Mark Z really really wanted to add a header to his already well running EVO X GSR race car, we tried to talk him out of it. Any of the big loopty-loo tubular manifolds would just put too much heat back there between the motor and firewall and on the track that is a lot of work to keep things from melting. The gains would be too small for the cost involved we explained.

But Mark was persistent and he did have enough upgraded parts to to be able to use some additional airflow. AEM intake, ETS 3.5″ FMIC and full piping. Full exhaust with an AMS DP bolted to a CBRD BBX stock frame turbo. With 1200cc RC Engineering injectors and a Blaqops/Walbro 255 lph fuel pump kit, the stock bottom end was pushing the limits of reliability on E-85. We like to keep stock bottom end EVO Xs to 360 foot lbs of torque. This limit seems to keep the stock skinny rods and pistons happy in competition.
There was one option to recommend, the Full-Race ProStock tubular manifold. While super sexy curvy, it isn’t too tall to practically use the stock manifold heat shield. We have seen mixed results with the polished Chinese manifolds. With the Full-Race super thick SS tube walls and consistent robotic welds, we didn’t have to worry about an expensive failure haunting us later on.
Here you can see the Full-Race manifold installed before we put the stock heat shield over it.

The install was not too bad. Only one bolt is a little tight to get to. There is better access than on other tubular manifolds. It is still an all day job and you run the risk of snapping stuck bolts. Mark’s CBRD BBX turbo had recently been installed so it went OK. Lots of penetrating oil always helps. All buttoned up and onto the dyno.

Right away we could see the motor flowing more air up top. With the boost left the same, power was up by 30 whp for one thousand RPMs. Boost is limited below 4500rpm to help keep the torque within our limits for a stock bottom end. We lost a couple hundred RPM of spoolup but the gains up above 5500 RPM are well worth it.

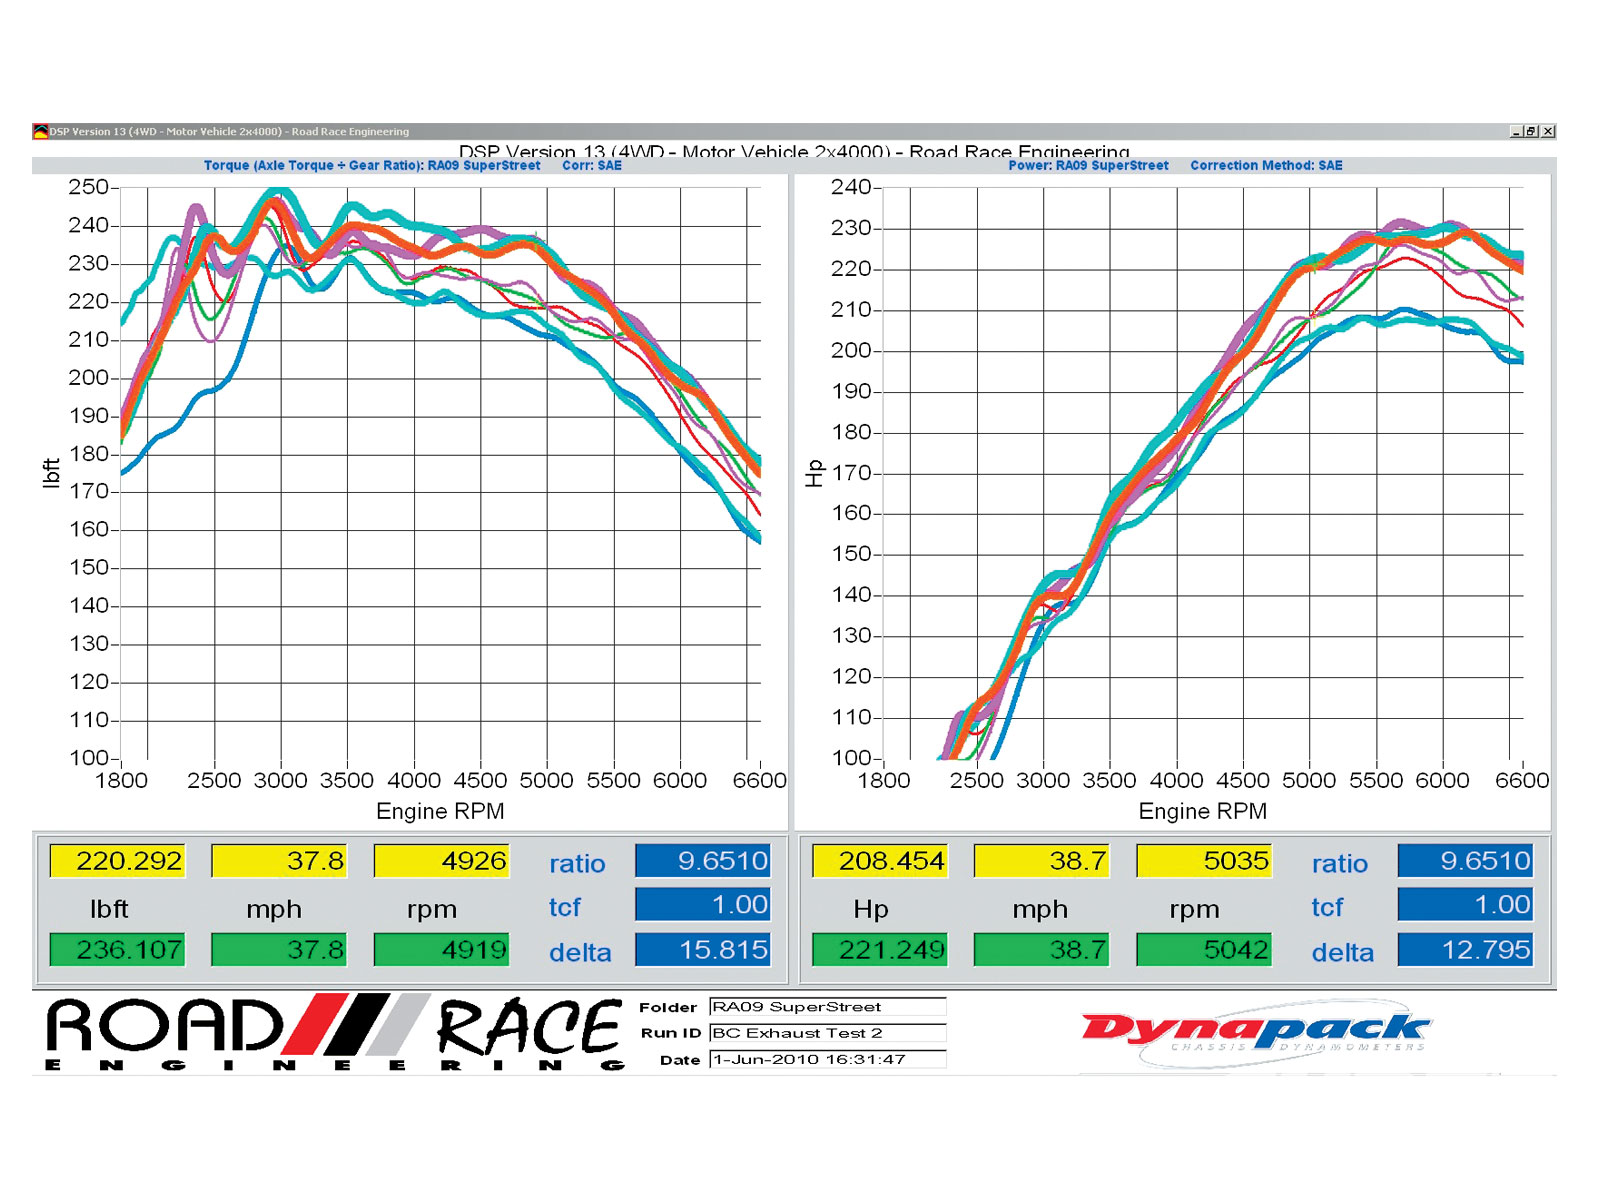
AEM Meth Fail (safe) Video
Remember _way_ back in September the DSport video crew was here shooting some video while we were testing an AEM meth/water injection flow gauge and how it worked as a fail safe device. Here is the final cut video:
Modified Magazine – November 2011 – RRE RalliArt
The November issue of Modified Magazine just hit the news stands. It is a skinny little magazine this month but well worth checking out. Some sweet old school cars and my favorite, an article on our project RRE Ralliart and the BBX Lite turbo install from CBRD! You also get a little article on the 2011 Mitsubishi Owner’s Day with a little pic of the RRE Battle Bot.

The car is currently tuned at 411 whp on our AWD Dynapack dyno and runs 375 whp on GReddy’s Mustang Dyno. It ran 12.2 @109 mph in the 1.4 mile at that hp. A bit more on this car is also in the October DSport. The full Modified Mag article is here.

Got Spoolup?
I cant say that I have ever seen this kind of spoolup with this kind of top end potential. This is a track car with a Buschur Racing 2.3 liter @ 10:1 compression. The turbo is the new Borg Warner on a Full Race manifold with dual Tial wastegates. AEM EMS and E-85 on 1600cc RC Engineering injectors tuned by Scot Gray here.
Running the car at different boost levels. Robert Fuller (RobiSpec) does the track prep and coaching on this EVO 8 and was was looking for something in the 500 whp range to keep the car somewhat driveable on a road course for his customer. Scot could not get the car to run below 18 psi so 524 is the lowest hp there can be.

AEM Meth/Water Injection Flow Gauge Testing
 Michael Ferrara and Stephan Papadakis were here at the shop today shooting some video for DSport while we were testing The Boz’s meth fail safe setup. You might remember Keith from a couple dyno shootouts with his white 700whp GVR4 last year. The GVR4 was getting a bit scetchy with that kind of whp and he went to the dark side and picked up a clean used EVO 8.
The Boz had just installed the AEM meth/water injection kit along with the AEM flow gauge and so it was a good car to do some fail safe testing on. The car has an EVO 9 turbo and stock cams. Boz had an AEM EMS on his GVR4 so he went with it again on the EVO.

We tested the fail safe with an overflow condition (simulating a hole in a hose), underflow (clogged nozzle) and also with no power to the pump. Look for the article and video from DSport Magazine in a month or two.


Modified Magazine – AEM Intake & MagnaFlow Cat-back – Nissan 370 Z
AEM ETI Air Intakes & MagnaFlow Cat-back Exhaust System

Pretty much everything has been said about intake and exhaust systems by now. By replacing the factory-equipped units, one hopes to increase airflow and decrease exhaust backpressure, allowing the engine to churn out some extra ponies for your enjoyment.
Sounds simple enough, and it usually is. However, some cars, such as the Nissan 370Z, are extremely finicky when airflow is altered, especially around the MAF sensor area. The ECU doesn’t like different readings, and the usual result is less horsepower than you started with.
The Nismo Z already comes with a great flowing exhaust system, but MagnaFlow set out to add more power and sound with its stainless steel dual 2.5-inch exhaust system. Using all mandrel-bent piping and a high-flow muffler, MagnaFlow’s exhaust system will wake up your Z from its sedate-sounding stock exhaust sound to a much more lively note.
With our Nismo Z in stock form, it belted out a solid 303 whp and 249 ft-lbs of torque on Road Race Engineering’s dynapack dyno. On went the MagnaFlow exhaust system, which is a very straightforward and simple install.
Read more: http://www.modified.com/tech/modp-1105-aem-intake-mangnaflow-exhaust-system/index.html#ixzz1aKwiEbvy
Modified Magazine – Snow Performance Water/Methanol Injection
Snow Performance Stage 3 Boost Cooler Water/Methanol Injection – Proving Grounds – Tech

Turbocharged engines love cold, dense and detonation-free intake charges, but providing those optimal conditions can be a bit of a challenge in the real world – especially when race gas can cost upward of $10 a gallon. Therefore, for most of us, pump gas has to suffice. Problem is, the lower octane levels prevent us from extracting every last ounce of power from our motors, so we go about our business making due with what power we extract from pump gas. There is, however, a much less costly solution to extracting race gas-like numbers from your turbocharged engine, and it comes in the form of methanol injection.
Methanol is rated at about 116 octane, so injecting it into your intake tract will raise the effective octane level and increase detonation resistance in your fuel. (Not to mention the added benefit of cooling your pressurized charge.) Methanol is usually distilled with water (50/50) to reduce flammability (methanol has a flash point of 140 degrees Fahrenheit – when mixed with water, it increases to approximately 650 degrees). It also makes it easier to tune because the air/fuel ratio won’t be affected as much, and it’s much more cost effective – on average, a gallon of meth/water injection would cost you $1.50, yet the mixture still retains the same knock-resistant, high-octane cooling properties that your engine so badly longs for.
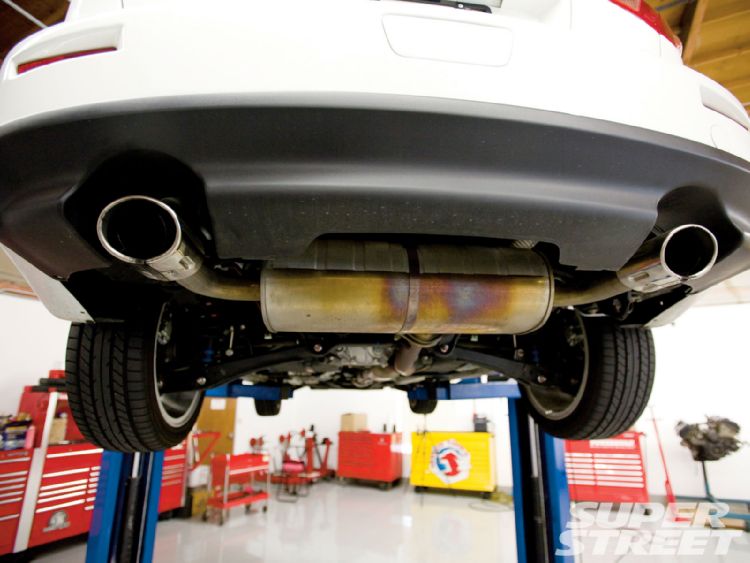
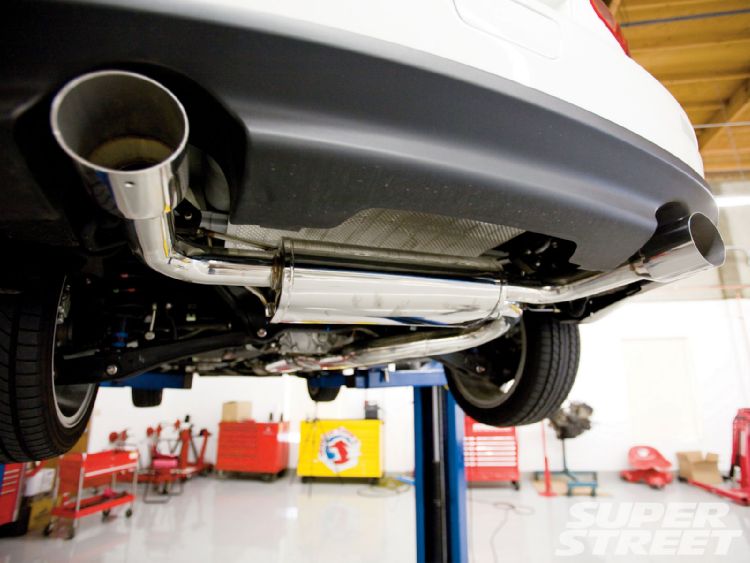
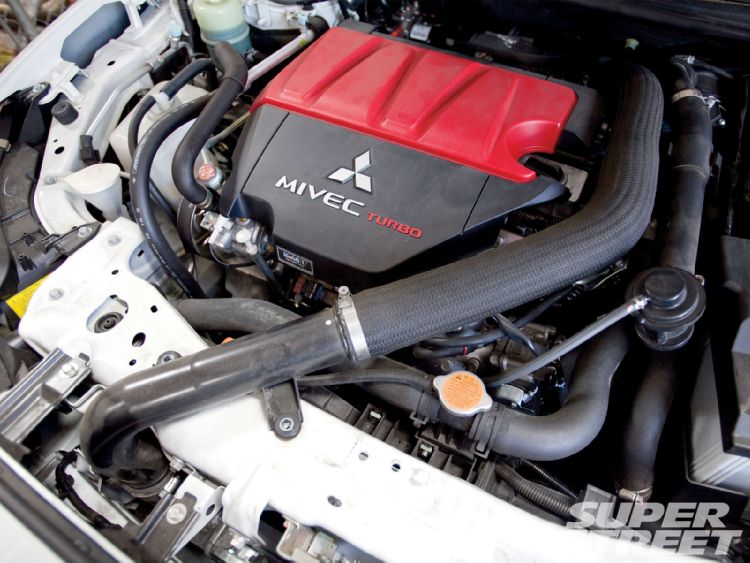
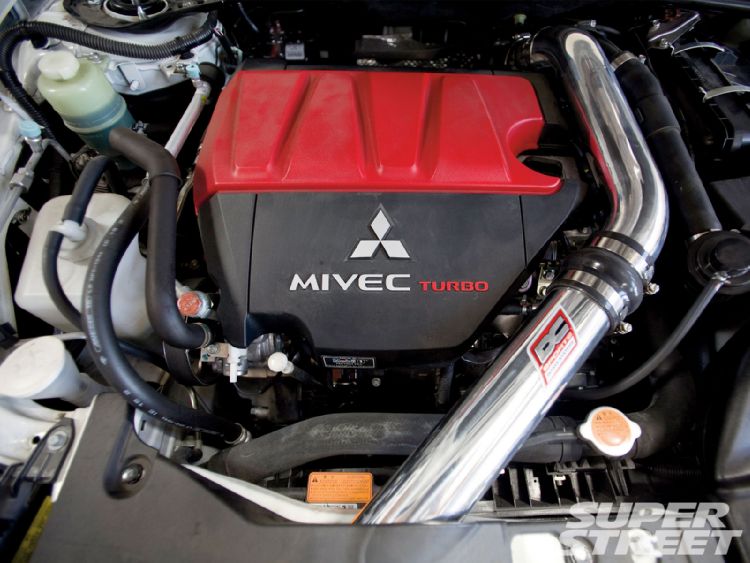
Super Street Magazine – Project Ralliart Sportback Upgrades
Flow And Low, That Is Our Tempo

In our last update for our Ralliart Sportback project, we did a simple upgrade of swapping out our engine valve cover with that of Modified’s Evo X project – not exactly hardcore tech. So to make up for this, we are going to give you a massive update, ranging from power-adders to the suspension and wheel package we’ve been dying to install. First up, it’s a relief to see that all the products that have been long under R&D have finally reached their final production units and we’re grabbing the first ones off the line. And probably like most of you, these are some of the first few mods that people do first to their cars, so we’re following right in line with the masses. We think you’ll be pleasantly surprised with the results.
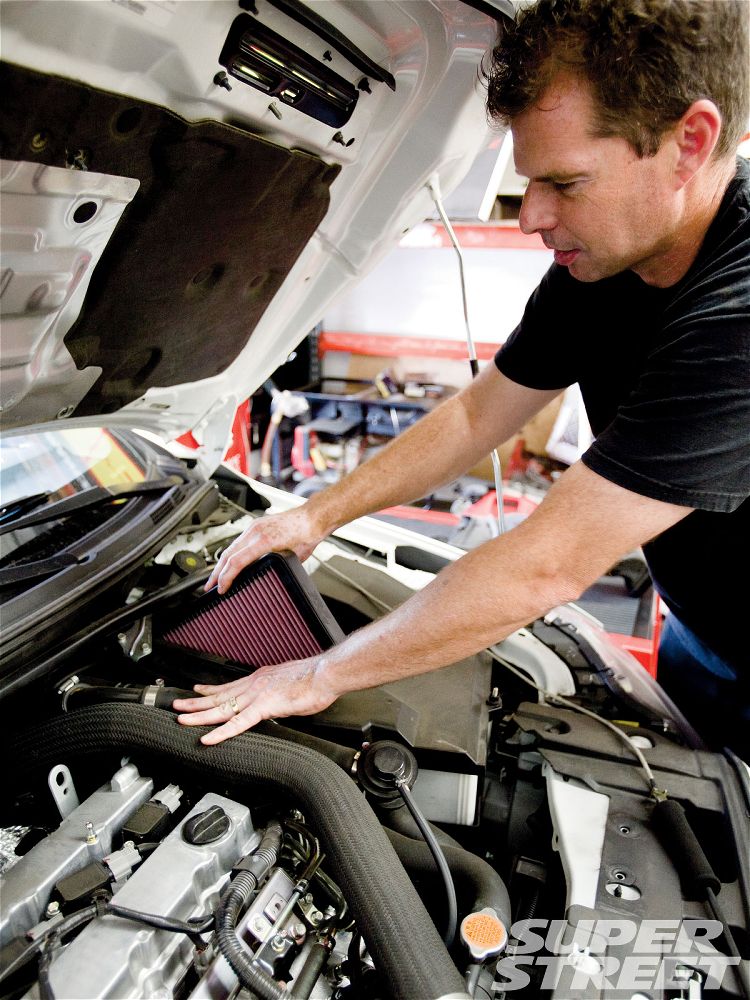
DC Sports Exhaust, Upper Intercooler Hard Pipe and K&N Drop-In Filter
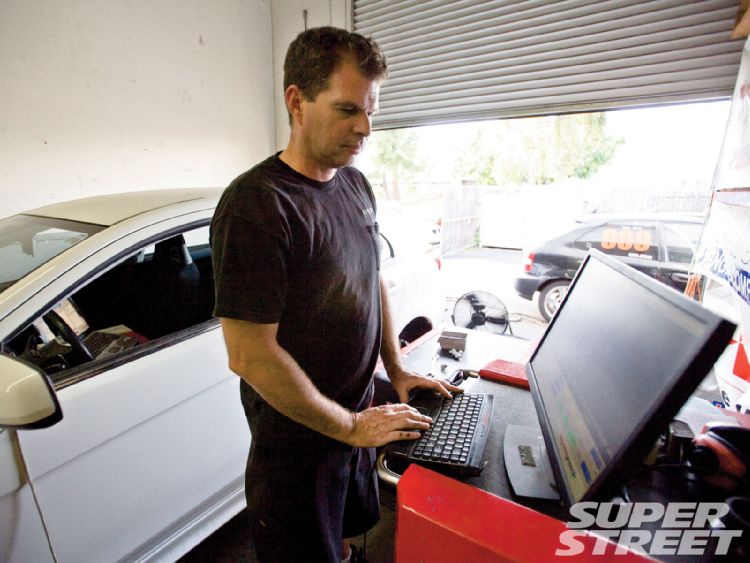
In our quest to hit stock Evo X power figures, we had to start somewhere. We learned quickly from Mike Welch at RRE that intake systems don’t affect power on the Ralliart quite like it does on the Evo X (due to the variance in intake design and the way air hits the air flow sensor), but an exhaust does wonders. To keep a close-to-stock appearance, we chose DC Sports’ DTS (Dual Tip System) after-cat exhaust, which is a three-piece kit made from mandrel-bent, 3” T304 stainless steel. Compared to the stock exhaust, this shiny happy replacement eliminates all the restrictions and improves flow roughly 40%, according to DC Sports. With a couple of friends, installing this exhaust is a breeze with only a few hand tools; just give yourself 20 minutes and a willingness to work out your arms.

Next, we went back to RRE and put it up on their Dynapacks to see what kind of power improvements we’d see from the DC DTS exhaust. For those of you who are new to this project, in purely stock form, our initial runs resulted in 210hp (200.13hp corrected) and 192lb-ft (164.31lb-ft corrected). Not bad and lots of room for improvement. With just an exhaust modification alone, we saw a surprising total of 228hp (213.60hp corrected) and significant torque increases of 236lb-ft (175.37lb-ft), which gave all of us a reason to smile as it brings us that much closer to hitting our stock Evo X goal. For kicks, we also decided to install a K&N drop-in filter anyway, just to see what it would do. Even with Mike’s doubts as to whether a drop-in would perform based on previous experiences, we actually came out surprised once again as we picked up an additional 2hp and saw a more smoothing effect of the power curve in higher rpm. While a K&N drop-in filter may not work wonders on all Ralliart engines, we were sold and would recommend this as an affordable modification.


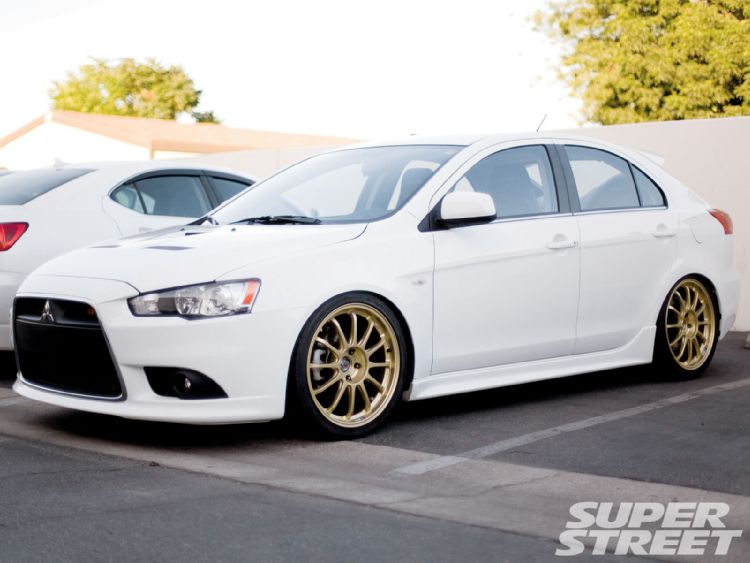
KW Variant 2 Coilovers/SSR Type F Wheels/Toyo T1R Tires
Though there are quite a few excellent choices when it comes to selecting a coilover manufacturer, it was actually more difficult to find a coilover kit for the Ralliart Sportback at all, simply because this isn’t an Evo X, due mostly to differences in subframe design. But there was one company who was willing to take on the Pepsi Challenge. KW Suspension, big in the European market and gaining big ground in the US, are huge car and motorsport enthusiasts, recognized the Ralliart’s tuning potential based off their Evo research on chassis stiffness, and decided to offer the Variant 2 kit solely for Ralliart buyers. Why only the Variant 2? The car isn’t cheap enough to warrant Variant 1s and isn’t quite the motorsport beast the Evo X is, so scratch the Variant 3. No doubt, the Variant 2 coilovers still provide superb handling without sacrificing ride quality, a crucial must-have for a street build like ours.
Russ Taylor – EVOX – AEM Meth Injection – Failsafe Test
Using the Tephra Mod V-1 ECU mod, we used an added pressure switch to the AEM Meth injection kit to switch maps. Once the AEM controller switches on the meth pump, pressure builds in the line and closes the switch. The switch activates the second map that is stored in the ECU. This second map pulls fuel and adds timing and boost.
For more info on the Tephra ROM hack and payment info, see here:
http://forums.evolutionm.net/evo-x-engine-management-tuning-forums/497325-tep…
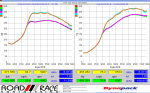
We ran a dyno pull with the meth injection off (red line). Then a couple pulls with meth on as normal (green adn blue lines) Then the next three pulls are with Sam in the trunk pulling the fuse for the meth pump in the middle of the run.
Edmunds Inside Line – GT30R Hearts AMS Widemouth
2008 Mitsubishi Evo GSR: GT30R Hearts AMS Widemouth At RRE
By Jason Kavanagh | September 16, 2009

Once the turbo, clutch and injectors were installed in Project Evo X, Mike Welch of Road Race Engineering got to work on the dyno.
Let it be known right now that to make real power on 91 octane, regardless of the hardware involved, is a royal pain the rear. Mike had his work cut out for him before he even began.
Oh, and Mike raised the crazy up one more level. He filled our tank with 91 octane from 7-11. It’s madness, yet there is method to it–if he can make our car knock-free on this utter crap fuel, then it’ll be safe on any fuel we’ll ever fill the tank with.
On to the tuning, then. First he scaled the bigger ID1000 injectors in the ECU and roughed in a conservative calibration. From there he gradually tuned the car, adjusting those scaling parameters, changing intake and exhaust cam timing, boost pressure and ignition timing.
During and between runs Mike monitors more than just output. There’s knock activity, fuel trims, air-fuel ratio, coolant temperature, intake temperature, intercooler effectiveness… you could say that a tuner’s job is like juggling cats next to a running chainsaw. If one cat gets away from you…
…ask him to switch off the chainsaw.
Eventually, the car stopped making power and started becoming knock-sensitive. That’s usually the point where you’re done and need to back off a bit to have a safe calibration.
The problem is that at this point, it just wasn’t making much more power than it was with the stock turbo. Everything looked good otherwise (and we have a nice closed-loop idle with the ID1000s; no nonlinearities, and a relaxed 62% duty cycle at redline).
As for the power situation, long story short, our car still had the stock exhaust elbow and downpipe. And that was a problem.
This elbow is that part of the exhaust that connects the turbo’s turbine discharge to the cat. Stock, it’s a restrictive little thing. One theory is that Mitsubishi engineers had to make the elbow all kinked up to accomodate right hand-drive cars. Basically, to keep it away from the steering shaft that pokes down in that same region.
Whatever, the operating theory is that the stock downpipe was very likely choking off flow and introducing backpressure. To address this, AMS sent us a higher-flowing replacement they call a Widemouth Downpipe. It’s an apt name. Comparison between the AMS Widemouth and stock piece can be seen below. You could drop a baseball in one end and of the Widemouth it would drop out the other.
It beautifully made, too, comprising cast stainless segments with a generously-sized flex section to replace the stock spring/bolt arrangement.


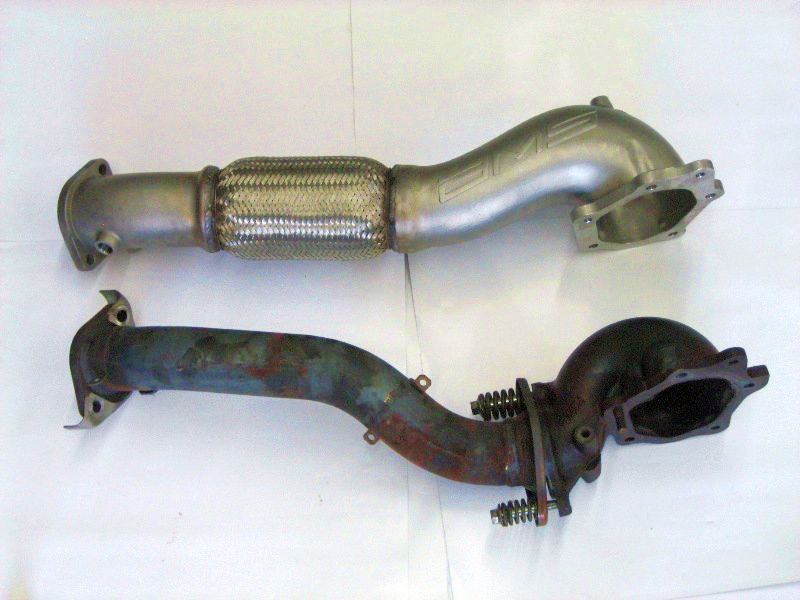

Back on the dyno with the new downpipe–RRE mentioned that installing the Widemouth was a bit tricky due to the physically larger GT30R–Mike noticed an immediate benefit. The car was now less detonation-prone, so he was able to better exploit the higher-flowing nature of the GT30R. From about 4200 rpm to redline, the Widemouth allowed him to tune in an additional 25 hp… and that’s with running a bit less boost in the midrange, too.
So the lesson here is that matching components is critical when we’re talking about the kind of output this 2.0-liter engine is making while being fed The Worst Fuel On Earth.
This post is getting long-winded so I’ll post up a dyno chart of its final state of tune in a followup blog entry.
Jason Kavanagh, Engineering Editor @ 25,000 miles.
RRE EVO 8/9 Stealth Exhaust Dyno Test
The RRE Stealth Exhaust for the EVO 8/9 occasionally gets picked on by haters for being restrictive. Threads come and go with speculation. The standard RRE Stealth cat back uses straight through perforated core resonators. These do not restrict anything. We use very mild angle mandrel bends and a large straight through Magnaflow stainless steel muffler. There are a few people out there that ask for the more restrictive louvered core resonators that would cost you a few hp depending on how much hp you are making.
In this thread I threw down the gauntlet.
http://www.socalevo.net/forum/index.php?topic=80224.0
———————Quote from: sxe_davexxx on June 22, 2009, 06:09:58 PMThe RRE stealth exhaust is overrated… Its super heavy, you’ll loose power significantly, and it is not that quiet.You should try the Cobb exhaust or the——————–Quote from: Mike W on June 22, 2009, 05:54:22 PMWould you like to prove what you are saying? I will help you.Back it up or take it back.mike@roadraceengineering.comI will give you my cell phone number and we can work out the details of “significant” and when and how to dyno your car at no charge to you.
MiKe W
——————–Quote from: sxe_davexxx on June 21, 2009, 12:03:55 PMEmailed, awaiting your reply =)
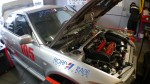
Sexy Dave was nice enough to volunteer his car and his buddies and he did the parts swapping on the dyno. He has a nice running stock turbo EVO 9 tuned by Bryan @ GST on E-85. The car us using ECU boost control. His exhaust is an RSR X-Mag. It is very loud and growly no resonators and a straight through small body muffler.
Dave brought his car by on a Saturday afternoon and we did some baseline runs.


Not bad at all, especially for how stock he has things looking under the hood. Boost was smooth with a peak of 27 psi and finishing at 20 psi at redline. The first run was a little peaky with the hp, with the car warmed up hp stabilized at 388-389 hp and ~370 ft pounds of torque.
Then Dave and friends swapped out the loud RSR exhaust for the RRE Stealth.

We went to make some pulls on the RRE system.
Again the first pull was a little choppy. But once warmed up it was making consistently higher hp pulls.

Over 400 hp now and peak torque was up too. Boost was a little choppy but not surprising considering that it was tuned for the other exhaust system. Interesting was that boost dropped off with it making more hp. Shows that the RRE exhaust actually flowed better than the RSR :-P

So here is the RSR (thin lines) vs. RRE Stealth (thick lines)

Boost, again RSR (thin lines) vs. RRE Stealth (thick lines)

And for fun the two wild card first runs of each exhaust, RSR thin lines, RRE Stealth thick lines.

Here is a video of the two dyno runs. IT just further prooves how internet sound clips are totally worthless. The little cameras we all use to make these has self adjusting/limiting microphones. You can hear the idle difference in the RSR. But at WOT they sound essentially the same. In real life the RSR was ear splitting on the dyno. The RRE was just loud.
Any questions?

Russ Taylor EVO 8 – Schooled Magazine
From Schooled Magazine September-October 2008 Issue
Over the next few issues, Schooled Magazine and Road Race Engineering (RRE) will take a stock 2008 Mitsubishi Lancer Evolution X and perform some serious modifications to show you what you can do to enhance your vehicle. This issue I hung out with the RRE crew as they modified the performance of the vehicle. By Russ Taylor

Intake Challenge
When choosing an intake system it is important to consider airflow. The more airflow the engine receives the better it will run. To find the best intake system for the Evo X, we wanted to compare three different systems to see what would give the best gain. With the three systems-the stock intake, Injen Cold Air and AEM Cold Air Intake- Schooled headed to Road Race Engineering (RRE) located in Santa Fe Springs, California to get the dyno results on which system would give the best performance gains. The dyno is a system that measures horsepower (WHP) of the vehicle.
I met up with Mike Welch, the master tuner at RRE, who has been tuning Mitsubishi vehicles for over 12 years. He was the perfect person to handle the intake challenge for the Evo X. We started with the dyno run to find the base numbers to compare against. The dyno placed 248 WHP with no modifications done to the vehicle with the stock intake system installed. Now that we had a baseline to judge by, we were then able to compare the two intake systems.
We started with the Injen (www.injen.com), and the results were depressing. There was only a 2 WHP gain. Considering that the unit retails at over $400, this was definitely not a very good bang for the buck.
We then tried the AEM intake (www.aempower.com) which increased the vehicle with a power gain of 26 WHP. With the cost of the intake at $285, this was a huge gain for a low price. AEM’s engineers took a different approach and designed a power-producing enclosed airbox. The airbox is constructed from cross-linked polythene. AEM’s revolutionary DRYFLOW synthetic performance air filter is the first cleanable, reusable performance air filter that does not require oiling to filter and trap dirt.
Even though the Injen unit looks considerably nicer with polished pipes than the AEM intake, the 26 WHP gains made our choice obvious- to go with AEM for the project.

Custom Fabricated Exhaust by RRE
To help with the airflow for the vehicle, RRE made a custom fabricated exhaust system. Art Thavilyaei, one of the RRE crew, pieced together what later would become a custom fabricated dual exhaust system.
RRE decided to use 3” piping going into dual 2.5” piping for the rear section, and the process was amazing to watch. They start by removing the stock exhaust system. A jig is used to hold the new piping in place as measurements are taken and airflow is considered. Once each piece is measured, it is then cut, ground, and welded in place with the use of the jig. Each bend and weld in the exhaust system potentially decreases the amount of airflow from the engine. Art took his time to ensure that the end product would produce the greatest amount of airflow from the vehicle.
After several labor-intensive hours, Art finished with the placement of the exhaust system only to have to remove the entire exhaust to perform the finishing welds. He completed the welds to perfection, and he placed the finished exhaust on the EVO X. Mike ran the car on the dyno and saw a 17 WHP gain over the stock exhaust. The total cost for the exhaust system like this from RRE is $650. It gives the vehicle solid power gains and sounds a lot nicer.
With the AEM Cold Air Intake and the custom fabricated exhaust by RRE, we saw a total 45 WHP increase on the vehicle. “The best bang for the buck is the intake and exhaust,” says Mike. With a total of 45 WHP gain, Schooled Magazine would have to agree.
In the next issue Mike will perform a custom tune and will add some additional performance parts to get the most gains possible out of the Evo X. You don’t want to miss the next issue of Schooled!