Sport Compact Car Magazine – Project Mazda 323 GTX: Part 2
Here is Josh Jacquot’s and Dave Coleman’s 2nd part of Project 323GTX. We no longer sell parts for this car since they have to be custom made on the car in the shop. But since I got my start working on AWD rally cars on the 323 GTX working for Rod Millen back in1990 I always have aspecial sentiment for these little cars.
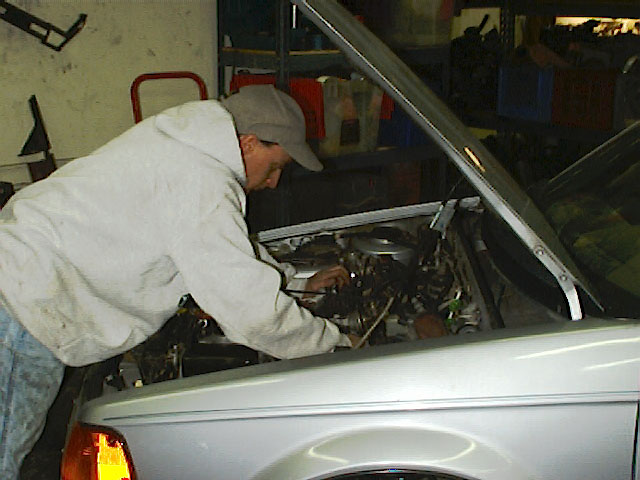
In this article we helped the SCC Mag guys with the GTX’s suspension, brakes and rebuilding the distributor.
Sport Compact Car Magazine
September 2000
Written By Josh Jacquot
Photography by Les Bidrawn, Dave Coleman, Josh Jacquot
The resurrection of our Mazda 323 GTX project car is still in its infancy as we continue with the essential repairs we began in the first installment. In case you missed out last month, we covered the replacement of the transmission and clutch as well as the basics of a wheel bearing rebuild. This month, we’ll tackle the GTX’s suspension, distributor and brakes, as well as a few less critical aesthetic add-ons.
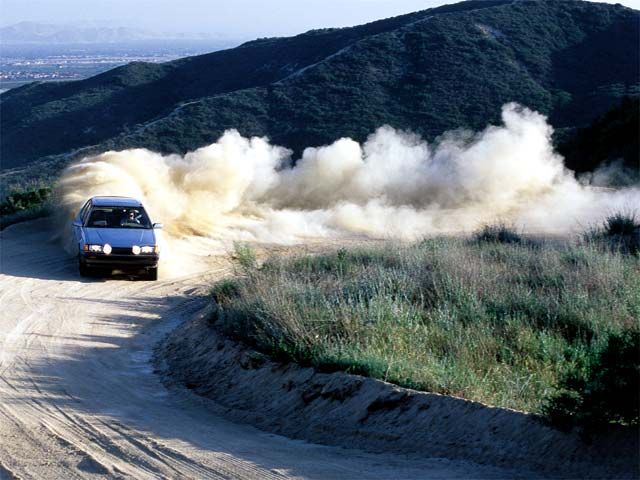
The GTX’s reliability (considering the regular pounding it receives) as well as its overall capability in the dirt continues to amaze and impress us all. It’s proving itself daily as one of the most fun and most practical cars around the office. While it may not impress anyone with its looks, every time we get behind the wheel, we remember why we had to have a car to play in the dirt.
Springs and Shocks
With what seems like several feet of rubbery suspension travel, the 323 isn’t very much fun when wearing worn-out shocks. This is a real problem and is something the GTX community is tackling in hundreds of creative ways. We aren’t going to pretend that there’s a simple solution either. No one has made new GTX-specific dampers in this country for years. Tokico Dirta struts went out of production several years back and very few, if any, shocks offer the kind of damping control required by the GTX’s long-travel strut system. Cork Sport, an Oregon-based Mazda specialty company still imports KYB struts for the car. However, they aren’t exactly what we were looking for, so the search continued.
Our solution? Buy used. We can’t, obviously, give our wholesale endorsement of this sort of upgrade, but in our case, it has worked fine so far. Given the lack of new suspension parts for these cars, this may be your best option if you decide to follow our lead. The 323 GTX listserv (www.egroups.com/group/323gtx) is likely the best place to look for used GTX parts and information.
Since our infatuation with 323 rally cars began a few years back, we’ve made friends with several 323 owners who race their cars in the California Rally Series and other SCCA events. This put us in good company when it came time to look for used suspension parts. Paul Timmerman (a local racer whose GTXs we featured in the January ’99 issue of SCC) and Road/Race Engineering came to the rescue.
Timmerman had a set of used GAB struts from an old Production GT 323 racecar he was keeping around as race spares. However, since he was planning to upgrade to a custom Bilstein coil-over setup in the near future, the parts that were currently on his car were about be spares. The timing was perfect and we stepped in with the cash. Timmerman gave us a generous price, which didn’t hurt the cause either. The front struts were fitted with stock-diameter rally springs but the rears had no springs. So, despite all our efforts and waiting, our wanna-be rally suspension still wasn’t complete.
Road/Race to the rescue. Naturally, Welch had the solution to our problem in the form of RRE’s coil-over setup. At $400 for all four corners, this reasonably priced setup allows an inch of adjustability–either up or down–from the stock ride height. We only needed half the kit since we already had front springs.
Welch chose 150 lb/in springs for the rear of the car, which he figured would complement the rather hefty looking front springs. At this point there was still no real way to know the rate of the front springs without disassembly and we were in a hurry to get the suspension together. Luckily, Welch has enough experience with these cars that we knew his estimate would be better than our guess. We plan to complete the coil-over kit in the future anyway, thereby eliminating the guesswork involved the spring rates. However, since this vehicle will be primarily a dirt car, the precision and exacting demands of dialing in a tarmac set-up don’t exist. If it worked well in the dirt, didn’t bottom out and rotated quickly, we would be happy.
Installation for the rear springs was as simple as sliding the sleeves over the strut body, threading on the collars, dropping on the spring and bumpstops, and then bolting the whole assembly together. We used the stock bumpstops but trimmed off the bellows section.There was still more than an inch of bumpstop to save our GABs from dangerously bottoming out, but with the added travel and increased spring rate, we figured that wouldn’t be a problem (and it hasn’t).
The fronts bolted into place with the same ease that everything else on the car had exhibited–rusted bolts, nuts and washers were the name of the game. We managed to get the struts out without breaking anything or rounding off any bolt heads. Fitment of the GAB strut housing required removing small amounts of material from the 323’s upright to achieve reasonable camber settings. This job was easily accomplished with a die grinder and a bit of patience.
Per Welch’s recommendation, we didn’t re-fit the front anti-roll bar after replacing the transmission. Reducing the GTX’s front roll stiffness enhances its ability to rotate quickly in the dirt–something real rally cars do very well. The rear anti-roll bar bushings were destroyed from years of wear and weather so we replaced them with RRE’s polyurethane anti-roll bar pivot bushings and new end links (which use rubber bushings). The original end links and bushings for the rear anti-roll bar had become one with the car after years of weather and wear and required some work with the sawzall and several choice words to remove. The new hardware went into place without any problems and took the slop out of the system.
We were initially quite concerned with the alignment settings of Project 323 GTX and asked our friends at Wheel Warehouse in Anaheim, Calif. to handle the job. However, after they could barely squeeze zero camber (Welch’s recommended dirt setting) out of the front end we were less serious about radical alignment. The problems in the front came from our less-than-precise method of grinding the uprights–a not-so-scientific way to get the GAB rally struts to fit. We simply set the car up to go straight down the road and quit worrying about toe and camber, since we are planning to spend most of our time in the dirt, where these settings become insignificant anyway.
Distributor
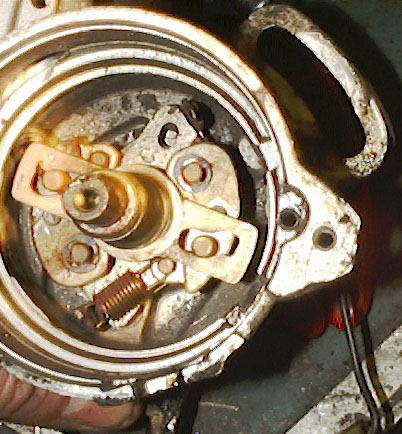
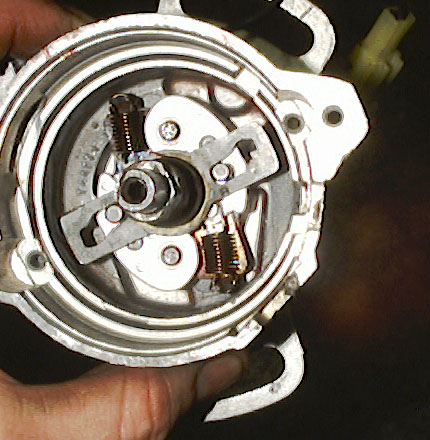
The GTX uses a mechanical-advance distributor to control spark and therefore suffers the consequences of such a complex design. The mechanical advance springs on most high-mileage GTXs fail, allowing the advance weights to swing into the distributor housing as the assembly spins. The weights then rub against the side of the housing, eventually cutting it in half if, not repaired. They also allow the engine to run with maximum mechanical advance of about 30 degrees BTDC. We found all this out the hard way.
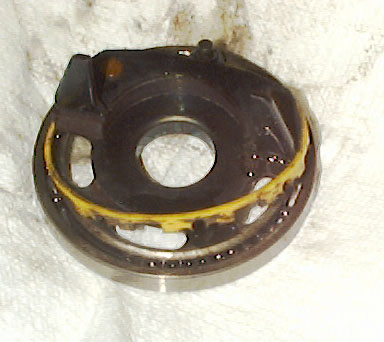
Our car had just about every distributor problem the GTX can exhibit. Not only had the advance springs failed, cutting through the distributor housing and allowing maximum advance at all times, but the advance plate, which rotates on ball bearings had seized, allowing for very little, if any, vacuum advance or boost retard. Yet, through some miracle of God-given grace, the car made it 800 miles from Salt Lake City to Southern California in its initial run home.
The distributor is easily removed from the 323 with only two bolts, several electrical connectors, the spark plug wires and one coil wire. (We guess that’s simple, anyway). Be sure to note where the rotor is pointing upon removal and return the distributor to that position when reinstalling. Also, it’s critical to not turn the engine over while the distributor is removed or you’ll end up spending hours trying to time the engine correctly.
Our distributor was removed easily enough, but refused to come apart for a rebuild. We ended up using the most elegant method we could think of for disassembly. Out came the cutting torch and pry bars as Welch pounded, heated and pried until the entire assembly was in pieces. Graceful it wasn’t. But we eventually reached the source of our problems and were able to replace the advance springs and rebuild the advance plate, which controls vacuum advance and boost retard. The new springs (which RRE sells for $7) utilize a plastic reinforcement where they attach to the advance weights–we don’t expect any more problems here. However, due to the broken springs, the weights had worn a hole completely through the distributor housing. Welch patched the hole with epoxy since it wasn’t large enough to cause structural fatigue and began reassembly of the numerous distributor parts. We also replaced the distributor cap, since it was cracked in several places surrounding the contacts.
All the problems listed above are common to GTX distributors, so don’t be surprised if your car exhibits similar failures. We were lucky enough to have all of them. However, despite the many parts and complexity of the GTX’s distributor, it’s possible for most weekend wrenchers to tackle its rebuild. Careful disassembly goes a long way in putting things back together in the right order. Plus, the parts that fail are cheap. If you’re still not up to the task, send your distributor to Road/Race and they’ll handle the job for $100.
Brakes (or Lack Thereof)
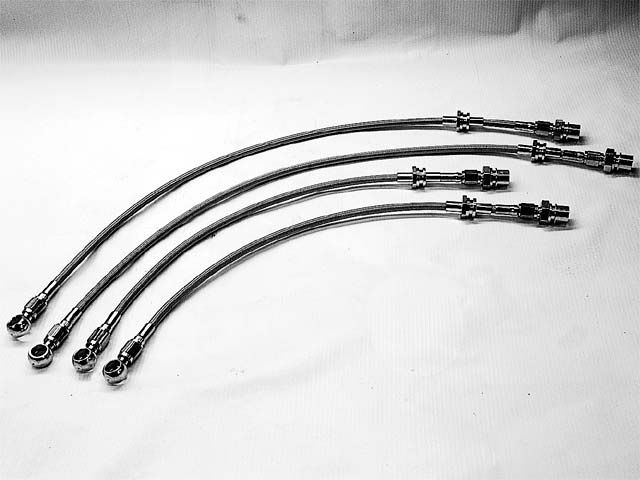
Stopping our GTX has been a bit of challenge since this project got off the ground. A mushy pedal is never very confidence- inspiring, especially in a car that will be driven with any enthusiasm. It didn’t take long underneath our GTX to notice the extreme wear on the original brake lines. The lines were cracked and worn, and had a generally dangerous look about them. We figured an upgrade to RRE steel braided lines couldn’t hurt. At this point it seemed safe to assume replacing the lines and thoroughly bleeding the brakes would bring back a stiff pedal. However, after doing so, we soon realized the problems with our GTX’s brake system go beyond simple line replacement.
Welch tells us that it’s not uncommon for GTX calipers to lose some off their free play over time. Apparently, the calipers’ self-centering mechanism seizes with exposure to moisture and dust after years of use. The resulting twist in the calipers causes excessive pedal travel, regardless of new brake lines. So we’ll be treating Project 323 to a caliper rebuild and some new brake pads in the next few months to bring back some solid pedal feel. In the mean time it still stops well, so we’ll survive.
Always Accessorize
In our effort to make a reliable and inexpensive rally car, we ran across a few other necessities that we just had to have. What was the one thing that all rally cars had that we were lacking? The answer was simple: Huge, night-killing driving lights.
Toucan Industries stepped up with a set of Super Road Boy 100-watt driving lamps. The lights come with a complete wiring diagram, wires and an on/off switch. Our mounting requirements forced us to mount the giant lights upside down–not the most aesthetically pleasing solution, but this car is all about function, not form. Plus, our mount requires no drilling into the bumper. We used 1 x 1.5-inch box section aluminum as a mounting bracket for the lights. The back of this box section bolted to the original grille mounting bracket at either end of the main grille opening. The front of the bracket bolted directly through the lights’ rear housing–a simple mounting solution, which only took a few hours to assemble. We obviously removed the GTX’s unique grille and replaced it with a section of grillwork we found at the hardware store. The new grill isn’t exactly beautiful (in fact, it’s pretty ugly) but, judging on looks alone, it flows considerably more engine-saving cooling air than the original.
Next Time
Hopefully we’ve covered the majority of the major repairs necessary to keep the GTX in running order as a daily driver. We’re counting on it regularly for transportation and recreation these days, so it’s necessary that it not leave us stranded. Next time we’ll begin with the basic power upgrades as recommended by Road/Race Engineering and hopefully have a few dyno charts from local competition GTXs for comparison. Until then, rally on…
Sizing it up
Assuming you’ve already run across the SCC Rallycross Smackdown story last month, you know how effective a properly prepared GTX can be in the dirt. However, we always want a back-to-back, before-and-after comparison to quantify the effectiveness of the changes to our project cars. Before doing any of the above-mentioned work to the car, we staked off a section of dirt road in the nearby forest and went to work. The road, an unbelievably twisty section of gravel with huge elevation changes, ranks among the best gravel roads any of us have ever seen.
Project GTX bobbed and weaved with engineering editor Coleman clinging for dear life in the passenger seat during our initial runs. Don’t bother repeating this test on your own, as its stupidity exceeds even our grossly skewed limits of sanity. We made the runs again after all the repairs and with the much-improved rally suspension in place.
So, what did all this insanity prove? Mostly that the changing conditions of dirt roads aren’t so good for comparing improvements in rally car performance. Without question, the new suspension, improvements in ignition advance and overall preparedness of the car made it easier to drive and faster in any conditions. However, because of our wet spring and consequent road grating, our test road was in considerably different shape during our second visit. With a much softer surface and more loose conditions our times don’t show the improvement we had hoped for. What they do show, if one looks closely at the raw times (not listed here), is that the GTX is now much more predictable and easier to handle over rough terrain. In fact, the GTX’s ability to devour washouts, ruts, rocks and any other dirt road impediment is simply amazing. Before the upgrades we were operating on faith, now we drive with confidence. See the map and elevation profile on the next page for more details.
Full Article on Modified Magazine:
http://www.modified.com/projectcars/0009scc_mazda_323_gtx_part_3/index.html#ixzz1h9r51Zsi

