
SCC Magazine – Project Eclipse – Interior Mods
Focus On The Cockpit
Sport Compact Car Magazine November 1998
By Dave Coleman
Over the last several months we have made several improvements to the Eclipse’s driving environment, most of which were overshadowed by out quest for power. The earliest change we made was to accommodate the Apex electronics we installed in our second update on the car (Project Eclipse GSX, January, 1998). Initially we had simply taped the Super AFC, AVC-R boost controller, and turbo timer to the underside of The dash. This only worked for about four hours, however, before we had to contend with electronic devices dropping onto our feet every few minutes when the tape let go. We wanted to mount all three devices in the dash, but with the double-DIN sized factory stereo/CD/cassette deck taking Lip all the room, there was nowhere for them to go.
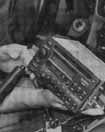
The stock stereo took up too much room for our new electronics so it had
While the factory stereo is actually quite good, it was in the way. If we installed a standard, single-DIN unit, there would be plenty of room to mount our electronics, but we would have to give up some features of the factory stereo to make it work. It wasn’t a very hard decision, as we never used the cassette portion of the stereo. The change would also allow, I us to take advantage of some better audio options.
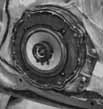
Competition Soundworks cut adapters to mount the Alpine speakers in the stock door locations.
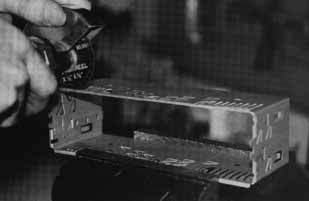
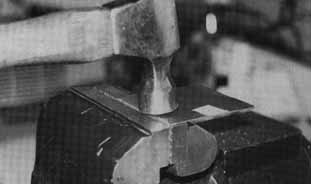
An extra stereo mounting frame was used to mount the Apex electronics, To fit the frame below the stereo, we had to cut the lip off the top of it. We used a air-powered cutting wheel, but if you don’t have one you’ll just have to get creative. The meat is relatively thin and easily cut.
Since the Eclipse didn’t have a CD changer, and we often end up driving the car long distances to events, we decided to go with Alpine’s 3DE-7886 three-disc in dash CD changer. it turned out to be a good choice. The amplified unit (35Wx4 channels) gave us good CD selection without eating up a bunch of cargo space with a changer (those long trips mean a lot of luggage in the Eclipse’s surprisingly large cargo space). And the unit was packed with enough features to keep even the most ardent gadget hound occupied for hours. Things like programmable preset address indicator, station title memory and automatic memory programming for the tuner, with 8X oversampling, a 1 bit DA converter, disc title memory and a host of other features we never, got to explore. We had Competition Soundworks in Cerritos Calif. install the CD Changer and a set of Alpine speakers in the doors.
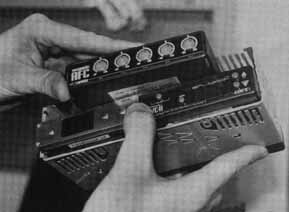
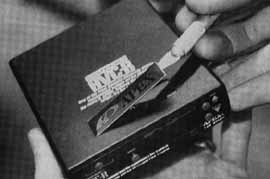
The Apex boxes were hot glued into the frame before being inserted into the dash.
We wanted to mount all three devices in the dash, big with the double-DIN sized factory stereo/CD/cassette deck taking. up all the room there was nowhere for them to go
To fill the hole left next to the AFC, we bent up a sheet metal block off plate,
We then peeled the Apex plaque off the top of the turbo timer and mounted it on the block-off plate.
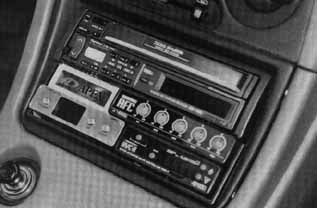
The new arrangement was definitely worth the work. The installation looks clean and well organized, and the Alpine stereo sounds great!
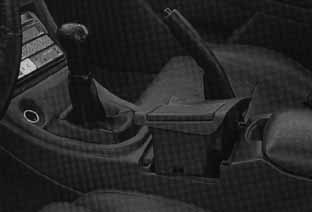
The CD changer was mounted in the top half of the double DIN hole to allow the CD cassette to shuffle without interfering with the shifter To mount the Apex electronics we used an extra mounting frame. Both the turbo timer and the AVC-R boost controller are quarter DIN sized, while the AFC is slightly wider. We could fit all three boxes in a single DIN slot with a small gap left next to the AFC. To mount each box, we simply used a hot glue gun to stick it to the frame, while the gap was filled with a sheet metal panel we cut out, and decorated with an Apex emblem we peeled off the top of the boost controller.
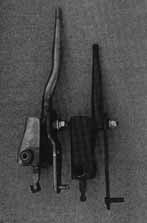
The Pace Setter shifter shortens shift throws by at shortening the rod above the pivot, and lengthening the rod below the pivot point,
Accessing the shifter can be difficult if you don’t know where to start. The first step is to remove the ash tray, there are some hidden mounting screws for the center console under here.
On other interior notes, the Eclipse’s cable shifter is rather clunky and imprecise. It also has a relatively long throw that makes fast shifting a little difficult. In an effort to solve this problem we installed a short shifter from Pace Setter. The short shifter both lowers the shift knob and changes the lever ratio between your hand and the shifting cables. This both shortens the shift throw and increases shifting effort. The shorter throws are definitely an improvement, but the increased effort makes shifting even more difficult. The shifter didn’t really feel any more precise-,,, either, as the sloppiness appears to be a result of the cables and the internal design of the transmission more than the shift linkage itself. When we later, installed a RAZO shift knob that was a few inches taller, the shift effort improved dramatically. Since the knob effectively brought the top half of the shift linkage back to its original length, the lever ratio was somewhere between its original value and the ratio provided with the stock, knob. Another improvement to shift effort came when we installed our Exedy clutch. The three-puck clutch disc has less rotational inertia than a fully faced clutch disc. and since the syncros have to accelerate or decelerate the clutch disc whenever you shift, less inertia makes the syncros work faster.
We also changed to Motul synthetic transmission fluid at the same time, which also helped speed shifting (since we did the clutch and fluid at the same time, it is impossible to tell which made the bigger difference). Shift effort while driving is nearly the same as stock now, but first and reverse are still much more difficult.
[RRE Note: We were not happy with the performance of either the Pace Setter Short Shifter or the Exedy Clutch, we do not recommend either one.]
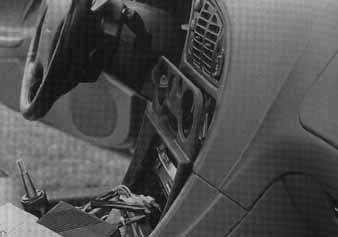
Next the trim panel over the ventilation controls must be popped off, Just get your fingers behind it and pull.
The RAZO shifter was originally installed for a show, as were a set of RAZO pedal pads. We were initially planning on removing them after the show, but when we discovered the improvement the shift knob made, we decided to leave it in place. Something similar happened with the pedal pads. Installing the pads not only makes the pedal surface larger and grippier, it also makes it closer to the driver, since the pads themselves are at least a quarter inch thick. Since most of the staffers driving the Eclipse on a regular basis are over six feet tall, nobody wanted the pedals any closer to them. The brake and clutch pedal pads came off almost immediately. The gas pedal pad, on the other hand, turned out to be very functional. The stock pedal is too small, too low, and too far from the brake pedal to be able to heel toe downshift. The pad moved the pedal just far enough to make the car much easier to drive. It my look a little funny, but having only the gas pedal pad in place worked perfect for our picky drivers
It may look a little funny, but having only the gas pedal pad in place worked perfect for our picky drivers
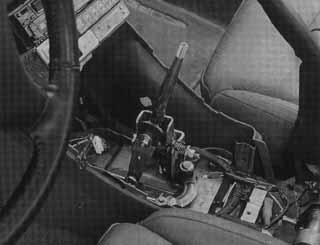
Once it is revealed, the shifter is fairly easy to replace
