
RRE Eclipse GS 2.4 MIVEC Underdrive Pulley Kit
RRE Eclipse GS 2.4 MIVEC Underdrive Pulley Kit
$189 plus $11 shipping for USPS Priority Mail within the lower 48 states. If you are looking to get one shiped to somewhere else, contact us for a price with shipping included.
This pulley kit has yielded an improvement of 6-7 whp and 9 ft/lbs of torque in dyno testing. Both the lighter construction and smaller size helps improve power. Kit includes a new belt and the pulley. Everything that you need. Fits all 2.4 liter Eclipses and Galants from 2005 through 2014
FAQ Page
What is it?
A lightweight crank pulley that is under-driven to release more power from less rotational inertia in the drivetrain. It results in an under-drive of around 25%, which frees up power.
What does it fit?
It will fit the 2006-2014 Eclipse GS models along with the 2005-2014 Galant with the 2.4 MIVEC motor. It will also fit 2004-2006 US Lancer RalliArt with the 2.4 MIVEC engine and the 2004+ Outlander with the 2.4 MIVEC engine. It will work on auto or manual transmission vehicles. Other applications are unknown although if you find that it works on something else then please let us know!
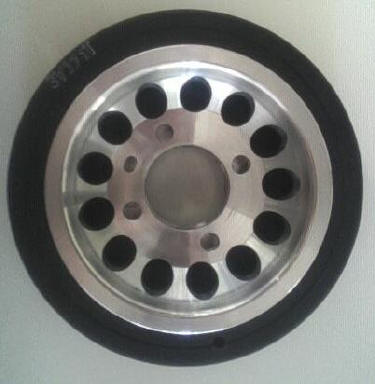
What are they made from?
The pulleys are produced from high quality T6061 spun aluminum. It has a very high tensile strength, will not rust, warp, and will always look great.
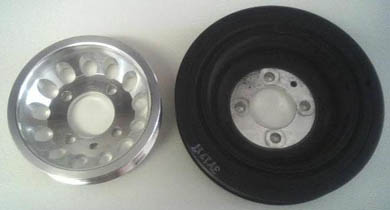
What is the weight differences?
The underdriven/lighter pulley is .58lbs and the stock unit is 3.911lbs. This is nearly 85% lighter. This weight was done on a calibrated grams scale used at the Backwoods Racing engine shop.
Is it safe?
Yes, the 2.4 MIVEC has a stock harmonic pulley, which acts as a dampener against vibration on the crank. The stock crank is semi balanced although the balance shafts in the 2.4 MIVEC engine do the primary job of dampening true vibration and balance of the whole engine. The stock pulley is meant to smooth idle out and keep vibrations inside the cabin happy. On a stock car or after a few thousand miles your Eclipse develops worse vibrations/rattles then you would ever be able to feel with this pulley.
What are the long-term effects?
There are several cars of various different makes that have run lighter/under-driven pulleys for years without any problems with the engine, transmission, etc. In long term testing on the 2.4 MIVEC I have seen no adverse effects, no check engine lights and I have more than made sure I was hard on the car to bring out any effects there could be. We feel 100% safe selling this pulley to any 2.4 MIVEC owner.
Where will I feel power?
On a stock car or modified 2.4 MIVEC you will feel gains. This pulley improves low-end torque and it makes the engine rev quicker to red line.
How will such a pulley affect my awesome sound system?
We hooked up a charging system tester and it showed the same readings as stock. There was no loss in AMPS /VOLTS. This car has the stock battery and no other power related modifications. You can keep banging and rolling with this pulley!
How long does it take to install?
If you do this yourself you will want to set aside around one hour of time. At a shop this should take about an hour of time for them to do. Do not let them over charge you. It does not require any special or complicated tools.
Will this affect timing?
This is a mechanical belt driven pulley, which does not require changing timing and will not affect your timing in any way. Your timing belt and your serpentine belt are two different belts.
RRE 2.4 MIVEC Underdrive Pulley Replacement Belt Part Number
K060721 or 6PK1830
Install Instructions:
Tools Needed:
* 1/2” Drive Ratchet wrench with 3” extension
* 3/8” Drive Ratchet wrench
* 3/8” Drive 12mm long extension
* 3/8” Drive 10mm long extension needed to remove splashguards
* Allen wrench of medium size to hold tensioner
* Jack and Jack stand to hold up car
* Lug Wrench to remove lug nuts
* Various screw drivers Phillips & straight to remove plastic splashguards
* Your new Pulley
* Your new Belt
* About One Hour of Time Directions:
1. Park your car in a level safe work area, let your car cool for a little while if needed.
2. Loosen the lug nuts a few turns on your passenger right front wheel
3. Jack the car up and support it securely on a jack stand
4. Remove the wheel/lugnuts from the car
5. Remove the splash guards behind the strut and under the oil filter area. This step is difficult, not technically although will take some patience.
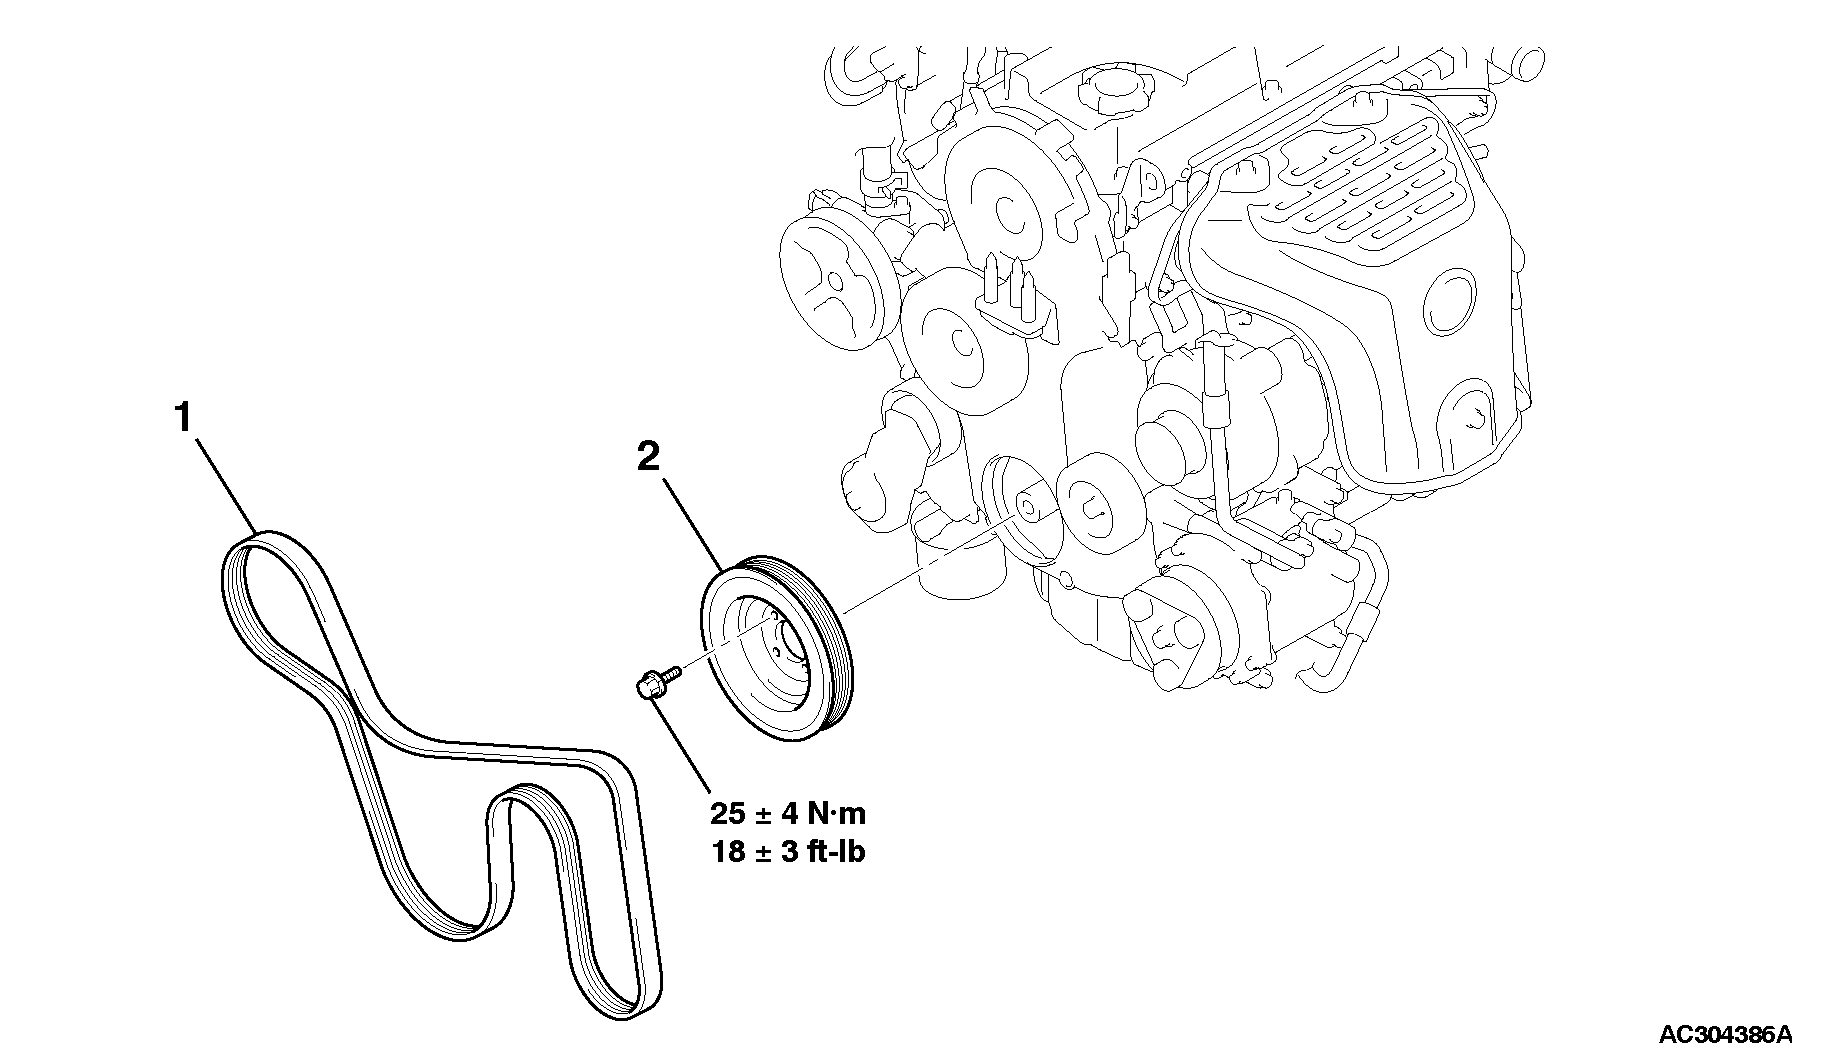
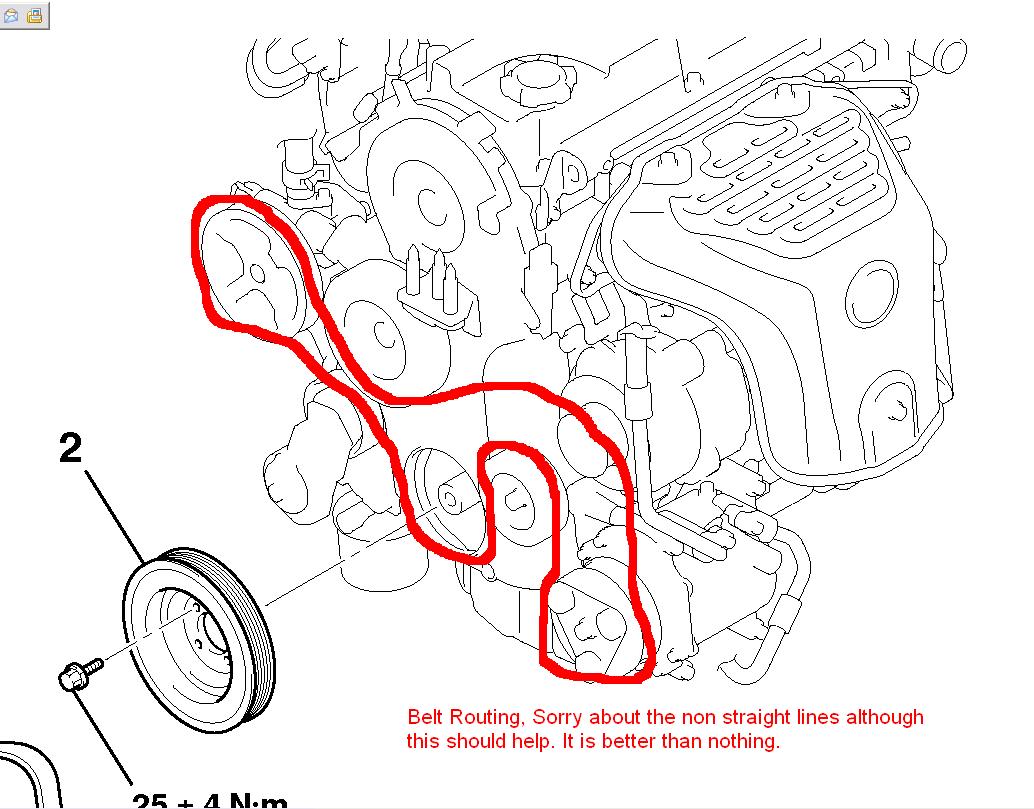
6. At this point you will pop the hood if you have not done so already. You will now want to observe the belt routing. Take notes if you need to.
7. Next step is too loosen although do not remove the 4 bolts on the stock pulley
8. You will now want to observe the tensioner. You will see the part on the tensioner where the 1/2″ drive ratchet goes. At the bottom left corner of the tensioner you will see a small round hole where the Allen wrench goes into. You do not want the Allen wrench any farther than 1/2″ into this hole.
9. Next you want to take the 1/2″ drive and pull it towards the front of the car which will take the tensioner towards the rear of the car. This will begin to remove tension from the belt.
10. At the point which you cannot pull the tensioner any more you will now see that your Allen wrench can be pushed through to hold the tensioner back. This step can be done with one person although it is difficult to hold the tensioner back and then push the Allen wrench through.
11. You can now let go of the wrench and the belt tension should be free and the tensioner should be held in place.
12. You will now remove the belt from the car taking careful note of how it is routed.
13. Next you will remove the 4 bolts from the stock pulley and remove the pulley from the car.
14. Next you will put the better pulley on making sure to line of the notch on the crank to the proper hole on the pulley. This is easy to do and there is only one way to go
15. Next you will put the 4 bolts on and tighten them down so the pulley is no longer loose.
16. Now you will prepare your belt by removing the folds and trying to straighten it out like the old belt
17. You will now put the belt on the car, make sure it is set in all the pulleys correctly
18. You will now remove the Allen wrench on the tensioner by turning the tensioner towards the rear of the car by using the 1/2″ ratchet.
19. Now that you have belt tension tighten the 4 crank bolts down as hard as you can. I do not have torque specs for these.
20. After this do a final check of the belt and the pulley to make sure everything is tight and the area is free of tools and anything that would hurt a test start.
21. Test it by starting the car and observe the belt and pulley to make sure everything is tight and spinning correctly. Make sure the belt is on all the pulleys and hasn’t moved over.
22. After testing you will now be ok to put the splash shields back on, put the wheel back on, hand tighten the lug nuts, raise the jack, remove the jack stand, lower the jack, then double check the lug nuts to make sure they are tight.
23. Go drive your car, be impressed with the results and tell your friends to buy one.
Testing & Results:
During testing We made sure everything was ok. We tested the charging system and it read normal. The AC blew just as cold and there was no change in power steering effort or effect. The car is so much more fun to drive. There is added torque down low and then a happier revving engine up top. We tested cold start, drivability, and hard stops to look for issues and returned with none. I was not easy on the car during testing and I had no problems. This is a bolt and play part.
Results:
The testing was done on a Mustang Dynamometer with inertia rollers. A total of 12 runs in, 8 were HP pulls and 4 were 1/4 mile pulls. The software has the luxury of performing a 1/4 mile run on the dyno, which is very cool although results are a bit high, although the difference shown below is what is important. The Mustang Dyno show very low HP compared to Dynojet numbers What is important though is the differences between the stock and the under-driven/lightened pulley.
The test conditions were humid and hot. Conditions were as follows:
Temperature: 90 F
Barometric Pressure: 29.05 milli-bar
Humidity: 85-90%
